Wednesday, July 29, 2009

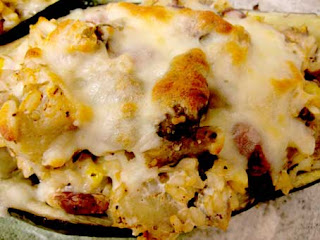
Lasagna with ground chicken, summer squash, and mixed greens recipe

Lasagna with ground chicken, summer squash, and mixed greensLife is full of odd coincidences. I made this lasagna last week, and was planning to post about it today. When I woke up this morning, I learned that it is National Lasagna Day. I'm not sure whether I should be excited or creeped out, but nevertheless, here's a great lasagna to celebrate the "holiday."

A few weeks ago I was trying to answer the question "what is your favorite food?" for a survey. I had to think about it for several days before coming up with an answer that would satisfy me. There are foods made by specific people that I love (like my grandmother's vegetable soup), and categories of food that I can't resist (don't laugh, but my mind first wandered to fresh vegetables), but I wanted to think of a specific dish that I love in all settings. The answer, I discovered, is lasagna. There are so many variations, each with different meats, cheeses, veggies, and sauces, that it doesn't ever get old. And all have the baked, bubbly, comforting taste that you can't beat. When I found myself with a ton of veggies last week, I decided to invent my new favorite lasagna... and luckily it lived up to that title.

Lasagna with ground chicken, summer squash, and mixed greens

1 Tbsp olive oil
1 large onion, diced
1 pound ground chicken
3 garlic cloves, minced
1/2 tsp crushed red peppper
1 can (28 oz.) crushed tomatoes
1 can (14 oz.) diced tomatoes
1 Tbsp dried basil
1 Tbsp dried oregano
salt and pepper to taste

1 bunch collard greens, stems removed
1 bunch swiss chard, stems removed and saved for another use
2 cups cottage cheese
1 egg
1/2 cup shredded parmesan cheese

9 brown rice lasagna noodles, cooked according to package directions
1 large zucchini, sliced thinly
1 large yellow squash, sliced thinly

1/4 cup shredded parmesan cheese
2 cups shredded mozzarella cheese

Heat olive oil over medium heat in a large skillet, and saute onion until tender. Then add ground chicken and cook until browned. Stir in garlic and red pepper, cook an additional minute, and add both kinds of tomatoes, herbs, and salt and pepper. Let this simmer for 30 min while you prepare the other ingredients.

Plunge the collard greens and swiss chard into a large pot of salted boiling water and let cook until they begin to wilt (about 3 min). Drain the greens and let cool. Roughly chop them, and then combine with cottage cheese, egg, and 1/2 cup parmesan.

Spread a very thin layer of sauce into the bottom of a 9x13" baking pan. Then layer 3 noodles, a thin layer of sauce, 1/2 of greens mixture, and 1/2 of zucchini and squash. Repeat the layers again, and then top with last 3 noodles and remaining sauce. Cover with foil and bake at 350 for an hour. Then remove foil, top with mozzarella and remaining parmesan, and bake for another 10 min. Let sit for 10 min before serving. Serves 8-10.

As I said before, this was amazing. Because it was loaded with veggies, the lasagna was very filling without being overly heavy. I could taste all of the ingredients, and the greens and squash gave it a more complex texture than the sauce, noodles, and cheese alone would have provided. Perhaps this will only be my favorite until I make my next lasagna, but I can definitely deal with that. So what's your favorite type of lasagna??

Tuesday, July 28, 2009

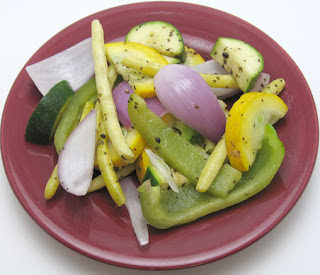
Crock pot roasted summer vegetables recipe

Crock pot roasted summer vegetables recipe, adapted from Not Your Mother's Slow Cooker Cookbook
Summer vegetables are most certainly my favorites. They're light and refreshing, and I simply can't get enough. I also can't stop myself from buying them, and my refrigerator is overflowing with veggies from my CSA share, my friend's CSA share (who generously gave me her veggies while she's out of town), and the various farmers' markets around town that I am drawn to even when I don't need anything. This recipe from the cookbook of the month sounded like the perfect solution.

Crock pot roasted summer vegetables (adapted from "Not Your Mother's Slow Cooker Cookbook" by Beth Hensperger and Julie Kaufmann)

2 red onions, cut into small wedges
2 green bell peppers, seeded and cut into strips
1 large zucchini, halved lengthwise and sliced into 1/2" chunks
1 large yellow squash, halved lengthwise and sliced into 1/2" chunks
1 pound yellow or green beans, ends trimmed
5 garlic cloves, peeled
3 Tbsp olive oil
1 Tbsp dried basil
salt and pepper to taste
2 Tbsp balsamic vinegar

Combine first 6 ingredients in a large crock pot (I used a 5 1/2 quart, and it was extremely full). Add oil, basil, and salt and pepper and stir well to coat all veggies. Cook on high for 2 hours, or until all veggies are tender (you may want to stir everything after about an hour). Stir in vinegar before serving. Serves 5.

This was delicious, and I can't stop eating it. I've become a roasting fiend in the last year, but using the crock pot was a nice alternative because it prevented the kitchen from heating up. It's also great because you can put a variety of vegetables in at the same time, even though they would have different cooking times in the oven. I will definitely be making this again soon, and can't wait to try out new veggie combinations.

Monday, July 27, 2009

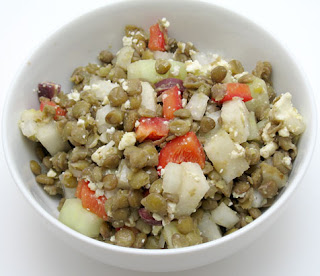
Lentil salad with feta, kohlrabi, carrot, bell pepper, and onion recipe

Lentil salad with feta, kohlrabi, carrot, bell pepper, and onion recipeLentils are one of my favorite legumes because of their versatility and ability to blend with many flavors, as well as the fact that they cook quickly (relative to dried beans). I love variations on lentil salads, and in brainstorming about what to make for dinner, something got that idea in my head. The best part is that I was able to incorporate some of my CSA loot (kohlrabi and carrot) into the salad.

Lentil salad with feta, kohlrabi, carrot, bell pepper, and onion

1 1/2 cups brown lentils, sorted and rinsed
1/2 large or 1 small kohlrabi, peeled and diced
1 purple (or other color) carrot, diced
1 small red bell pepper, seeded and diced
1 small Vidalia onion, diced
4 oz. feta cheese, crumbled
2 Tbsp olive oil
juice of large lemon
1 tsp cumin
salt and pepper to taste

Put lentils in a medium saucepan, add water so that it comes a few inches above lentils, and bring to a boil. Then reduce heat to low, cover, and let simmer until lentils are tender (about 40 min). Drain lentils and let cool for about 20 min. Combine cooked lentils with remaining ingredients and stir well. Serves 5.

My Legume Love Affair 13
This might be my favorite version of lentil salad that I've made thus far. I really enjoyed the addition of kohlrabi and carrots. If you don't have kohlrabi, you could easily substitute jicama or cucumber for a similar crunchy texture. I meant to add tomatoes to this too, but am just remembering that at this very second. Perhaps tomorrow I'll stir in a few diced tomatoes before I enjoy this for lunch. I'm submitting this to My Legume Love Affair, which was conceived by Susan from The Well-Seasoned Cook and is hosted by Sunshinemom at Tongue Ticklers this month.

Sunday, July 26, 2009

Stuffed eggplant with Sante Fe rice and beans recipe

stuffed eggplant with santa fe rice and beansBack when I ate frozen dinners from time to time, one of the few that wasn't revolting was Smart Ones Sante Fe Style Rice and Beans. Apparently people haven't figured out how to make cooked chicken survive the freezer and microwave, even with millions of preservatives. Rice, beans, and cheese sauce, on the other hand, do just fine. Reeni from Cinnamon & Spice has the same love for this meal, and shared her re-creation of it. But, as usual, I couldn't leave the recipe alone. I happened to have an eggplant lying around, and started thinking that it might be a nice addition to the rice and beans.

Stuffed eggplant with Sante Fe rice and beans (adapted from Cinnamon & Spice)

1 large eggplant
1 Tbsp olive oil + more for rubbing eggplant
1 small onion, chopped
1 clove garlic, minced
1 1/2 cups cooked brown rice
2 Tbsp chopped green chiles
1/2 cup corn (I used frozen - no need to thaw)
1 large tomato, chopped
1 cup plain yogurt
1/2 tsp chili powder
1/2 tsp oregano
pinch of cayenne pepper
salt and pepper to taste
1/2 cup shredded provolone cheese

Remove stem end of eggplant, and cut it in half lengthwise. Rub cut side with olive oil, and place down on baking sheet. Roast at 400 for about 20 min, or until it's tender. Let it cool, and then scrape out the inside of the eggplant (leaving about 1/4"), and chop the innards into small chunks. Heat 1 Tbsp oil in a large skillet over medium heat. Saute onion until tender, and then add garlic and eggplant chunks. Let this cook for a few minutes, and then stir in rice, chiles, corn and tomato. Remove from heat and add yogurt and spices. Put eggplant shells in a large baking dish and fill them with the stuffing mixture. Put extra stuffing in a separate dish or fill around the eggplant. Top with cheese and bake at 400 for 20 min. Serves 3.

Reeni did a great job of re-creating the frozen meal, but of course it was far better fresh and without additives and preservatives. I loved the combo of eggplant with it, too, because the silkiness of the cooked eggplant fit right in with the creamy texture provided by the yogurt. I just discovered the first tiny eggplant growing on my plant a few days ago, so I'm hoping that I'll eventually be able to make more variations on stuffed eggplant later in the summer.

Friday, July 24, 2009

CSA round up week #3

cooking away my CSA round up #3It's time for another CSA round up as part of the Cooking Away My CSA challenge! I had a particularly fun time with this batch of veggies that included collard greens, swiss chard, kale, bok choy, carrots, and snow peas. I picked them up on Monday, but knew that I had to cook everything by Wednesday because of a weekend trip to Chicago. I also had to get somewhat creative with my greens just to avoid getting too tired of them. The peas and most of the carrots didn't last very long - they were quickly consumed as snacks. Here's what became of the rest:

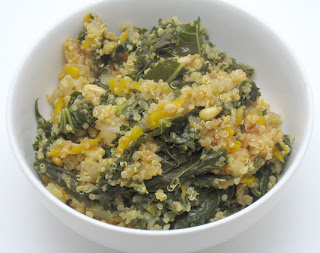
I used several of the carrots and the kale to create a tasty quinoa pilaf:
recipe for quinoa pilaf with kale, carrots, and pine nuts
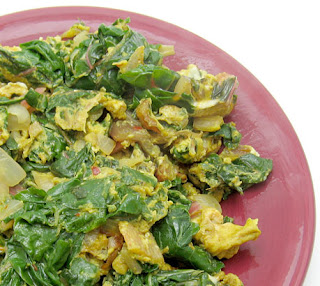
And I made a quick scramble with the swiss chard:
recipe for swiss chard scramble
I really enjoyed this collection of recipes, and I got approval from a couple of my favorite taste-testers :). I'm also very excited that a wider variety of veggies have just begun to appear in my share and at the market. I'm definitely ready to start eating 4 servings of squash a day.... and I'm not exaggerating.

Thursday, July 23, 2009

Yellow squash and black bean saute recipe

Yellow squash and black bean saute recipeI've been anxiously awaiting the beginning of squash season, and I'm very excited that it's finally here. I'm not sure why I like squash so much, but it's near the top of my favorite vegetables. This will really come in handy in about a month when everybody else is sick of squash and trying to get rid of it. I will happily take it off their hands.

Yellow squash and black bean saute

1 Tbsp olive oil
1 onion, chopped
4 garlic cloves, minced
1 jalapeno, seeded and diced
1 tsp cumin
2 cups cooked black beans (or 1 can)
2 tomatoes, diced with juices saved (or 1 can)
6 small yellow squash, cut into 1/2" chunks
salt and pepper to taste
1/2 cup shredded mozzarella cheese

Heat oil over medium heat in a large skillet. Saute onion in oil until tender, and then add garlic, jalapeno, and cumin and cook an additional minute. Stir in beans, tomatoes, squash, and salt and pepper, and let simmer until squash is very tender (about 20 min), stirring occasionally. Top with cheese. Serves 3.

Weekend Herb Blogging
I was looking forward to a simple meal with squash as the focus, and this did not disappoint. I really love squash with spice and Mexican flavors, so this was a great conglomeration of ingredients. I'm submitting this to Weekend Herb Blogging, which is organized by Haalo from Cook (almost) Anything At Least Once, who also happens to be hosting this week.

Wednesday, July 22, 2009

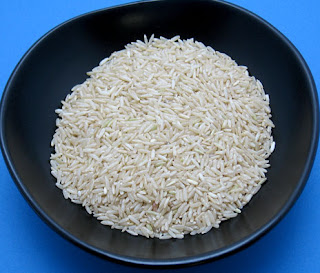
Everything you always wanted to know about brown rice but were afraid to ask

brown rice 101
The Whole Grains 101 series is continuing this week with a focus on brown rice. This is probably the best understood whole grain and has slowly creeped its way into mainstream culture, but it definitely deserves a post. Even though I have incorporated a wide variety of grains into my life, I will never turn down a simple bowl of brown rice.

What is brown rice?
Brown rice is simply rice that has had the hull removed but still retains the bran and germ of the rice kernel (unlike white rice). There are many varieties of brown rice, as each type of white rice has a brown counterpart. Commonly, short-, medium-, and long-grain varieties are found, which have similar properties to white rice of the same grain length; short-grain rices are very starchy and tend to stick together, while longer-grain rices have less starch and are more fluffy than sticky. Brown Basmati rice is also extremely common, and is primarily used in Asian cooking. Other varieties of whole grain rices include Forbidden black rice and Bhutanese red rice, which can be substituted for other rices for something new and different.

What does brown rice taste like and how is it used?
Brown rice is similar to white rice, but definitely has a rich, nuttier flavor. It's also chewier than white rice. It can be substituted for white rice in just about any recipe, but it's best to stick with the same type of grain-length (i.e., substitute short-grain brown for short-grain white).

Where do you buy and store it?
Brown rice is quite easy to find at any grocery store, but can also be located in bulk bins at natural foods stores. In my opinion, it's better to choose quality brown rices, not the supermarket brand. If you can't find quality brown rice in stores, there are many sources online. I'm in love with Massa Organics brown rice, and have learned a lot about their methods (and their new ducks!) on Twitter. Not only does their rice taste great, but I love getting to know the people that grow my food, even if it is through the internet. You can also order short-grain, long-grain, Basmati, and sweet brown rice from Bob's Red Mill. The more unique whole grain rices (like Forbidden black rice and Bhutanese red rice) can often be found in Asian markets or ordered through websites such as Lotus Foods.

Brown rice is more susceptible to becoming rancid than white rice because it retains the oils in the bran. If you have room in the refrigerator or freezer, store your rices there in an airtight container. If not, keep them at room temp but try to use them within six months (but again, make sure they're in an airtight container). If you cook a big batch of rice, it stores well in the refrigerator for a week or so and in the freezer for virtually forever.

How do you cook it?
There are several basic methods for cooking brown rice. No matter which one you pick, you should sort through your rice to pick out any debris and rinse it under cold water. To cook brown rice via the classical method, bring 1 part rice and 2 parts water (plus salt and butter or oil, if desired) to a boil in a saucepan, then cover, reduce heat to low, and let simmer for 50 min (or until all water is absorbed). Fluff the rice with a fork and serve. Or, you can cook rice like pasta by bringing excess water to a boil and letting the rice boil vigorously for 30-35 min (until rice is tender), then draining and letting the rice steam, covered, in the pot for 10 min. Many people also bake their rice, but I've never tried it, so I can't offer any advice. One cup of uncooked rice yields about 3 cups when cooked.

My recipes using brown rice
Other great brown rice recipes
Dilled adzuki bean and rice salad from Whole Life Nutrition
Mexican rice from Closet Cooking
Mushroom casserole from 101 Cookbooks
Rice-stuffed acorn squash from I Am Gluten Free
Vegetable fried rice from The Perfect Pantry
Roasted summer veggies over brown rice from Gluten Free Cooking School
Spinach rice gratin from 101 Cookbooks
Crockpot chicken and brown rice casserole from A Year of Slow Cooking

Tuesday, July 21, 2009

Quinoa pilaf with kale, carrots, and pine nuts recipe

Quinoa pilaf with kale, carrots, and pine nuts, adapted from Gluten-Free BayThe greens keep coming from my CSA share and the farmers' market, and I'm trying to get creative so that I don't get tired of them. I decided that I would use this week's CSA kale in a grain dish to mix things up a bit.

Quinoa pilaf with kale, carrots, and pine nuts (adapted from Gluten-Free Bay)

1 cup quinoa, rinsed well
1 Tbsp olive oil
1 small onion, chopped
4 garlic cloves, minced
2 1/2 cups veggie stock
1 bunch kale, stems discarded and leaves chopped
1 large or 2 small carrots, grated
1 Tbsp tomato paste
1/2 tsp dried thyme
salt and pepper to taste
1/4 cup pine nuts

Heat a large skillet over medium heat and toast quinoa for 10-15 min, stirring frequently. While quinoa is toasting, heat oil in a medium saucepan over medium heat. Saute onions in the saucepan until they're tender, and then add garlic and cook for another minute. Stir toasted quinoa into onions and then add remaining ingredients except for pine nuts. Bring to a boil, cover, reduce heat to low, and simmer for 20 min. If water remains in the pot, remove cover and cook on high for a few minutes, until water evaporates. While quinoa is cooking, toast the pine nuts in the skillet over medium heat, shaking frequently, for 5 min or until they are light brown and fragrant. Stir nuts into quinoa. Serves 5.

This is one of the best quinoa dishes I've had in a while. There's a lot of flavor going on, and I liked the kale and quinoa together. It was extremely filling, tasty, and a much needed change from eating kale alone.

Sunday, July 19, 2009

Swiss chard scramble recipe

Swiss chard scrambleI came home with a ton of greens from my CSA share this week, and I wanted to try something new. I also had some eggs that needed to be used, so I decided that I should make a frittata. As I poured the eggs into the pan, I quickly realized that my chard:eggs ratio was way too high, so I ended up turning this into a scramble. It's not quite as pretty as a frittata, but it worked.

Swiss chard scramble

1 Tbsp olive oil
1 small onion, chopped
2 garlic cloves, minced
1/4 tsp red pepper flakes
1 bunch chard, leaves and stems chopped separately
4 eggs
1 tsp turmeric
salt and pepper to taste

Heat oil over medium heat in a large skillet. Saute onions until tender, and then add garlic and red pepper flakes and cook for another minute. Add chard stems and let cook until tender (about 5 min). Then stir in chard leaves, cover skillet, and let cook until chard is wilted (about 3 min). While chard is cooking, whisk together eggs, turmeric, and salt and pepper. Pour eggs into the skillet and stir with the chard until eggs are cooked (about 4 min). Serves 2-3.

Even though I had to deviate from my original plan, it still tasted great. If you've never tried turmeric in your eggs, I highly recommend it. In fact, since I discovered this combo last fall, I don't think I've cooked eggs without this fabulous herb. Best of all, this was extraordinarily quick to make.

Saturday, July 18, 2009

Crock pot chili with venison sausage recipe

Crock pot chili with venison sausage, adapted from Not Your Mother's Slow Cooker CookbookI've always been a big fan of chili, and Mom frequently made it when I was growing up. Sometimes we would eat it by itself, but frequently we used it to top baked potatoes. One of the reasons that I love chili is that you can throw virtually anything into the pot and, assuming you let it simmer long enough, it's delicious. While this version has sausage, I love vegetarian chilis too, and I also enjoy experimenting with a diversity of beans and vegetables. This time I happened to have about a cup of chickpeas in my fridge, so I threw those in. It's different every time I make it, which is probably why I never get tired of it.

Crock pot chili with venison sausage (adapted from "Not Your Mother's Slow Cooker Cookbook" by Beth Hensperger and Julie Kaufmann)

10 oz. hot bulk venison sausage (or any ground meat)
1 large onion, chopped
1 bell pepper, chopped
3 garlic cloves, minced
2 cups cooked kidney beans (or 1 can)
1 cup cooked chickpeas (or 1/2 can)
1 can (14 oz) diced tomatoes
1 can (8 oz) tomato sauce
1 cup chicken or veggie stock
1/2 tsp dried oregano
1/2 tsp cumin
salt and pepper to taste

Cook sausage, onion, bell pepper, and garlic in a large skillet over medium heat until veggies are tender and sausage is browned. Drain off any fat, and pour this mixture into a medium-sized crock pot (I used a 3 1/2 quart one). Add remaining ingredients and stir well. Cook on low for 8-9 hours, stirring occasionally if possible. Serves 4-5.

This was tasty, but make sure to start this on a day when you don't plan on spending much time in the house. It smelled so good while it was cooking that I ended up snacking all afternoon. I wasn't even that hungry by the time the chili was ready, but I definitely ate a bowl of it. I don't know that I liked it as much as the black bean and sausage chili or quinoa and black bean chili that I've made in the last few months, but it was still quite good (hmmm... perhaps I prefer black beans in my chili!). It's perfect if you're looking for a very traditional chili, and the recipe couldn't get any easier.

Thursday, July 16, 2009

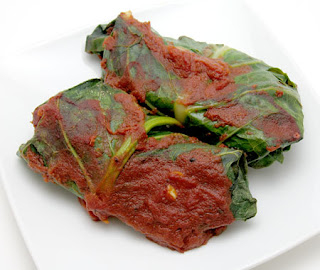
Mushroom and rice stuffed collard greens recipe

Mushroom and rice stuffed collard greensAfter making a somewhat traditional collard green recipe with my CSA collards last time, I decided to do something a little bit different. Heather from Flour Girl, and the creator of the Cooking Away My CSA group, brought up stuffed cabbage rolls on Twitter last week, and that got me craving the little suckers. As I was planning a course of action for my collards, I began to think that the large and flat leaves of collard greens might work as a fabulous substitute for cabbage.

Mushroom and rice stuffed collard greens

1 Tbsp olive oil
1 large onion, chopped and divided
2 garlic cloves, minced
8 oz. button mushrooms, diced
1/4 tsp crushed red pepper
1/4 tsp dried thyme
salt and pepper to taste
1 1/2 cups cooked brown rice

1 tsp olive oil
2 garlic cloves, minced
1 1/2 cups crushed tomatoes
1/2 tsp dried basil
salt and pepper to taste

6 large collard green leaves

Heat 1 Tbsp olive oil over medium heat in a medium skillet. Saute half of onion until tender, and then add garlic and cook another minute. Stir in mushrooms, red pepper, thyme, and salt and pepper and cook until mushrooms are brown and soft. Combine mushrooms with rice and set aside.

Add 1 tsp oil to the same skillet and saute the remaining half of the onion until tender. Then add garlic, cook an additional minute, and stir in tomatoes, basil, and salt and pepper. Let this simmer for 20 min.

Remove the end of the stem (past the leaf) from each collard green. Then fold each one in half length-wise so that the tough stem is on the outside. Trim some of the stem off, being careful not to cut leaf. Then plunge the leaves into a large pot of boiling water for 1-2 min, until tender. Remove from water and let cool for a few minutes.

Add about 1/4 cup sauce to the bottom of a medium baking dish. Assemble rolls by placing about 1/2 cup of mushroom and rice mixture at one end of a collard leaf and rolling it, folding ends in as you go. Place each roll in the prepared pan and top with remaining sauce. Bake at 350 for 30 min. Serves 3.

Weekend Herb Blogging
The collard greens worked remarkably well as a stand-in for cabbage. They were a bit tougher, requiring a knife or else resulting in a mess (guess which one I picked...). They also had a stronger flavor than cabbage, but definitely not in a bad way. I loved this simple filling, which was the result of throwing random things into a skillet. Once again, I have yet to find a vegetable that doesn't like to be stuffed. I'm submitting this to Weekend Herb Blogging, which is organized by Haalo from Cook (almost) Anything At Least Once and is hosted by Lynne from Cafe Lynnylu this week.

Wednesday, July 15, 2009

Bok choy with sesame and garlic tofu recipe

Bok choy with sesame and garlic tofu, adapted from The Whole Foods Market CookbookAfter I picked up my CSA share on Monday, I immediately started flipping through cookbooks to see what I would make for the week. One of the things that I came home with was another head of bok choy, so I was excited to find an enticing recipe in "The Whole Foods Market Cookbook". It included tofu, which was perfect because I'm now a vegetarian on Mondays and Tuesdays...

A few weeks ago I got an email from a friend proposing a vegetarianism sharing group. The idea is that you get several people together who are not vegetarians but recognize the importance of decreasing meat consumption because of its extreme impacts on the environment. Everyone commits to being a vegetarian for a day (or in some cases two days) of the week so that the whole week is covered by the group. I thought this was a great idea, as did a few other people, so I will now be making a conscious effort not to eat meat on Mondays and Tuesdays. Given that I don't eat much meat in the first place, it hasn't been much of a change for me. It's exciting that some of my friends are recognizing the impact of food choices, though, and I'm glad to be part of a group that is making a positive step towards reducing energy consumption.

Bok choy with sesame and garlic tofu (adapted from "The Whole Foods Market Cookbook")

3 cloves garlic
1 inch piece of fresh ginger, peeled
2 tsp sesame oil
1/4 cup soy sauce (use wheat-free tamari for gluten-free)
1 Tbsp rice vinegar
1 tsp brown sugar
1 Tbsp sesame seeds
1 tsp crushed red chili flakes
3/4 cup water
3 Tbsp gluten-free miso
1 lb firm tofu, cubed

1 1/2 Tbsp peanut oil, divided
1 head bok choy, chopped
2 garlic cloves, minced
1/2 inch piece of fresh ginger, minced
1 Tbsp soy sauce (wheat-free tamari)
1 bunch green onions, sliced
1 Tbsp sesame seeds

Combine everything from garlic to miso in a food processor or blender and process until smooth. Marinate tofu cubes in this marinade for at least 2 hours in the refrigerator.

Heat 1/2 Tbsp peanut oil in a large skillet over medium-high heat. Remove the tofu from the marinade (but save the marinade) and cook in the skillet, stirring frequently, until browned on all sides (about 5 min). Set tofu aside. Pour remaining oil into skillet and reduce heat to medium. Add bok choy, garlic, and ginger and cook, stirring frequently, until bok choy stems are tender (about 7 min). Stir in soy sauce and green onions and remove from heat. Serve tofu over bok choy, spoon some of the marinade over the top, and garnish with sesame seeds. Serves 4.

I really enjoyed this and almost saved the remaining marinade (but didn't because I couldn't figure out what I would do with it in the next few days). It had a good kick to it with really great flavor. Apparently my cheap food processor isn't so good at keeping liquids in, and I ended up with marinade all over my kitchen, with some dripping down the 1/8" crack between my stove and cabinets. As a result, my kitchen will likely smell like the marinade for a while, and I'm not complaining. I also really enjoyed the contrast between the soft tofu and the somewhat crunchy bok choy. I don't normally like to make a recipe twice in quick succession, but if I get more bok choy, this may make another appearance. It was that good.

Monday, July 13, 2009

Crock pot mixed grain porridge recipe

Crock pot mixed grain porridge, adapted from Not Your Mother's Slow Cooker CookbookI want breakfast the second my feet hit the floor in the morning. This means that I rarely make anything time-consuming because I simply don't have the patience (or the time) to wait for something to cook. This is where the crock pot can be a lifesaver. Simply put it all in before you go to bed, and you wake up to a perfectly cooked breakfast.

Crock pot mixed grain porridge (adapted from "Not Your Mother's Slow Cooker Cookbook" by Beth Hensperger and Julie Kaufmann)

1/2 cup steel-cut oats
3/4 cup wild and brown rice blend (or use any combo of rices)
1/2 cup millet
1/4 cup stone-ground grits
3 Tbsp flax seeds
5 1/2 cups water
pinch of salt

Combine everything in a medium crock pot (I used a 3 1/2 quart one) and cook on low for 8-9 hours. Serve with dried fruit, nuts, honey, or anything else that comes to mind. To reheat, add a splash of water or milk before microwaving. Serves 6.

When I woke up, I caught a whiff of toasted nuts (I think it was the smell of wild rice), and was excited to try it out. This might be my new favorite breakfast. I loved the combination of the grains, and the way that they almost melted into one another (particularly the millet, which could no longer be identified).

I'm submitting this to the Breakfast Recipe Blog Carnival to benefit Haiti, hosted by Winnie of Healthy Green Kitchen.

Sunday, July 12, 2009

Caramelized onion dip recipe

caramelized onion dipI had a long conversation about caramelized onions last weekend, so when I needed some kind of dip to bring to a wedding shower, my mind immediately drifted towards a recipe for onion dip that I bookmarked a long time ago. My only problem with making things involving caramelized onions is that I'm way too tempted to eat them all before they actually make it into the dish. I managed to exercise some restraint and salvage some this time.

Caramelized onion dip (adapted from Andrea's Recipes)

2 Tbsp olive oil
2 large vidalia onions, sliced thinly
1 tsp balsamic vinegar
pinch of salt
freshly ground pepper
1 cup plain yogurt
3 oz. cream cheese, softened

Heat the oil in a large skillet over medium heat. Add onions, vinegar, salt, and pepper, and let cook, stirring occasionally, until onions are brown and extremely soft (about 40 min). Let the onions cool to room temp. Beat the yogurt and cream cheese together with a hand mixer, and then beat in the onions. Refrigerate overnight, and then serve with veggies, chips, or crackers. Makes 2 1/2 cups.

This was delicious and I repeatedly "tested" it yesterday morning just so I would have an excuse to eat more. I even had one friend say that she enjoyed it despite not liking onions. Yes, that is the magical power of caramelizing them. I really liked the fact that the onion slices were intact, but feel free to chop the onions to prevent making a mess when the occasional onion slice falls to the floor.

Saturday, July 11, 2009

CSA round up week #2

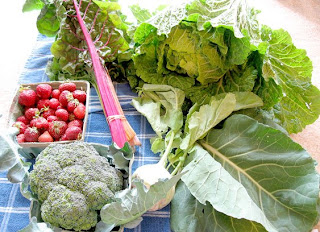
CSA share week 2 from Titus FarmsWell, it's time to wrap-up what I made with my CSA share from the last two weeks for Cooking Away My CSA. This batch included broccoli, swiss chard, collard greens, a giant head of napa cabbage, kohlrabi, and strawberries. I had fun with these, and was excited to try kohlrabi for the first time.

First, I mixed the broccoli with spaghetti carbonara to make it a little bit healthier (and even more delicious!):
recipe for spaghetti carbonara with broccoli
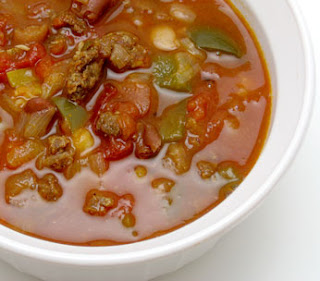
The collard greens went into a soup with black-eyed peas to create a dish that would be appropriate for any southern New Year's meal:
recipe for black-eyed pea and collard green soup
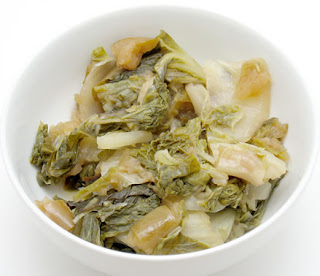
recipe for napa cabbe in the crock pot with apples and a vinegar and honey sauce
The remaining cabbage became a simple Chinese cabbage salad.

I roasted the kohlrabi (at 450 degrees for about 30 min), and thoroughly enjoyed this new veggie that reminded me of a combination of broccoli and parsnips (it's actually related to cabbage):
roasted kohlrabi
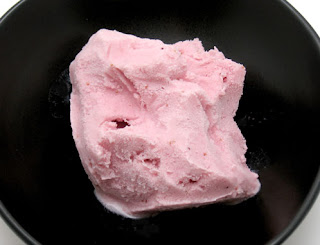
And finally, I made amazing strawberry coconut ice cream with what is probably the last of my CSA strawberries:
recipe for strawberry coconut ice cream
I can't wait to see what next week brings!!

Friday, July 10, 2009

Strawberry coconut ice cream recipe

strawberry coconut ice cream recipe, adapted from Elana's PantryI promised myself that I wouldn't buy another kitchen gadget. I'm good about keeping my promises to others, but apparently not those to myself. I've been eyeing an ice cream machine for a while now, but after weeks of fresh strawberries at the market and reading recipe after recipe for strawberry ice cream, it became more of a serious thought. One morning I was checking out the household items on Craigslist (note: not a good thing to do when you're trying to avoid buying things), and noticed that someone was selling a virtually brand new ice cream machine (the same one that I had my eye on). In a moment of weakness, I emailed her and ended up picking it up that afternoon. I'm fairly sure that when I move I'll have to get a separate U-Haul just for everything in my kitchen.

Strawberry coconut ice cream (adapted from Elana's Pantry)

10 oz frozen strawberries
1 cup coconut milk
2/3 cup whole milk (or more coconut milk)
2 Tbsp honey (or agave nectar)
1 Tbsp vanilla extract

Throw everything into a heavy-duty blender and blend away. Pour into your ice cream machine and freeze according to directions (mine takes about 30 min). For firmer consistency, pour into a container and freeze for a couple of hours. Makes 1 quart.

So I've already made 2 batches of this in the last week. I think that I subconsciously "forgot" to take a picture of the first batch because I wanted to make more. I also made a mistake with the first batch and had to correct it the next time. If you have a machine that requires you to freeze the container first, make sure it is COMPLETELY frozen. Mine wasn't, despite being in the freezer for several days, and the ice cream didn't get as firm as I would have liked it, but then froze into a solid chunk after it was in the freezer for a while. It didn't stop me from shaving off chunks of the best tasting ice cream block I had ever tasted. Apparently there's only one temperature control for my whole refrigerator/freezer unit, and when it's set at a temp that's cold enough to freeze my ice cream machine, things in the fridge get icy. It's worth adjusting it just to make ice cream, though.

Anyway, about the ice cream... it's amazing! It's lighter than most, which I like because it allows the real strawberry taste to shine through. I used strawberries from my CSA share, and I definitely didn't want to hide their deliciousness. I'm going to have to do something to control my ice cream intake before the blueberries and peaches start arriving...

Wednesday, July 8, 2009

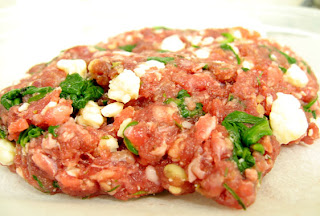
Bison burgers with spinach and queso fresco

bison burger with spinach and queso fresco, adapted from Eating Well
(I forgot to take a picture after they were cooked... oops!)

There are some words and phrases that are commonly used in the midwest that I refuse to adopt. You will never hear me say 'pop,' for example. Sure, I understand that referring to every carbonated beverage as 'coke' isn't quite accurate (especially up here in Pepsi-land), but there are many other terms that better describe the product (like 'soda' or 'soft drink'). Otherwise I start singing about weasels, and that's just annoying. Then there are 'parking ramps' - those multi-level concrete structures that hold a ton of parked cars. While I have occasionally used this wording, I still picture a ski ramp in the middle of the street that you drive over and end up flying through the air (in the style of Evil Knievel). 'Parking garage' makes much more sense to me.

The word that confused me most at first, though, was 'barbecue.' When I think of barbecue, I picture pulled pork that falls apart and makes a complete mess but is the most fabulous thing you've ever tasted. Or perhaps ribs that are so tender that they fall off the bone right into your mouth, smothered with a delicious sauce of one style or another, depending on where you happen to be at the moment. And when I was invited to my first bbq in Michigan, this is precisely what I found. It was hosted by a friend from Tennessee who decided to throw a few pork shoulders and several racks of ribs on his smoker and cook them to death, meanwhile whipping up a huge vat of sauce. I was right at home. Soon thereafter friends started planning barbecue after barbecue, and I was very excited. After I heard some of the plans, though, my excitement turned to confusion... hot dogs and hamburgers don't belong at a barbecue. Sure, throw them on a grill and go to town, but that's completely different than a hunk of meat that has been cooked low and slow.

I went to these events and had a good time, but I struggled with the misnomer for a while. Every time that I would hear the word, part of me would instinctively get excited, and then I would have to bring myself back to reality. I do love that people are obsessed with grilling over the summer here (probably because it's only feasible for 3 months out of the year). When I'm lucky, we also throw some veggies on the grill because that's almost as good as real barbecue.

Now that it's been four years, I've finally come to terms with the fact that 'barbecue' doesn't mean barbecue here. But I was ecstatic to get an evite for a 'grilling party' for the 4th of July this year. This friend happens to be a native Michigander, and I am unbelievably happy that she knows her terms for outdoor meat cooking occasions.

As the grilling party approached, I remembered that I had a package of ground buffalo meat from TMZ Farm in Pinckney, MI that I picked up at the Ann Arbor Farmers' Market several months ago. I thought that this would be the perfect time to use it. I'm not one of those people who loves the taste of meat alone (at least not usually), but I think that it can blend well with many other flavors. Thus, I present the bison burger with spinach and queso fresco.

Bison burgers with spinach and queso fresco (adapted from Eating Well)

5 oz spinach
1 lb ground bison
2 oz queso fresco (or feta), crumbled
2 garlic cloves, minced
1/2 tsp dried dill
1/2 tsp dried oregano
1 tsp cumin
1/2 tsp salt
1/2 tsp freshly ground black pepper

Cook spinach in a large pot of boiling water just until wilted (about 2 minutes). Drain spinach, let cool, and chop. Combine all ingredients in a medium bowl, mix together with hands just until blended, and form into 4 patties. Cook over medium-low heat on a grill or in a skillet until it's done to your liking (buffalo meat is extremely lean and can't take high temperatures). Serves 4.

These were the best burgers that I've had in a long time. The original recipe is for Greek burgers, but I substituted queso fresco for the feta because I had some leftover from the squash enchilada casserole. They still had a Greek vibe to them, but the queso fresco was more mellow than the feta would have been... and I think I liked it better that way. This is the first bison meat I've had from TMZ Farm, and it was amazing. I think that I've also seen it at the Lansing City Market, and I will likely be heading over there to see if I can get more. It has a more subtle flavor than most of the bison I've eaten before, and it didn't overpower the other ingredients. Perhaps I'll have to whip more of these up for future grilling parties... and maybe even a barbecue.

Tuesday, July 7, 2009

Crock pot napa cabbage with apples

crock pot napa cabbage with apples, adapted from Not Your Mother's Slow Cooker CookbookOne of the things that I chose for my CSA share this week was a gigantic head of napa cabbage. This was the largest cabbage that I've ever seen, in fact. Rebecca, who runs the CSA, looked at me in shock when I took the biggest one. I assured her that if there's one thing I know how to eat, it's cabbage.

Crock pot napa cabbage with apples (adapted from "Not Your Mother's Slow Cooker Cookbook" by Beth Hensperger and Julie Kaufmann)

1/2 head napa cabbage, shredded (or as much as your crock pot will hold)
2-3 granny smith apples, cored and diced
1/2 cup red wine vinegar
1 1/2 Tbsp honey
salt to taste

Combine cabbage and apples in a large crock pot (I used a 6 quart). Combine vinegar and honey and pour over cabbage and apples. Then toss to combine, cover crock pot, and cook on low for 5 hours. Season with salt. Serves 5.

I've made cabbage with apples before, but this was slightly different because the cabbage and apples dissolved into each other and the vinegar gave quite a bit of tang. Actually, now that I think about it, the taste of this was a combo of the cabbage with apples and sweet and sour cabbage. It was quite tasty, and extremely easy... once I figured out how to wrangle my huge cabbage head.

Monday, July 6, 2009

Black-eyed pea and collard green soup

black-eyed pea and collard green soup, adapted from Gluten-Free BayThis week I got some collard greens in my CSA share and, like any good southerner, I had to combine them with black-eyed peas. This duo is part of the traditional southern meal for New Years Day, but I couldn't wait another 6 months. I decided to mix things up a little bit, though, and make them into a soup. I'm not usually a big fan of soup in July, but it's been unseasonably cold here this summer (much to the chagrin of my vegetable plants).

Black-eyed pea and collard green soup (adapted from Gluten-Free Bay)

2 Tbsp olive oil
1 onion, chopped
4 garlic cloves, minced
1/2 tsp crushed red pepper
1/2 tsp cumin
1 tsp chili powder
1 bunch collard greens, stems removed and leaves roughly chopped
2 large tomatoes, diced (or 1 can diced tomatoes)
2 1/2 cups chicken or veggie stock (or more for a thinner soup)
3 1/2 cups cooked black-eyed peas (or 2 cans)
10 dashes Tabasco
salt and pepper to taste

Heat oil over medium heat in a large pot. Add onion and saute until tender. Then add garlic, red pepper, cumin, and chili powder and cook for an additional minute. Toss collard greens in the pot, stir well to coat with oil and spices, and let cook for 5 min. Add tomatoes, stock, peas, and Tabasco and bring to a boil. Then reduce heat, cover, and let simmer for 30 min. Season with salt and pepper. Serves 5.
heart of the matter
I loved this soup, and it definitely reminded me of the south. Peas, collards, and hot sauce are an amazing combination - definitely don't leave out the Tabasco, but feel free to use a little less if you don't like spicy foods. Even though I'm happy to have a pile of peas and one of collards on a plate, combining them into one dish worked particularly well. This makes a very comforting meal, and is extremely filling. I'm submitting this to Heart of the Matter because this month's theme is Budget-Friendly Foods, and this soup fits perfectly because it's simple, healthy, and incredibly cheap to make. Now I'm already looking forward to January 1st, even though I'll have to make do without fresh, local greens.

Saturday, July 4, 2009

Celebrating independence from gluten (for now)

going gluten-free
Ok, folks... it's storytime. I considered not saying anything until I had made a firm decision about this, but it's affecting me and what I've been cooking, so it's time to share.

I had reached a point where I had grown accustomed to feeling "off" - not horrible, just not great - fairly often. Given that I eat a fairly healthy diet and get tons of exercise, it didn't make a whole lot of sense. But this alone didn't make me worry because I thought it was just me (I'm kinda weird in general, so maybe my body was just playing along). It didn't really stop me from doing anything, so I figured it would be ok.

Then a couple of weeks ago I noticed that I was developing conditioned taste aversions to some foods. I would have one or two servings of something and it would be one of my favorite dishes. Then the thought of eating it again would repulse me and I would have to force it down until it was gone (the thought of throwing away food makes me cringe). Was I somehow becoming an anti-leftovers person? Not really - it seemed to only happen with certain foods, and the ones that I noticed in particular were spelt berry salad, homemade ravioli, and date and oat bars. Hmmm... wheat seemed to be a common denominator. And then came the horrible stomach cramps. Twice last week I developed horrible cramps (like someone was stabbing me in the stomach, sides, and back) a little while after eating. And both times I happened to be eating a fair amount of wheat. That was the final straw.

While I was still doubled over in pain from the second episode of pain, I decided to stop eating wheat and all glutenous products. The idea of having problems with gluten (the main protein in wheat, barley, and rye) wasn't foreign to me. I have a good friend who has been on a gluten-free diet for the four years that I've known her, and I've also learned more about gluten issues recently through several gluten-free recipe blogs that I follow because they have great recipes. In fact, just last week I noticed Alta from Tasty Eats at Home wrote about a very similar realization and conversion to a gluten-free lifestyle. I suppose that's why I came to the conclusion so quickly, although not quickly enough. I have no idea whether I have celiac disease (an autoimmune disorder in which gluten triggers inflammation of the small intestine), a wheat allergy/sensitivity, or neither (although this would involve some weird coincidences). My basic plan is to go a month without gluten and then try to eat wheat and see what happens. And don't worry, I also plan to talk to my doctor and a nutritionist about it after the month is over. It's already been 9 days, and I feel a whole lot better. I have a lot more energy, I'm running faster, and I haven't had any weird stomach cramps.

What has gluten, you might ask. Well, lots of things. Anything with wheat, barley, or rye, and almost all oats (due to cross-contamination during processing). This means the obvious (flour, bread, wheat or barley cereals, wheat berries, etc.), as well as beer, most soy sauce, anything with barley malt extract (which is used as a sweetener in a wide variety of things), anything using gluten as a binder (including a TON of packaged foods), and some preservatives and artificial flavorings/colorings. In terms of eating at home, it's really not a big deal. I already try to avoid all additives, so that's not a problem. I also minimize the added sweetener that I consume (and didn't have anything with barley malt extract in my pantry or refrigerator), so no loss there. I'll have to say goodbye to several of my favorite grains (at least temporarily), but I can deal with that if it makes me feel better. I still have millet, quinoa, certified gluten-free oats, corn, teff, and brown rice to get me through. After raiding my entire kitchen, the pile of off-limits stuff was fairly small, and consists mostly of wheat/spelt/Kamut berries, shredded wheat cereal, puffed Kamut, pasta, crackers, bread, protein bars, and several sauces (soy, worcestershire, and oyster). Through some miracle, everything else is gluten-free.

The real challenge is eating out. It's harder to make sure that there's no gluten in any of the ingredients, and many waiters/waitresses don't understand what needs to be done to completely avoid gluten. Unfortunately I decided to start this at the beginning of a conference, when I didn't have time to do research or prepare foods. I rarely eat out under normal circumstances, but due to extremely long days, it was a necessity. I originally planned to pack most meals that weren't provided, but all of my plans involved gluten in some way (like making a sandwich out of the bread in my freezer or carrying leftover pasta). I had no time to prepare something to eat for the week, and it was somewhat scary. The first day I had a meeting over lunch, and ended up eating a ton of salad (with no dressing, as many have gluten) and a pile of chicken and cheese. It was an odd meal for someone like me who doesn't eat much meat, but I had no other options. After ordering 20 pizzas that night for a workshop that I organized, I sat in the corner sipping water. The next day I had to go to lunch on my own because I couldn't think of any gluten-free options at the restaurant that my friends chose. And it didn't get any better the following day when I left the conference for the afternoon to attend a wedding. My only options for dinner at the reception were a small plate of salad (again sans dressing) and a plate full of broccoli and melon slices. Now, if anyone can handle a plate of broccoli it's probably me, but it's not exactly a filling meal. I had to watch my wine consumption because I was afraid that drinking on a virtually empty stomach would cause me to embarrass myself far more than I was willing to accept. It was also hard to pass up a lot of free beer at the conference, especially considering that I just developed a real appreciation for beer. Even though it was tough, I'm very glad that the conference happened to be in East Lansing this year, because I was able to eat breakfast at home and bring along a few snacks to get me through the day.

It was a scary few days, but now that life has returned to normal, it's not such a big deal anymore. The only real downside is that if this is a permanent thing, I'll end up spending a lot more money on ingredients (gluten-free flours are extraordinarily expensive, and require other enhancers). For now I'm going to hold off and do without bread for the month (so far corn tortillas and brown rice cakes seem to be getting me through). I also have a few options for eating out, now that I've had time to do research. Many of the chains are coming out with gluten-free menus (but I try to avoid chains, so I don't know how much I'll take advantage of that). There's also a pizza joint nearby that makes gluten-free pizzas and subs. They're ridiculously expensive because all of the flours cost so much, but it could be an occasional treat. The thought of going on a trip is frightening, but I'll learn to plan ahead and pack tons of food.

The good news? I can still eat my favorite foods. If someone told me I had to stop eating fruits or vegetables, I would cry for days. But this I can deal with. And who knows, perhaps this isn't really the problem and I'll be able to eat normally after this month. I would rather prepare for the worst and be pleasantly surprised if this isn't permanent.

So how might this affect the blog? Well, it might only affect things for the next month. If not, it will mean more recipes featuring gluten-free grains and grain substitutions (you might notice that I used brown rice pasta the other day, which is very tasty and already had a home in my pantry). If it's permanent, I'll eventually learn how to bake with other grains and I'll share those recipes. I'll also have to tweak my Whole Grains 101 series, but nothing will change for now. In all honesty, I don't think it will have a dramatic impact on the blog as a whole. Looking back over the past few months, very few recipes involved wheat or barley, and I've never liked rye. As I told Mom, as long as they don't start sprinkling flour over the produce at the farmers' market or in my CSA share, everything will be fine. As I've gone through this transition, though, I've been craving comfort foods like crazy. I think it's my attempt to prove to myself that I can still make all of my favorite foods. So there may not be as much experimentation going on in the next month or so, but we all need a return to the classics from time to time, right?

I'm discovering that there's a huge gluten-free community that exists in the blogging world, and it's really nice to have lots of resources to get me through this. It will be extremely helpful to have fellow bloggers who are also going through this transition right now (like Alta), in addition to ones who have been living gluten-free for years and have great advice and perfected recipes. So, as Karina from Karina's Kitchen - Recipes from a Gluten Free Goddess pointed out the other day, it's time to celebrate independence from gluten. I will be doing that today with some gluten-free beer (made from sorghum) and great friends.

Friday, July 3, 2009

Crock pot squash enchilada casserole

Crock pot squash enchilada casserole, adapted from Not Your Mother's Slow Cooker CookbookI originally had other plans for this month's cookbook of the month but, due to extenuating circumstances (that I will soon share), I decided to hold off on those for a while. Instead, we're going to change things up a little bit this month and try out some recipes from Beth Hensperger and Julie Kaufmann's "Not Your Mother's Slow Cooker Cookbook." I haven't used my crock pot in a while, and it's time to change that. Although you can cook just about anything in the crock pot, I especially love it for things that get better with time, like soups, chilis, and casseroles. Slow and steady is definitely the way to go for those things, and that's where the crock pot reigns over all other cooking methods. Crock pots also use far less energy than ovens and don't heat up the room (and I'm hoping this will help me accomplish my goal of not turning on my A/C this year). This book includes a ton of delicious recipes, and hopefully these will help satisfy my comfort food cravings that have been plaguing me lately. The only downside is that crock pot concoctions do not tend to be very photogenic, so bear with me on that.

Crock pot squash enchilada casserole (adapted from "Not Your Mother's Slow Cooker Cookbook" by Beth Hensperger and Julie Kaufmann)

2 Tbsp olive oil
1 onion, chopped
4 cloves garlic, minced
2 medium zucchini, sliced into 1/2" rounds
2 medium yellow summer squash, sliced into 1/2" rounds
1 tsp dried oregano
1/2 tsp cumin
1/2 cup corn kernels (fresh or frozen)
1 1/2 cups cooked kidney beans (or 1 can)
2 cups green chile sauce
6 corn tortillas, each cut into 4 strips
1 1/2 cups grated cheddar cheese
4 oz. queso fresco, crumbled

Heat oil over medium-high heat in a large skillet. Saute onion until it gets soft (about 5 min). Add garlic, zucchini, squash, oregano, and cumin and cook until squash and zucchini start to brown (about 7 min). Stir in corn and cook for another 2 min. Remove this mixture from heat and add in beans.

Spread 1/3 cup chile sauce in the bottom of a medium crock pot (I used a 3 1/2 quart one). Layer 6 tortilla strips, about 1/3 cup sauce, a third of the veggies, and a quarter of the cheddar and queso fresco. Repeat these layers two more times, and then top with the remaining tortilla strips, sauce, and cheeses. Cover the crock pot and cook on low for 4 hours. Serves 5.

This is the perfect example of how crock pots can enhance your basic casserole. It was wonderful - easily one of my favorite meals in a long time. The squash and zucchini were falling apart, which is just how I like them, and all of the flavors melded into one. It had a little bit of spice, but was in no way "hot"; it was cheesy, but not overwhelmingly so. I'm already excited about the rest of the month!