Sunday, May 31, 2009

Pasta and spinach bake

**This is not a gluten-free recipe and was posted before I eliminated gluten from my diet. Use brown rice pasta and a gluten-free flour as substitutes.**
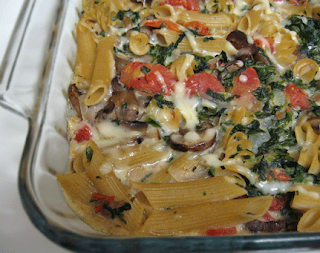
pasta and spinach bake, adapted from The Complete Cooking Light CookbookIt looks like I'm still on my baked pasta and cheese kick. One reason is that these dishes are easy and freeze well (and I just finished off my stock of lasagna in the freezer and needed to replace it for emergencies).

Pasta and spinach bake (adapted from "The Complete Cooking Light Cookbook")

8 oz. small whole wheat pasta (I used a combo of penne and fusilli)
1 Tbsp olive oil
1 medium onion, sliced
2 garlic cloves, minced
8 oz. baby bella mushrooms, sliced
1/4 cup whole white wheat flour
2 1/2 cups milk
1 1/4 cup grated provolone cheese, divided
1 1/2 tsp Italian seasoning
freshly ground black pepper
1 can (14.5 oz) diced tomatoes, drained
10 oz. package frozen spinach (or 10 oz. fresh spinach, cooked until wilted)
1/4 cup shredded parmesan cheese

Cook pasta according to package directions. While pasta is cooking, heat oil in a large saucepan. Add onions, garlic, and mushrooms and cook until onion and mushrooms are tender (about 8 min). Add flour and cook, stirring constantly, for 30 seconds. Add milk and cook until it begins to simmer, stirring constantly. Add 1/4 cup provolone and stir until melted. Add drained pasta, remaining provolone, Italian seasoning, pepper, tomatoes, and spinach to the sauce and stir well. Pour into oiled 9x13" pan and top with parmesan. Bake at 350 for 30 min. Serves 6.

This was delicious, simple, and another great combination of pasta, veggies, and cheese. There was an abundance of sauce that didn't seem to cook off while this was baking, so next time I'll reduce the amount of milk (or allow it to thicken more) to prevent this from occurring.

Well, the month is just about over, so this will be the last post from the cookbook of the month, "The Complete Cooking Light Cookbook". This is such a solid book that includes a huge variety of recipes. I often turn to it for simple ideas, as most of the recipes come together quickly and use ingredients that I usually have on hand. My favorite recipe that I made from it this month was chicken and corn maque choux (partly because it was really good, and partly because it brings back good memories). My parents have made this twice this month, so apparently I'm not the only one that likes it! I'm happy to say that I would make all of the recipes that I tried from this book this month again (lentil soup, roasted veggie pasta, sweet and sour cabbage, jalapeno cornbread, huevos rancheros, spicy tofu and noodles, and this pasta recipe), although with a few tweaks in places. This book has also provided me with great recipes for venison lasagna and kamut pilaf in the past few months. Sometimes simplicity pays off!

Homemade gnocchi with chard, chickpeas, and tomatoes

**This is not a gluten-free recipe and was posted before I eliminated gluten from my diet. **

Homemade gnocchi with chard, chickpeas, and tomatoes, adapted from Culinary in the Desert/CountryI've been wanting to make real gnocchi for a few months, but I was somewhat worried after reading many horror stories about the dough not having the right consistency or the gnocchi falling apart while cooking. I finally got the courage to try it out while I was in Florida because I had more time and much more space (one of my favorite parts of cooking at my parents' house). I noticed that one of my favorite blogs, Culinary in the Desert Country!, has several tasty looking recipes using gnocchi, and this might have been the reason that I originally got the gnocchi idea stuck in my head. By pure luck, Culinary in the Desert Country! happens to be the blog of the month for Palachinka's FBI gloves food blogging event. The basic idea is to make one of the recipes from the blog and then record your observations. I jumped on this opportunity to try a gnocchi recipe.

Homemade gnocchi (adapted from Smitten Kitchen)

1 1/2 lbs russet potatoes
1 egg, beaten
1 tsp salt
1 cup whole white wheat flour

Prick potatoes with a fork and bake at 400 until they're tender (45-60 min), turning once. Let potatoes cool slightly, then peel them and press them through a ricer*. Add egg and salt to potatoes and mix well. Then gradually add small amounts of flour, kneading between additions, just until the dough sticks to itself and no longer sticks to your hands (I added about 1/2 cup, but it will vary depending on your potatoes). Put the dough on a lightly floured surface and knead for a couple of minutes (do not over knead!). Divide the dough into 6 pieces, and roll each piece into a log (about 3/4" diameter). Cut each log into 1" pieces, and roll the back of a fork across each piece (so that the piece is slightly flattened and retains the indentations from the fork tines). At this point, you can boil the gnocchi (they're done about a minute after they float to the top), or you can saute them as I describe below.

*I was originally planning to grate them, as described at Smitten Kitchen, but was pleasantly surprised to find that my parents have a ricer!

Sauteed gnocchi with chard, chickpeas, and tomatoes (slightly adapted from Culinary in the Desert Country!)

1 Tbsp olive oil
1 recipe fresh gnocchi (see above; or you can use 1 lb. packaged gnocchi)
1 onion, sliced
4 garlic cloves, minced
1/2 cup water
1 large bunch of chard, stems removed and roughly chopped
2 large tomatoes, diced
1 tsp dried basil
1 tsp dried oregano
1 1/2 cups cooked chickpeas (or 1 can, drained)
salt and pepper to taste
1/2 cup shredded fresh mozzarella
1/4 cup shredded parmesan

Heat olive oil over medium heat in a large skillet. Add gnocchi and saute until they are brown on each side (I had to turn them over individually so that they didn't stick together before they got firm). Remove gnocchi and set aside. Add onions to the pan and saute until they begin to soften (about 5 min). Then add garlic and water, cover, and cook until onion is very soft (about 5 min). Stir in the chard, recover, and cook for a few more minutes until chard is wilted. Add tomatoes, basil, oregano, chickpeas, and salt and pepper, and let cook for a couple of minutes. Stir in the gnocchi and cheese, cook until cheese melts, and serve. Serves 4-5.

The gnocchi experiment went fairly well. I was very stingy about adding flour, which is apparently the key to gnocchi success. I thought that sauteing the gnocchi would prevent problems with the dough falling apart in water, but in retrospect this might have been more difficult because they tended to stick together in the skillet. In addition, because I had to flip them individually to prevent the sticking, some of them got a little bit more brown than I would have liked. Perhaps next time (and yes, there will be a next time), I'll give the traditional boiling method a shot. Or, I bet that letting the gnocchi sit in the refrigerator for a while would allow them to firm up and prevent problems (which is probably why it works well with packaged gnocchi).

I loved this recipe with the mix of chard, chickpeas, and tomatoes because I could really taste all of the components and it included a nice mix of textures. I love the combination of greens and tomatoes, but this had several more layers added on top of that, and they worked perfectly together. My parents really enjoyed this, too, which was exciting given that Dad generally prefers to have meat on his plate.

I'm glad that I finally tried gnocchi, and now that I have a bit more confidence with the process, I will definitely be trying out some of the other recipes from Culinary in the Desert Country!, particularly the brown butter gnocchi with spinach and pine nuts, baked gnocchi with ricotta and spinach, and gnocchi with broccoli rabe, caramelized garlic, and parmesan.

Friday, May 29, 2009

Grilled peaches and a tupelo honey giveaway

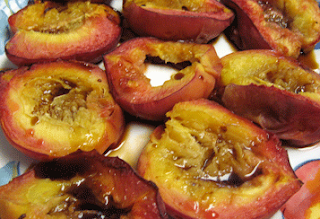
grilled peaches with a balsamic reduction, inspired by The Perfect PantryAfter a huge Memorial Day meal, we needed a light dessert. I was thinking of making a simple fruit and yogurt dessert, but Mom suggested grilled peaches. Peaches are just coming into season in Georgia and South Carolina, so this seemed like the perfect idea.

Grilled peaches with a balsamic reduction (inspired by The Perfect Pantry)

5 peaches, halved and pitted
1/4 cup balsamic vinegar
2 Tbsp honey (or agave nectar)

Place foil on grill (or, if your grill is very clean, skip this step). Spray peaches with olive oil and place on the foil. Grill over very low heat until the peaches are very tender and beginning to fall apart (about 20 min). While peaches are cooking, heat vinegar and honey in a small saucepan over medium heat until the mixture reduces by about half. Drizzle this over the peaches. Serves 5.

This was fabulous, and is one of my new favorite desserts. The peaches developed a great flavor after being grilled, and this contrasted fabulously with the acidic (and slightly sweet) reduction. I have a feeling that I will be making this over and over once peaches are available in Michigan.

Another honey giveaway!!

To celebrate another great recipe that I made with tupelo honey, I'm going to give away 2 more bottles. Tupelo honey is fantastic because it has a great mellow flavor and never crystallizes (see my previous giveaway for more info). So, leave me a comment about your favorite thing to do with peaches or honey, and I will randomly pick 2 winners who will each receive one squeeze bottle of tupelo honey from Florida. I'll do the drawing at 5 pm (Eastern time) on Sunday, June 7, and unfortunately I'll have to limit this to U.S. residents. Make sure to leave me your email address if you don't have a blog so that I can contact you. Good luck!!

Purple cabbage salad with carrots, almonds, and raisins

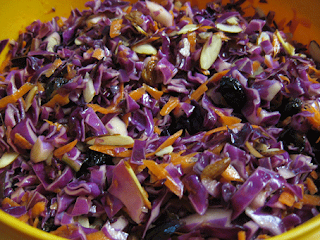
purple cabbage salad with carrots, almonds, and raisins, adapted from Vegan Yum YumOk, we've finally come to the last salad that I made for Memorial Day (but don't worry, dessert is still to come!). With potato salad already on the menu, I didn't want to make a traditional slaw, but couldn't pass up the chance to have cabbage.

Purple cabbage salad with carrots, almonds, and raisins (adapted from Vegan Yum Yum)

1 head purple cabbage, chopped into small shreds
4 large carrots, grated
1 cup raisins
1 cup sliced almonds
2 Tbsp balsamic vinegar
1/4 cup rice vinegar
2 Tbsp water
pinch of salt
1 Tbsp honey (or agave nectar)
3 Tbsp olive oil

Combine cabbage, carrots, raisins, and almonds in a large bowl. Mix remaining ingredients together in a small bowl, adjust dressing ingredients to taste, and toss with cabbage mixture. If you need to make this in advance, leave out almonds and add them just before serving. Serves 6-8.

This was definitely my favorite of the Memorial Day salads. The potato salad was light and had a great potato flavor, the bean salad was colorful and summery, and the cantaloupe and mozzarella salad was different and delicious, but this had a great mix of sweet and savory, as well as crunchy and chewy (and it included cabbage!). I have to give much of the credit for this salad to my mom because she chopped the cabbage. I generally don't have much patience when it comes to chopping cabbage for slaws, and I end up with huge chunks (take my Chinese cabbage salad, for example). That's not necessarily a bad thing, but it tends to look much nicer and is far easier to eat when it's in these small perfect shreds. The colors of this salad were beautiful, too, and it made for an even more exciting meal. I will definitely be making this salad again!

Colorful black bean salad

colorful black bean salad, adapted from Could It Be...Seitan?Although I probably could have stopped with the chicken and shrimp kabobs, potato salad, and cantaloupe and mozzarella salad, I decided that a bean salad would be fun, summery, and perfect for Memorial Day. And I certainly couldn't pass up another chance to use more local tomatoes while I was in Florida (I got back to Michigan yesterday, and am already regretting that I didn't fill a suitcase with them).

Colorful black bean salad (adapted from Could It Be... SEITAN?)

2 cups cooked black beans (or 1 can, rinsed and drained)
2 cups frozen corn, thawed
1 red bell pepper, diced
1 orange bell pepper, diced
1/2 red onion, diced
2 tomatoes, diced
1 avocado, diced
juice of 2 limes
2 Tbsp olive oil
salt and pepper to taste

Combine all ingredients in a large bowl, stir well, and serve immediately. Serves 6.

This was really good, light, and definitely perfect for the beginning of summer. Mom said it was her favorite of the salads that I made, particularly after adding the oil. Not only was it tasty, but it was also a very colorful addition to the table. My grandmother has lost most of her sense of taste, but she enjoyed the color and texture of this salad. I have to admit that I didn't think of this while I was making it, but I'm glad that she was able to enjoy it too!

Thursday, May 28, 2009

Cantaloupe, mozzarella, and mint salad

cantaloupe, mozzarella, and mint salad, adapted from Wheat Free Meat FreeI saw this salad a few weeks ago, and knew that I had to try it out. It combines several things that I would have never thought to put together, which always grabs my attention. Plus, Dad had a ton of fresh mozzarella and Athena cantaloupes are just coming into season in Florida, so it seemed like the perfect time to try it out.

Cantaloupe, mozzarella, and mint salad (adapted from Wheat Free Meat Free)

1 cantaloupe, cut into bite-size pieces
8 oz. fresh mozzarella, cut into small chunks
juice of 1 small lemon
1/3 cup chopped fresh mint
salt and pepper to taste

Combine all ingredients in a large bowl. Serves 6.

I liked this, and Dad said it was his favorite of the salads that I made for Memorial Day (because it was so different). The fresh taste of the mozzarella and cantaloupe meshed well together, and the mint added to this nicely. It's incredibly simple to make, and was a good addition to the meal. I also want to try this with honeydew (as Wheat Free Meat Free's recipe describes).

Lighter potato salad with onions and garlic

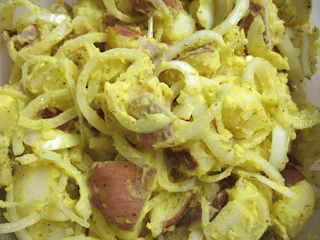
lighter potato salad with onions and garlicI love potato salad, but I'm very picky about it. I like simple ones that allow you to really taste the potatoes (something similar to mayonnaise soup with small chunks of potatoes is not my idea of good food). One of my friend's made a great potato salad a couple of weeks ago, and inspired me to try one out for Memorial Day.

Lighter potato salad with onions and garlic

5 large red potatoes, cut into bite-size chunks
1 Vidalia onion, sliced thinly
1 cup plain yogurt
1 tsp turmeric
2 tsp dried dill
1 tsp Greek seasoning mix
3 garlic cloves, minced
salt and pepper to taste

Bring a large pot of salted water to a boil, add potatoes, and cook until fork-tender (20-30 min). Drain potatoes, let them cool for 5-10 min, and add onions. Stir remaining ingredients together in a small bowl and adjust seasonings to your liking. Stir about half of the dressing into the potatoes and onions, and add more until potatoes are sufficiently coated, but not swimming. Ideally let it sit in the refrigerator for a while before serving. Serves 6-8.

This definitely satisfied most of my requirements for potato salad - it was light and emphasized the potatoes. The garlic was a little bit overwhelming (my cloves were huge), so I would either use smaller cloves or fewer of them next time (I can't believe that I just said that I plan to cut back on the garlic!). I love that the turmeric gives this a beautiful yellow color and a slight mustard taste. It's such a fabulous spice!

Chicken, shrimp, and veggie kabobs for Memorial Day

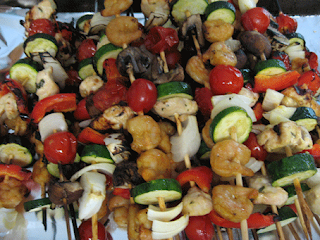
chicken, shrimp, and veggie kabobs for Memorial DayLet's just say that I got a little bit carried away for Memorial Day. I had no intentions of making a big meal, but when I started planning a few recipes, it turned into a big production (not unlike what happened when I cooked for Thanksgiving last year). I suppose that's what happens when I cook for multiple people (five, in this case). It's also easier to get carried away when I have a couple of extra pairs of hands (thanks, Mom and Dad!). And I'm also constantly afraid that there's not going to be enough food, so I make enough for a small army. But, the leftovers have disappeared fairly quickly.

The stars of the meal were these shrimp and chicken kabobs. I thought that Memorial Day wouldn't be complete without something on the grill, and kabobs are more fun than slabs of meat (plus, you get to mix in lots of veggies!).

Tarragon and mustard chicken marinade (adapted from Kalyn's Kitchen)

1 lb. boneless skinless chicken breasts
1 Tbsp chopped fresh tarragon
2 Tbsp Dijon mustard
juice of 1/2 lemon
1 clove garlic, minced
1/4 cup olive oil

Cut chicken into small (bite-size) pieces. Mix remaining ingredients together, and marinate chicken in the mixture for 6 hours.

Shrimp marinade (adapted from Kalyn's Kitchen)

1 1/2 lbs. medium shrimp, peeled and deveined
1/2 cup yellow mustard
1/2 cup soy sauce (use wheat-free tamari for gluten-free)
juice of 2 lemons
1/4 cup olive oil
1 garlic clove, minced
6 drops Tabasco sauce
1 tsp Cajun seasoning mix

Mix mustard through Cajun seasoning together, and marinate shrimp in the mixture for 6 hours.

Veggies I used for the kabobs:
2 small containers of cherry tomatoes
2 Vidalia onions, chopped into bite-size pieces
2 red bell peppers, chopped into bite-size pieces
1 lb. baby bella mushrooms, halved or quartered
3 medium zucchini, sliced

Soak a bunch of wooden skewers in water for at least 10 min (ideally more). Put veggies and meat on skewers (ideally you should keep chicken and shrimp on separate skewers because they cook at different rates). Spray kabobs with olive oil and grill over medium flames until meat is cooked through, turning occasionally (I'm not sure exactly how long it took because Dad was kind enough to take care of the grilling). Makes about 40 kabobs.

I loved these, and the marinades were perfect. I especially enjoyed the one I used for the shrimp, and I'm planning to use it on salmon very soon. This was a good compromise for my family because there are several people who prefer meat, and several of us who would rather have a veggie-rich meal. The kabobs take a long time to make (and we ended up with a huge mess on the kitchen counter), but they're very festive and much more fun to eat!

Tuesday, May 26, 2009

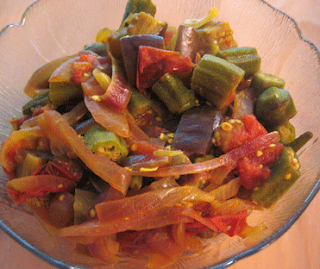
Okra, eggplant, and tomato curry over quinoa

okra, eggplant, and tomato curry over quinoaI'm currently in Florida visiting my parents, and this is the first time I've been home during the summer since I moved to Michigan 4 years ago. I'm LOVING the fact that so many vegetables are already in season here and, as a result, I've been cooking up a storm. This weekend we went down to Orlando for my cousin's wedding, and I knew that I had to find a farmers' market because I would go through severe withdrawal without my weekly trip. We ended up going to the market at Lake Eola on Sunday morning before we made the trek back to Tallahassee. This market is very different than my usual farmers' market (it had lots of arts/crafts and homemade food, but not much fresh produce). We did get some local tomatoes that are delicious, and picked up a few things from the one large produce stand. As soon as I saw the okra, I knew that I had to get it.

For me, okra is a comfort food and brings back fond memories of my childhood. I will occasionally find some in Michigan, but I rarely see the lovely small pods that result in the most delicious okra dishes. I also love okra's versatility - it has completely different characteristics depending on how it's cooked. Of course most people instinctively fry okra, which is always tasty. I've also become a big fan of roasting okra (with or without a flour/cornmeal coating), which makes the outside and seeds crunchy, similar to frying. I also love the often-feared boiled okra. Bring on the sliminess! Perhaps my favorite method of cooking okra, though, is stewing it with tomatoes. This results in a thicker stew-like concoction (similar to gumbo) and combines two of my favorite foods.

Recently I've become fascinated by the extreme overlap between Southern food and that of other warm-climate cultures. I didn't realize quite the extent of the similarities until I was eating at The Earthen Jar, a delicious vegetarian Indian buffet, in Ann Arbor the other day and discovered that my plate was covered in southern staples (like okra, collard greens, and black-eyed peas). And, as I looked through the okra recipes that I had bookmarked over the last few months, almost all of them were for Indian food. So, it seemed natural to use the okra (as well as the eggplant and tomato that we picked up at the market) in a curry.

Okra, eggplant, and tomato curry over quinoa

1 Tbsp olive oil
1 red onion, sliced thinly
1 Tbsp curry powder
1 tsp turmeric
2 tsp ground ginger (or use fresh if you have it)
3 cups okra, cut into 1/2" pieces
2 small graffiti eggplants, diced
2 large tomatoes, diced
1 Tbsp tamarind concentrate
salt and pepper to taste
3 cups cooked quinoa* (or rice)

Heat oil in a large skillet over medium heat. Add onion and saute until it gets tender. Stir in curry powder, turmeric, and ginger, and cook for an additional minute. Then add okra, eggplant, tomato, and tamarind concentrate, stir well, cover, and cook until okra and eggplant are tender (about 15 min). Add salt and pepper to taste and serve over quinoa. Serves 4.

* To cook quinoa, bring 2 cups of water to a boil in a small saucepan. Sort and rinse 1 cup of quinoa, and add to boiling water. Reduce heat to low, cover, and let simmer until all of the water is absorbed (15-20 min). Let it stand, covered, for 5 min.

weekend herb blogging
Mom and I really enjoyed this, and it was extremely easy. This is one of those great meals where you can eat a ton (and believe me, I did), but it's light and fresh enough that you don't feel sick afterwards. I thought that this was a great use of okra, because it thickened up the sauce a bit and provided a great texture contrast to the eggplant and tomatoes. I'm submitting this to Weekend Herb Blogging, a blogging event was originally started by Kalyn of Kalyn's Kitchen and is now organized by Haalo of Cook (almost) Everything At Least Once. This week, Susan from The Well-Seasoned Cook is hosting. This has become one of my favorite food blogging events, and I'm excited that I could take advantage of the plethora of fresh and local veggies that I have access to this week!

Friday, May 22, 2009

Honey winner

And the winner of the tupelo honey giveaway is....

Julia!

I really appreciate all of the comments, and I now have more ideas for using honey and cabbage!

I had completely forgotten about mead, and am glad that both Sam and Mel brought it up. It sounds like it could be fun to make some with tupelo honey. Perhaps I'll try it out one of these days...

Although there was only one comment about the best honey-related word, I have to emphasize that I also love mellifluous. It's one of the few Latin derivatives that I actually remember. Thanks, eli!

Wednesday, May 20, 2009

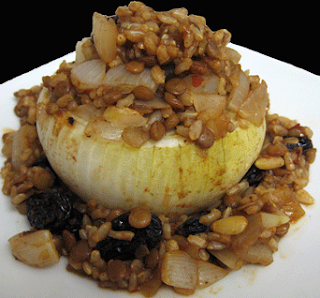
Vidalia onions stuffed with rice and lentil pilaf

Vidalia onions stuffed with rice and lentil pilaf, adapted from FatFree Vegan Kitchen
I love vidalia onions. As a child, I thought they were the standard type of onion because they were everywhere. I realized how special they truly are when I moved to Michigan and could only find them at certain times of the year. And now is that time (and they're even on sale!). I've had a recipe for stuffed vidalias from FatFree Vegan Kitchen bookmarked for months, and this seemed like the perfect time to try it out. Plus, I just discovered that FatFree Vegan Kitchen is this month's blog for Tried and Tasted, a blogging event to explore and re-create recipes from other food blogs. This month's host of Tried and Tasted is Holy Cow!, and I'm excited that I discovered this event at just the right time!

Vidalia onions stuffed with rice and lentil pilaf (adapted slightly from FatFree Vegan Kitchen)

2 large vidalia onions
1 Tbsp olive oil, divided
salt and pepper
6 Tbsp brown rice
1 Tbsp tomato paste
1 1/4 cup water
1/4 cup brown lentils
1/8 tsp cinnamon
1/4 tsp red pepper flakes
small pinch of ground cloves
pinch of salt
1/4 cup raisins
2 Tbsp pine nuts

Peel onions and cut off the very bottom so that they have a flat surface to stand on. Then cut off about 1/2" of the top of each onion and save. Place onions in oiled baking dish, rub with 1/2 Tbsp olive oil, and sprinkle with salt and pepper. Bake at 400 until onions are soft and begin to caramelize on the outside (45-60 min).

Prepare the pilaf while the onions are cooking. First, chop up the onion tops. Heat remaining 1/2 Tbsp oil in a saucepan over medium heat and saute onion until tender. Then add rice and tomato paste and cook for a minute. Stir in water, lentils, and spices, and bring to a boil. Then cover, reduce heat to low, and simmer for 30 min.

When onions are soft, take them out of the oven and let cool for a few minutes. Take all but the outer 3 layers of each onion out. Cut off the very bottom of each middle section and return it to the outer layers (to create a bottom). Chop up the remaining middle sections and stir that into the pilaf along with the raisins and pine nuts. Press pilaf into each onion and put remaining pilaf around the onions in the baking dish. Sprinkle each onion with 1 Tbsp water, cover dish with foil, and bake at 350 for 20 min. Serves 2.

I loved these. Roasted vidalias are great on their own, but it was fun to stuff them. Somehow stuffing vegetables magically makes the veggie and the stuffing taste better. The pilaf was delicious, and had a great blend of Middle Eastern flavors. The only change that I would make is with the raisins. I used very large ones, so many bites were raisin-less. Next time I'll either use smaller ones or add more. But other than this minor problem (that was my fault), this recipe is perfect.

While looking through the massive archives at FatFree Vegan Kitchen, I found myself wanting to make just about everything. "Wait, you're not a vegan," you might say. You're correct, but you might be surprised to find out what I discovered about my recipes. Over the past 3 months, I've posted 53 recipes. Of these, 21 (40%) are vegan and another 19 (36%) are vegetarian. And some of the vegetarian dishes could easily be made vegan by substituting agave nectar for honey. I'm honestly shocked that this number is so high, but it explains why I like so many of FFVK's recipes!

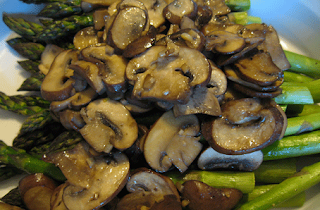
Asparagus topped with sauteed mushrooms

Asparagus topped with sauteed mushrooms, inspired by Mark Bittman's How to Cook EverythingEvery week I end up coming home from the farmers' market with several pounds of asparagus because that's one of the only vegetables in season. It's causing me to flash back to Barbara Kingsolver's descriptions in "Animal, Vegetable, Miracle" of patiently waiting for the first stalks of asparagus and eating so much of it that you never want to see it again... until next spring. Until recently, I didn't realize that Michigan is the third largest producer of asparagus in the country, and even has a National Asparagus Festival. For some reason that doesn't get as much attention as the cherries.

While I thoroughly enjoy asparagus that has been simply roasted or sauteed with a bit of oil, salt, pepper, and garlic, I was in the mood for something a little bit different. This was perfect.

Asparagus topped with sauteed mushrooms (inspired by Mark Bittman's "How to Cook Everything")

1 1/2 lbs asparagus, ends trimmed
2 Tbsp olive oil, divided
pinch of salt and pepper
10 oz. baby bella mushrooms, sliced
2 cloves garlic, minced
2 Tbsp white wine

Toss asparagus, 1 Tbsp oil, and salt and pepper together on a large baking sheet. Roast at 400 until asparagus is somewhat tender, but has a bit of crunch left (about 15 min, or less if you have thin stalks). While asparagus cooks, heat remaining oil in a skillet over medium heat. Add mushrooms and saute for 15 min. Stir in garlic and wine and continue to cook for 5 more min. Top asparagus with mushrooms. Serves 4.

The mushrooms alone were delicious with the hint of wine and garlic that they absorbed, but these were even better when combined with the slightly crunchy asparagus. This would be the perfect dish to convert those who are convinced that they hate both mushrooms and asparagus because they have only tasted canned versions. The rubbery (in the case of the former) and slimy, limp (for the latter) abominations should simply not exist. This is the perfect antidote.

weekend herb bloggingI'm submitting this recipe to Weekend Herb Blogging, a food blogging event that was started by Kalyn of Kalyn's Kitchen and is now organized by Haalo of Cook (Almost) Anything At Least Once. This week, Cinzia from Cindystar is hosting this fabulous event. Buon appetito!


Monday, May 18, 2009

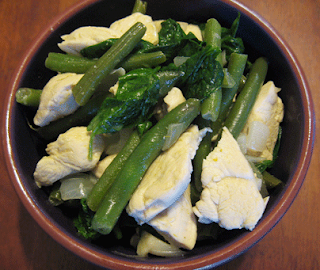
Thai green curry with chicken, green beans, and spinach

thai green curry with chicken, green beans, and spinach over millet, adapted from Cook Sister!I wanted to spend time outside after getting home from the lab because it's somewhat warm here (as long as you're wearing enough clothes and keep moving). This meant that I needed a quick recipe for dinner, and this green curry recipe caught my eye. I've fallen in love with Thai food recently, and so far I have been able to come somewhat close to real Thai food with various curry pastes. I'm still searching for lemongrass and galangal, but until I find it, commercial pastes will do just fine.

Thai green curry with chicken, green beans, and spinach (adapted from Cook sister!)

1 Tbsp olive oil
1 large onion, chopped
1 lb. green beans, cut into 1-2" pieces
1 lb. boneless skinless chicken breasts, cut into bite-size pieces
2 Tbsp green curry paste
8 oz. (about 1/2 can) light coconut milk
4 cups spinach

Heat oil in large skillet over medium heat, and then add onion and cook just until it starts to become translucent. Add green beans and continue to cook until they become slightly tender. Stir in chicken and saute until chicken is thoroughly cooked. Then stir in curry paste and cook for an additional 2 minutes. Pour coconut milk into skillet, wait for it to begin to simmer, then cover, reduce heat, and let simmer for 10 min. Add spinach, recover, and let cook 5 more min. Serve over grain of your choice (I used millet because it's delicious and it cooks quickly). Serves 3-4.

Good and easy. That's about all that there is to say about this recipe. It tastes similar to the green curries that I've had at Thai restaurants, but didn't take long to make and I had all of the ingredients on hand.

Don't forget that the tupelo honey giveaway ends on Friday at 5 pm, so leave a comment on my post about sweet and sour cabbage for a chance to win!

Sunday, May 17, 2009

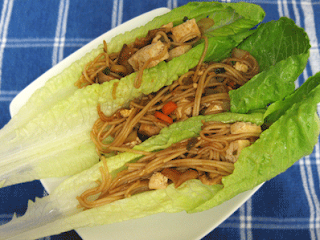
Spicy tofu with noodles and mushrooms

spicy tofu with noodles and mushrooms, adapted from The Complete Cooking Light Cookbook
I could make up an elaborate story about how I decided to make this recipe, but in all honesty, I just needed to use up my tofu before I leave for Florida this week. I have mixed feelings about tofu because I know far too many people who do research on the effects of soy and phytoestrogens on the brain (and it's rarely good news), but I usually manage to put aside these feelings because it's so delicious. Sometimes ignorance really is bliss.

Spicy tofu with noodles and mushrooms (adapted from "The Complete Cooking Light Cookbook")

1 cup boiling water
1 oz. dried mushrooms (I used a combination of oyster and shiitake)
4 oz. spaghetti (I used brown rice spaghetti)
1 Tbsp peanut oil
1/2 small onion, chopped
3 green onions, chopped
1/2 cup diced carrot
1/2" piece of ginger, minced
1 tsp Sriracha sauce
2 garlic cloves, minced
1 Tbsp soy sauce (use wheat-free tamari for gluten-free)
1 Tbsp hoisin sauce
2 tsp rice vinegar
1 lb. firm tofu, cubed
12 romaine lettuce leaves

Combine boiling water and mushrooms in a small bowl, cover, and let sit for 15 min. Drain mushrooms and chop. While mushrooms are soaking, cook pasta according to package directions. Then, heat oil over medium-high heat in a large skillet. Add mushrooms, both types of onions, carrot, ginger, Sriracha, and garlic and stir-fry for 3 min. Stir in soy sauce, hoisin sauce, vinegar, tofu, and noodles and cook for 3 more min. Put 1/2 cup of mixture into each lettuce leaf. Serves 4.

I really liked this, and it had a good mix of hot and sweet from the various sauces. It paired perfectly with one of my favorite simple veggie dishes - roasted broccoli tossed in soy sauce. My only complaint was that the spaghetti made it hard to eat (it kept making its way into my lap). But perhaps that's only a problem for people who excel at making a mess.

Friday, May 15, 2009

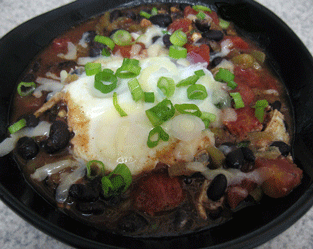
Huevos rancheros (sort of)

huevos rancheros, adapted from The Complete Cooking Light CookbookI'm tired of hearing eggs get a bad rap. I grew up thinking that they were horrible for your cholesterol, but there's actually very little evidence that dietary cholesterol has any effect on blood cholesterol levels. And guess what? All animal products have cholesterol. But, in my humble opinion, eggs are one of the tastiest. So, this adulterated version of huevos rancheros is my tribute to eggs everywhere (especially those that came from chickens who are happily frolicking about on the pasture... on a farm very near my kitchen). Ok, the thought of chickens frolicking is a bit absurd, but quite fun to imagine!

Huevos rancheros (adapted from "The Complete Cooking Light Cookbook")

1 1/2 cups diced tomatoes (or 1 can)
1 1/2 cups cooked black beans (or 1 can)
1 can (7 oz.) diced green chiles
2 Tbsp chopped cilantro
2 tsp chili powder
1/2 tsp cumin
salt and pepper to taste
3 eggs
1/4 cup shredded white cheddar
1 green onion, chopped

Combine tomatoes, beans, chiles (including liquid), cilantro, chili powder, cumin, and salt and pepper in a large skillet. Bring to a boil, then cover, reduce heat to medium-low, and simmer for 10 min. Pour each egg* into a separate cup and gently pour into bean mixture. Cover and simmer for 7-8 min, until eggs are done to your liking. Garnish with cheese and onion. Serves 3.

*I was cooking for myself, so I only cooked one egg in the mixture. When I was ready for leftovers, I brought an individual serving of the bean mixture to a simmer and then cooked another egg.

I really enjoyed this. Of course traditional huevos rancheros involves a corn tortilla, but I left it out because I was eating this with jalapeno cornbread mini muffins. This was the perfect vegetarian dish for a big meat-eater because I swear that it had a ground beef texture to it. And I don't even have any ground beef in my apartment, so I know that I didn't go into a trance and slip some in. I'm a big fan of topping just about anything with an egg, so this made my night. It was incredibly filling, too, and a leftover serving gave me enough iron to be eligible to donate blood this afternoon!

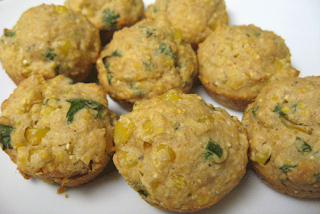
Jalapeno cornbread mini muffins

**This is not a gluten-free recipe and was posted before I eliminated gluten from my diet. **

jalapeno cornbread mini muffins, adapted from The Complete Cooking Light Cookbook

Who doesn't love cornbread? And to get real cornbread (cornbread that isn't sickeningly sweet) in Michigan, I have to whip some up myself. I love regular cornbread, but I always had a particular fondness for Mom's Mexican cornbread. It's perfect with a pot of chili... or with black-eyed peas and greens on New Year's Day. So I was especially excited to find a recipe for jalapeno cornbread in May's cookbook of the month.

Jalapeno cornbread mini muffins (adapted from "The Complete Cooking Light Cookbook")

3 Tbsp whole white wheat flour
3 Tbsp yellow cornmeal
1/2 tsp baking powder
1/8 tsp salt
3 Tbsp milk
1/2 Tbsp canola oil
1/4 cup corn (frozen and thawed is fine)
2 Tbsp chopped cilantro
1 tsp minced jalapeno

Combine flour, cornmeal, baking powder, and salt in a medium bowl. Stir together milk and oil in a separate bowl, and then add this to dry ingredients. Fold in corn, cilantro and jalapeno. Oil 9 mini muffin cups (or 3 regular size ones) and evenly pour batter into them. Bake at 350 for about 25 min, or until they're brown and toothpick inserted in center comes out clean. Makes 9 mini muffins (or 3 regular muffins).

I have one complaint: these were not hot enough. They would be great if you avoid spiciness, but I could have used 2-3 times more jalapeno. Otherwise they tasted great. They had a really great texture, even without the egg (I left this out because I quartered the recipe and didn't feel that a quarter of an egg would make much of a difference). If you're making a bigger batch, go ahead and add an egg in with the milk and oil for good measure. They didn't quite compare to Mom's cornbread, but it's a good starting point, and adding more pepper would make the competition a lot closer.

Monday, May 11, 2009

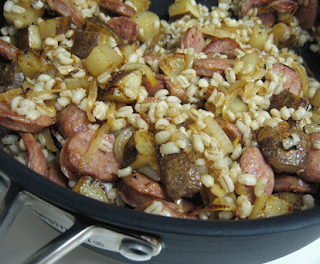
Barley with sausage and potatoes

**This is not a gluten-free recipe and was posted before I eliminated gluten from my diet. Brown rice would be a great substitute for the barley for a gluten-free option.**

barley with sausage and potatoes, adapted from 80 BreakfastsThis recipe provided a great meal, but also taught me an important lesson: ALWAYS sort through your grains. I normally make a point to look through my grains for rocks or other small objects, but of course this was the time that I forgot. Sometimes I find some rocks (particularly in brown rice, for some reason), and sometimes I don't, so I was hoping that I would luck out and have a batch without any "impurities." But, as I was enjoying my dinner, I heard a loud crunch and thought that part of my tooth might have fallen off (luckily this was not the case). I then discovered a small rock in my mouth... and apparently I have a strong jaw because I managed to break it in half. I really hope that this was the only one, but I'll probably be more careful when I eat the leftovers. And I will DEFINITELY remember to sort through my grains next time.

Barley with sausage and potatoes (adapted from 80 Breakfasts)

1 1/2 cups water
pinch of salt
1/2 cup barley, sorted and rinsed :)
1 tsp olive oil
1 large onion, sliced thinly
1 large Russet potato, diced
3 garlic cloves, minced
1/2 tsp dried thyme
8 oz. smoked sausage, sliced

Bring water and salt to a boil, then turn off heat and add barley (barley has a tendency to boil over). Bring back to a boil over medium heat, reduce heat to low, cover, and simmer for 40 min. Drain barley, return to empty pot, cover, and let steam for 10 min. While barley is cooking, heat oil over medium heat in large skillet. Add onion and potato and cook until they start to brown (about 10 min). Add garlic and thyme and cook for another minute. Stir in sausage and let cook until it browns. Finally, stir in the barley. Serves 3-4.

I really liked this... even with the extra crunch. I'm not a huge fan of most meats, but sausage is an exception. I brought this back from Tallahassee, and I'm convinced that people from North Florida/South Georgia know how to make the best sausage. Perhaps I'm biased (and I've never conducted a thorough double-blind taste test), but I'm fairly sure of this belief. And that taste test is sounding tempting... anyone want to join me?

Saturday, May 9, 2009

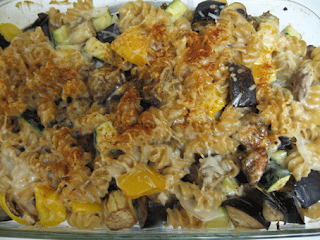
Roasted veggie and cheese pasta

**This is not a gluten-free recipe and was posted before I eliminated gluten from my diet. Use brown rice pasta and a gluten-free flour for substitutes.**

roasted veggie and cheese pasta, adapted from The Complete Cooking Light CookbookApparently I've been craving pasta and cheese dishes. I made mac and cheese with tofu a couple of weeks ago, and then loved the sound of this recipe when flipping through the cookbook of the month.

Roasted veggie and cheese pasta (adapted from "The Complete Cooking Light Cookbook")

1 small eggplant, diced
1 small zucchini, diced
1 bell pepper, chopped
4 oz button mushrooms, sliced
1 medium onion, chopped
2 garlic cloves, minced
2 Tbsp olive oil
1/4 cup whole white wheat flour
1 1/3 cups milk
3/4 cup shredded provolone
salt and pepper to taste
6 oz. whole wheat pasta (any small shape), cooked according to package directions
2 Tbsp shredded parmesan
pinch of paprika

Combine all veggies (eggplant through garlic) and olive oil and spread out in a large baking pan. Roast at 450 for 20 min, stirring occasionally. While veggies cook, add flour to a small saucepan. Slowly whisk in milk, and then cook over medium heat, stirring constantly, until milk thickens (about 8 min). Add provolone, salt, and pepper, and continue to cook until cheese is completely melted (1-2 more minutes). Combine pasta, cheese sauce, and veggies in a large bowl and pour mixture back into baking pan. Sprinkle parmesan and paprika on top and bake at 375 for 20 min. Serves 5.

This was amazing. I liked the mac and cheese with tofu, but this recipe was definitely more similar to authentic mac and cheese. It still wasn't too heavy, though, because the veggies diluted the intense cheesiness and gave it a fabulous flavor. During the past year I have completely fallen in love with roasted veggies of any sort, and this was a perfect use for them.

Most of the recipes that I make are fairly simple (including this one), but for some reason making a béchamel sauce (or a knock-off without butter) makes me feel like I'm really doing something complicated... in a good way. I'm pretty sure that I could teach a 2 year old to stir together flour and milk, but I suppose that it's because this sauce is the basis of many extremely complicated dishes. It's nice to be able to make something easy but feel like you've really accomplished something :).

Friday, May 8, 2009

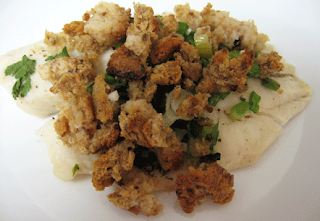
Chile and cilantro stuffed tilapia

**This is not a gluten-free recipe and was posted before I eliminated gluten from my diet. However, gluten-free bread crumbs could be easily substituted.**

chile and cilantro stuffed tilapia, adapted from Grow. Cook. EatIf I haven't already convinced you to visit my blogging mentor Julia's site, Grow. Cook. Eat., hopefully this will twist your arm. Last weekend I was thinking about cooking the rest of the tilapia that was hanging out in my freezer, but I couldn't decide on a recipe. I've tried a few, but none have turned out as good as a simple saute. I wanted to do something new and different, though, and was incredibly excited when I woke up the next morning to find that Julia had just posted a tilapia recipe.

Chile and cilantro stuffed tilapia (adapted from Grow. Cook. Eat.)

1 tsp chopped jalapeno
1 green onion, chopped
1 tsp parsley, minced
1 tsp cilantro, minced
1 garlic clove, minced
1/2 cup bread crumbs (I toasted and crumbled a piece of homemade bread, but Julia used panko crumbs, which sounds even better)
1/2 Tbsp olive oil
3 small tilapia filets
salt and pepper to taste
1 lime

Combine jalapeno, onion, parsley, cilantro, and garlic in a small bowl. In a separate bowl, mix bread crumbs and oil together. Season fish with salt and pepper and place it on a baking sheet. Squeeze lime over the filets, spread jalapeno mixture over them, and then sprinkle with bread crumbs. Bake at 350 for about 12 min, or until flaky. Serves 2-3.

This was fabulous. The flavors were great, but didn't overwhelm the fish (I love a good pure fish taste). I'm glad I didn't cook my tilapia last week... but a little freaked out that Julia can read my mind :).

Tuesday, May 5, 2009

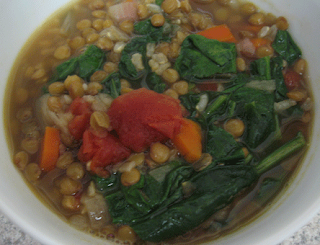
Lentil soup with spinach

lentil soup with spinachI know, I know... it's not soup weather anymore. I've been wanting to make lentil soup for about 5 months, though (and hey, it's still cold in my apartment!). This will probably be the last soup for quite a while, although I do have a zucchini recipe that may make an appearance in a few months :).

Lentil soup with spinach (adapted from "The Complete Cooking Light Cookbook")

1/2 Tbsp olive oil
1/2 red onion, chopped
1 small carrot, diced
2 cloves garlic, minced
3 cups chicken or veggie broth
1/2 cup brown lentils
1/3 cup brown rice
1/2 tsp cumin
pinch of salt
freshly ground black pepper
1/2 cup diced tomatoes
5 oz spinach

Heat oil in medium pot over medium heat. Add onion and carrot, and saute until tender (about 8 min). Add garlic and let cook an additional minute. Stir in chicken broth, lentils, rice, cumin, salt, and pepper. Let the soup come to a boil, cover, reduce heat, and simmer for 45 min. Add tomatoes and spinach and let cook for an additional 5 min (or until lentils and rice are tender). Serves 3.

I LOVE lentil soup. That and black bean are rivals for the top on my list of favorite soups. They're so simple, yet so filling and hearty, and I loved the addition of spinach. I don't know if I'll enjoy it as much for lunch tomorrow because my office is like a sauna (sometimes I swear that I'm having hot flashes), but life could be worse :).

Saturday, May 2, 2009

My blogging mentor (Julia from Grow. Cook. Eat.), flowers, and farmers

adopt-a-blogger, hosted by Kristen at Dine&Dish
It's been fun trying to figure out the whole blogging thing, but I know that I still have a lot to learn and can make the process more enjoyable for my faithful readers (thanks to those of you who keep up with my adventures!).  I was excited to read that Kristen at Dine & Dish was putting together a third round of Adopt-a-Blogger, a program in which she pairs experienced food bloggers with newbies like me.  I was very excited to be paired with Julia from Grow. Cook. Eat.  Julia has a lot of professional cooking experience and is now a food consultant.  She also creates cookbooks for CSAs that highlight the produce specific to that farm.  Her blog is somewhat different from most food blogs because she manages to include fabulous recipes, updates from her garden, and interesting tidbits on food and wine.  I'm very excited to have her as my mentor because she has a great blog and an immense amount of experience in the food world, and I'm sure that I can learn a lot from her.  Because I don't have room for a garden of my own (other than the tomato plants that I'm hoping to grow in containers on my patio), I'm looking forward to reading her garden updates this summer and learning more about the whole experience for when I can finally have one of my own. I highly recommend that you check out her blog!

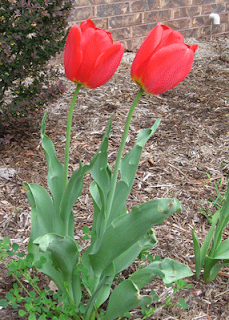
tulips outside of my apartment!Speaking of growing things, I'm happy to report that flowers are finally blooming in Michigan!  These are tulips right outside of my apartment, and there are enormous beds of them next to my building on campus.  I don't remember there being so many around the city in previous springs, but perhaps I'm paying more attention after the severe winter that we had to endure.  I doubt that I'll be able to make it to Holland, MI this year for the tulip festival, but it looks like we're having one of our own in Lansing :).

As my excitement about flowers was building, I also knew that this meant that my wait would soon be over.  Today was the opening day for the Meridian Township Farmers' Market, and I've been patiently awaiting this day since it closed in late October.  This market is less than 2 miles from my apartment and is the best one in the Lansing area.  Unfortunately, I couldn't get much today because I was heading straight to campus to help with the Michigan Science Olympiad, and knew that I could only buy produce that could withstand sitting in the car for 9 hours.  That ruled out the strawberries - they looked amazing but incredibly fragile - so they will have to wait until next week.  I did get asparagus and spinach, and just ate the best spinach salad I've had in a long time.  I also got good info about tomato plants, which I hope to buy from one of the vendors in the next couple of weeks.  More than anything, it was great to see everyone (both vendors and patrons) excited about being back at the market.  I missed the sense of community that I feel every Saturday during the summer and fall, and I'm so happy that I have it back!

Kale and onion saute with soy sauce

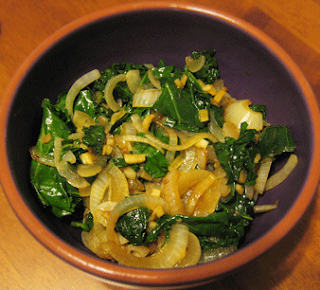
kale and onions with soy sauceWhile passing by the MSU Student Organic Farm stand on my way to seminar the other day, the kale jumped out at me. I'm not sure why - they had lots of delicious looking greens and other veggies - but I went with my craving. I wanted to take advantage of its freshness and cook it the day it was picked, but I was feeling somewhat lazy, so I decided to modify one of my favorite spinach recipes.

Kale and onion saute with soy sauce

1 tsp olive oil
1 large onion, sliced thinly
2 garlic cloves, minced
1 bunch kale, stems removed and leaves coarsely chopped
1 Tbsp soy sauce (use wheat-free tamari for gluten-free)

Heat oil in skillet over medium heat. Add onions and saute until they begin to brown (about 10 min). Add garlic and cook an additional minute. Stir in kale, cover, and let cook until thoroughly wilted (about 5 min). Stir in soy sauce. Serves 2.

So easy and so delicious. I love soy sauce and greens together, especially with the slightly bitter twang of kale. And it took virtually no time to make!

Friday, May 1, 2009

Chicken and corn maque choux

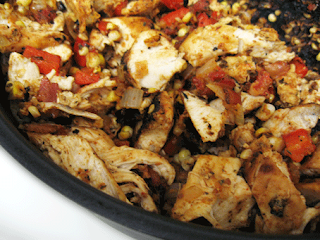
chicken and corn maque choux, adapted from The Complete Cooking Light CookbookMay is one of my favorite months... not for any one specific reason, but because of a conglomeration of fabulous things (flowers blooming, the beginning of softball season, sunny days, the first festivals, the opening of the farmers' markets, etc.). So, for May's cookbook I've decided to choose a good all-around book, The Complete Cooking Light Cookbook. Before I collected a ton of cookbooks and began reading food blogs like a fiend, CookingLight.com was one of my primary resources for recipes. This book combines some of the best ones from the website.

After picking the new book, I began to leaf through to see what looked interesting. One recipe screamed out at me, and I knew this had to be the first of the month. I've used this book a lot in the past, and I don't know how I overlooked it before. The story begins with a trip to New Orleans with my parents when I was 12. One night we ate at a cajun restaurant (if I remember correctly, it was Paul Prudhomme's restaurant K-Paul's). I liked the sound of the shrimp and corn maque choux, but I had no idea how to pronounce this for the waitress. We had fun trying to figure it out, and Dad, jokingly, decided that it should be pronounced ma-kweek-a-chex. The waitress finally informed us that it's really mock-shoe (which sounds far too much like a sneeze, if you ask me). I don't remember much about the actual dish, but this discussion is one of my most distinct memories about that trip (that and drinking red hots from the Tabasco factory out of the bottle).

Chicken and corn maque choux (adapted from "The Complete Cooking Light Cookbook")

2 tsp paprika
1 tsp garlic powder
1/2 tsp salt
1/2 tsp onion powder
1/2 tsp dried oregano
1/2 tsp dried thyme
1/2 tsp cayenne pepper
2 boneless skinless chicken breasts
1 slice of bacon, chopped into small pieces
1 red bell pepper, chopped
1 onion, chopped
kernels from 3 ears of corn
1/2 cup diced tomato
1/3 cup whole milk
pinch of salt

Mix first 7 ingredients and put 1 Tbsp of mixture on a plate (reserve the rest). Set plate aside. Render bacon fat in large skillet over medium-high heat. When bacon is crispy, remove pieces with a slotted spoon and set aside. Dredge chicken in spice mixture on plate and add to bacon fat in skillet. Brown chicken on each side (about 2 min per side) and set aside. Add red pepper and onion to skillet and let cook on medium heat for 5 min. Stir in corn, tomato, milk, salt, and the reserved paprika mixture, and let simmer uncovered for 10 min. Add chicken pieces back to skillet and let cook uncovered for 25 min or until done, turning once half-way through cooking. Remove chicken, shred, and return to skillet. Sprinkle bacon on top. Serves 2-3.

I love cajun food, and this was great. The spices are perfect, and the pairing of chicken to veggies was exactly what I was looking for. My only problem is that I didn't have enough bacon fat, and some of the corn mixture was slightly burnt on the bottom by the time the chicken was done. It wasn't a huge problem, and I preferred to think of it as blackened :). After years of thinking about this dish, I'm glad that I wasn't disappointed! But, I'll still call it ma-kweek-a-chex :)