Showing posts with label grains. Show all posts

Thursday, July 29, 2010

Georgia food adventures

You're probably tired of hearing me talk about all of the wonderful food I've been enjoying since the move.  Too bad, because I have to share more.  One of my favorite luxuries of living near Atlanta is being able to make occasional trips to the Dekalb Farmers Market.  I remember stumbling into this place while I was in college and being completely blown away.  The name is misleading because it's not your typical farmers' market, it's more of a store... but unlike any store I've ever seen. It does have tons of produce, some local, some not so much (at least everything is very clearly identified).  But my favorite two sections are the grains and spices.  They buy everything in bulk and then package it themselves, so their spices are incredibly cheap (some less than 10% of what you would pay in a typical store).  And they have every grain I've ever heard of (including sorghum, not that I have any desire to buy any).  The meat, seafood, and cheese sections are amazing, too, but I'm usually too cold to stay long once I get to those sections (I'm pretty sure they keep the store at around 50 degrees, and I can never remember to bring extra clothes).  Every time I go to this place, I leave with a huge smile on my face.  Not only is it a fun shopping experience, but it's so cheap (but incredible quality) that I always feel like I've won something.

Unfortunately they don't let you take photos in the store (I can't figure out why), but here's what I got:
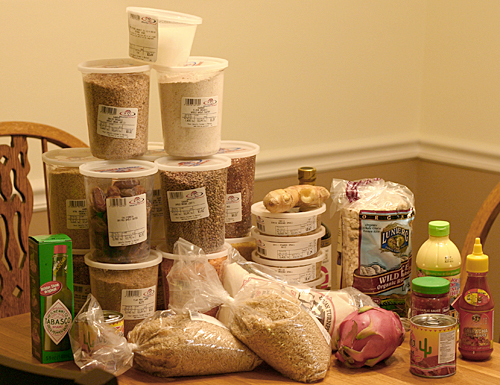
my loot from the Dekalb Farmers Market
Notice the plethora of grains (in the tall, stacked containers and the bags in front) and spices (the short containers).  I tried to control myself because I went two days before I left for Toronto, so I couldn't buy many perishable foods.

My favorite part about the produce section is that I've never heard of about a quarter of the items they sell.  It's the perfect place to find strange ingredients for recipes, but I'm also excited about trying something new each time I go.  This time I didn't go too crazy, but I decided that I needed to finally eat a dragon fruit.  The descriptive sign above them went into detail about their laxative effects, so I was a bit hesitant about eating it the night before my trip, but I was brave and suffered no consequences.  I really enjoyed it, and was excited to see some at the opening reception at my conference a mere two days later.

dragon fruit

My favorite part of my new food adventure has been enjoying all of the fruits and veggies from my grandma's garden.  I have an amazing family (and am completely spoiled), and my mom and great aunt and uncle pick food specifically for me whenever Mom will be making a stop by my place on her way home from Grandmother's house.  It might not be that exciting for those of you with great gardens, but it's wonderful when you're stuck in an apartment with no place to grow anything.  Here's what Mom brought last weekend:
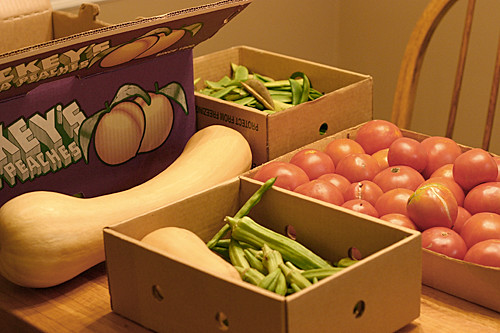
produce from my grandma's garden
(okra, butter beans, millions of tomatoes, and butternut squash)
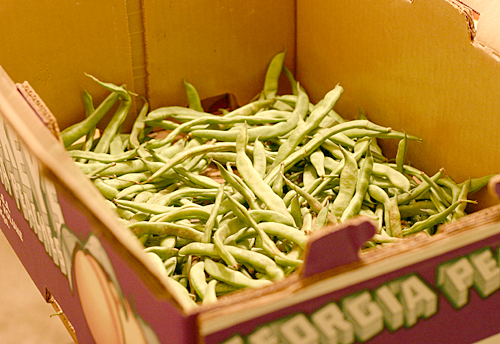
green beans
(a mess of green beans)

figs
(figs galore)

Plus I have more blueberries, but I forgot to take a photo.  How can you be sad when your dining room table is filled with amazing produce?  I going to experiment with drying some of the figs in my oven this weekend - does anybody have any tips?

And to top it all off, I had the experience of my life the other day.  Every year my grandparents would take a field trip to Dickey Farms in Musella, GA.  After hearing tons about this place, I convinced one of my friends that we should venture out there, and now I completely understand why they love Dickey Farms.  It's not a huge operation, but I was mesmerized by the washing/sorting/packing machines.  If you go in the middle of the day, you will find dozens of retired people sitting on the porch in rockers eating peach ice cream.  And if you go out back, little old ladies are frantically piling the "reject" peaches into 1/2 bushel boxes.  While we were there, a church van pulled up with tons of excited ladies, and I can only imagine the pies and cobblers that they made when they got home.  We happily joined in to fill our box for only $5.  Yes, you read that right.  Five dollars.  And we had well over 30 pounds of peaches in our box.  The entire process was fun - I was trying to catch the peaches as they flew off the conveyor belt (but felt like Lucy in the chocolate factory).  Many of the "rejects" had a soft spot, but plenty were fine - just too ripe to ship to stores.  We split the box, but I was still exhausted after freezing my half.  A big part of me wants to go back next week, but I'm not sure what I would do with more peaches.

Somehow between shelling beans and going to the peach farm, I've been able to get a lot of work done in preparation for my fall classes, but that's less fun to talk about :).  Have any of you had an exciting food adventure recently?

Wednesday, May 26, 2010

Two gluten-free granola bar recipes

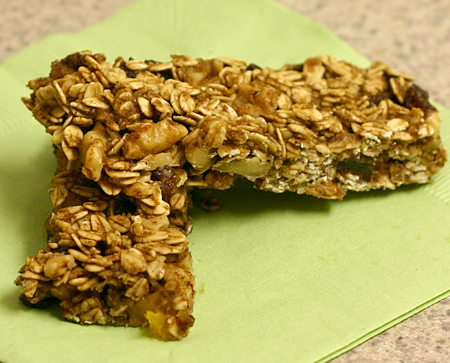
gluten-free granola bars
In addition to the fig, pecan, and flax crackers I made for my Mother's Day care package, I also sent two kinds of granola bars.  I found two recipes that sounded fantastic and couldn't decide between them, so I went overboard as usual.  Luckily granola bars fare well in the freezer, so none of them went to waste.  Both have relatively little refined sugar and are gluten-free, and I thought both were delicious.  Unfortunately the cocoa and orange variety (on the bottom in the picture, if you can actually tell them apart) had too much liquid and didn't stay together very well at all (I pieced one together for the picture).  I loved the combination of chocolate and orange, though, and I think the problem could be remedied simply by reducing the amount of orange juice.  The fig, raisin, and walnut ones were fabulous, too, and these held together well.  So, here are both recipes.  I recommend going overboard and trying both.  What do you have to lose?

Cocoa and orange granola bars (adapted from Anja's Food 4 Thought)
(Printable version)

1 1/2 cups rolled oats
1/2 cup chopped walnuts
1/4 tsp salt
1 tsp cinnamon
1 Tbsp cocoa powder
zest of one orange
3/4 cup dried fruit (I used half apricots and half currants)
1 1/4 cup orange juice (I would start with 3/4 cup and add more if necessary)
2 Tbsp honey

Combine oats, walnuts, salt, cinnamon, cocoa powder, zest, and dried fruit in a large bowl.  In a separate bowl, stir together orange juice and honey.  Pour the orange juice mixture into the dry ingredients and stir well.  Let this sit for 15 min, and then add more orange juice if the mixture isn't sticking together.  Spread this out on a parchment-lined baking sheet so that it's about 1/2" thick, and bake at 350 for 25 min.  Then let cool and cut into bars.  Wrap individually and freeze for long-term storage.  Makes 20 bars.


Fig, raisin, and walnut granola bars (adapted from Simply Sugar & Gluten-free)
(Printable version)

2 cups rolled oats
2 Tbsp flax meal
6 Tbsp teff flour
1 cup chopped walnuts
1/2 cup dried figs, chopped
1/2 cup raisins
1 tsp cinnamon
1/4 tsp ground ginger
1/3 cup agave nectar or honey
2 eggs, beaten
water if necessary

Combine oats, flax meal, teff flour, walnuts, figs, raisins, cinnamon, and ginger in a large bowl.  In a separate bowl, stir together agave nectar and eggs.  Pour the agave mixture into the dry ingredients and stir well.  If you need to moisten the mixture so that everything sticks together, add water a tablespoon at a time.  Spread the mixture out on a parchment-lined baking sheet so that it's about 1/2" thick, and bake at 350 for about 20 min.  Then let cool and cut into bars.  Wrap individually and freeze for long-term storage.  Makes 20 bars.

Saturday, May 22, 2010

Cabbage stuffed with quinoa pilaf recipe

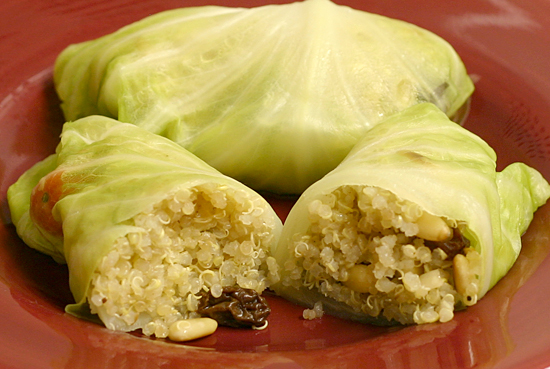
cabbage stuffed with quinoa pilaf
I loved this simple quinoa pilaf, especially because my last pilaf was virtually inedible.  The flavors were very simple, but the combination of quinoa, tomatoes, raisins, and pine nuts was perfect.  I got the pilaf recipe from Gluten-Free Goddess, but decided to stuff cabbage instead of mushrooms.  The pilaf would be great alone, as well (I had some left after stuffing the cabbage, and enthusiastically gobbled it up while the cabbage rolls were baking).  I'm submitting this dish to Weekend Herb Blogging, which is organized by Haalo from Cook (almost) Anything At Least Once, and hosted by Astrid from Paulchen's Foodblog.

Cabbage stuffed with quinoa pilaf (adapted from Gluten-Free Goddess)
(Printable version)

8 large cabbage leaves
1 tsp olive oil
2 garlic cloves, minced
2 cups cooked quinoa
15 cherry tomatoes, halved
4 green onions, chopped
3 Tbsp raisins
3 Tbsp toasted pine nuts
salt and pepper to taste

Bring a large pot of water to a boil, and then add cabbage leaves and boil until they're tender (about 5 min).  Remove the leaves from the water and set aside to cool.  While the cabbage cools, heat the oil in a large skillet over medium heat.  Then add the garlic and saute for a minute.  Stir in the remaining ingredients, season with salt and pepper, and let heat through for a few minutes before removing it from the burner.  Then stuff each cabbage leaf with about 1/3 cup quinoa pilaf, roll the cabbage up tightly, and place it seam side down into a large baking dish.  Bake at 350 for 20-30 min.  Serves 4.

Monday, May 17, 2010

Brunswick stew recipe

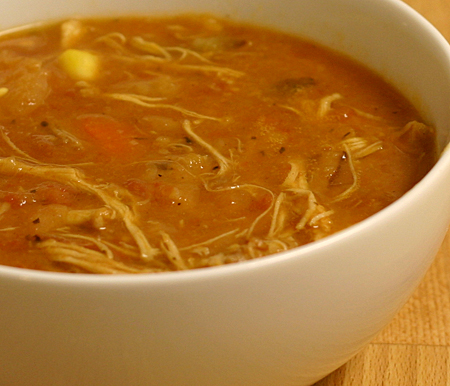
brunswick stew
I'm ecstatic right now.  I have a lot of recipes in the queue, but I have to tell you about this one immediately.  One of my absolute favorite meals in the world (perhaps THE favorite) is my grandmother's vegetable soup with cornbread.  The soup has a creamy tomato base with a bit of a kick (thanks to Tabasco), and is filled with butter beans, okra, corn, and potatoes.  My cousins and I fight over the soup, and I'm really hoping that Grandmother remembers that I organized and catalogued her chest freezer last month and will give me at least one of the three containers of soup she has left.  And very similar to her vegetable soup is her perlue stew (a few Google searches revealed that people spell it all kinds of ways: purlo, perlo, and purlew are just a few).  Perlue stew has a very similar base, but typically contains chicken, rice, potatoes, and corn.  It's heavenly as well, but for some reason Grandmother didn't make it nearly as often.  Unfortunately I've been intimidated to make both.  I'm afraid to even attempt her vegetable soup because, let's be real, it won't be the same.  I've pleaded for a recipe, but it's one of those things where she throws things in the pot and "knows" when it's right.  I do have her recipe for purlue stew, but nobody else in the family has succeeded at replicating it (and Mom found out the hard way that you must use a roaster chicken because of its higher fat content).

But then last month I was flooded by recipes for Brunswick stew from the Daring Cooks challenge.  Brunswick stew is a combination of Grandmother's vegetable soup and purlue stew.  It has some kind of meat (typically beef, pork, or chicken along with some random other ones - sometimes squirrel or rabbit), butter beans, corn, potatoes, tomatoes, and sometimes okra.  But that creamy tomato base is common among all of three of them (apparently to Burgoo as well, which I've never tried, but is basically Kentucky's version of this stew).  I associate Brunswick stew with barbecue restaurants.  If a restaurant doesn't sell Brunswick stew, don't eat the barbecue there.  Trust me.

The influx of Brunswick stew recipes last month made me drool, and I'm trying to eat up the cooked butter beans I have in my freezer, so I had to make this, and boy am I glad I did.  I don't know if this is the absolute best Brunswick stew I've ever had, but it's pretty close.  I'm used to the Georgia-style stew with beef, so the chicken version (more typical of Virginia) was different but equally as enjoyable.  If it follows the Rule of Soups and Stews (they get better and better as the days go by), I'll be in heaven all week.  And even more exciting is that the base is the exact same creamy tomato base of Grandmother's vegetable soup.  Forget the PhD, I'm far more proud that I've mastered the stew/soup base that I love so much!

Brunswick stew (loosely adapted from What We're Eating)
(Printable version)

2 strips of bacon
1 large onion, chopped
2 small peppers, diced (I used dried Thai chilies because that's all I had, but jalapenos or serranos are preferable)
2 1/2 pounds chicken thighs, skin removed
5 cups chicken stock
2 bay leaves
2 tsp Tabasco or other hot sauce
freshly ground black pepper
2 carrots, diced
4 small red potatoes, chopped
2 1/2 cups cooked butter beans
1 cup corn (fresh or frozen)
1/3 cup ketchup
1 large can (28 oz) crushed tomatoes

Cook bacon in a large soup pot over medium heat.  When it's done, place it aside on paper towels and crumble it.  Add the onions and peppers to the bacon grease and cook until the onion is tender.  Then push the onions to the side of the pot, and add the chicken, making sure that it's touching the bottom of the pot as much as possible.  Sear the chicken on both sides (a few minutes per side), and then add stock, bay leaves, Tabasco, and black pepper to the pot.  If the chicken isn't covered by the stock, add more until it's almost completely submerged.  Bring the stock to a boil, then reduce heat and simmer for 30 min.  Remove the chicken from the pot and set it aside to cool.  Then add carrots, potatoes, butter beans, corn, ketchup, tomatoes, and crumbled bacon to the pot.  When the chicken is cool enough to handle, shred it and add the meat to the pot.  Then bring the stew back to a boil, reduce heat to medium low, cover, and cook for 90 min, stirring occasionally.  If the stew base is very watery, leave the cover off for a while so it can thicken, or add more stock or water if it's too thick.  After the stew is done, mash the stew with a potato masher for a few minutes to create the creamy base.  Taste and add more Tabasco if necessary, and remove the bay leaves.  Serves 6-8.

Tuesday, May 11, 2010

Let's talk about sorghum

I'm guessing that a lot of people have had sorghum syrup at some point in their lives.  And those of us who have adopted a gluten-free diet have almost surely had sorghum flour and sorghum-based beer.  In fact, I use sorghum flour more than any other type because it seems to work as a multi-purpose flour and has a mild taste that is great in all kinds of baked goods.  However, I hadn't seen sorghum grains until I received a bag of sorghum from Shiloh Farms as part of the first place prize package in the Whole Grains Council's photo contest last fall.

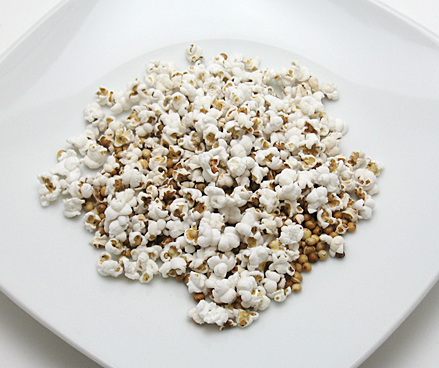
Sorghum grains are round, similar to millet or quinoa but much larger.  The bag listed several cooking options, and suggested popping it.  This intrigued me, so I immediately used my favorite method of making popcorn with the sorghum (put a handful in a paper lunch bag, roll the top over a few times, and cook in the microwave on the popcorn setting).  It was good.  Really good.  It tasted similar to popcorn, with a slight millet-like quality.  The only problem was that many of the kernels didn't pop, but I'm wondering if this could be remedied by cooking it on the stove.

popped sorghum

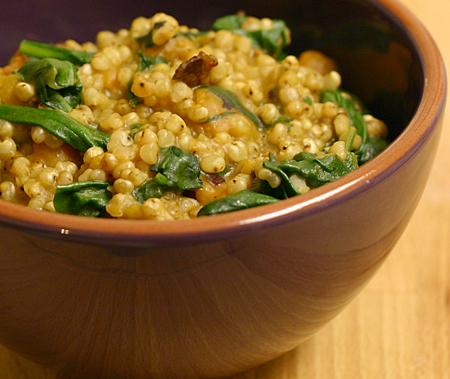
I only had one bag of it, though, so I decided that I should resist popping all of it and try another cooking method.  And then I forgot about it for 5 months.  I recently rediscovered my sorghum while taking an inventory of my pantry in preparation for my upcoming move, and finally got around to cooking more of it.  There was a recipe for sorghum pilaf on the bag, so I decided that was the route to take.  But instead of following that recipe, I substituted my sorghum for quinoa in a pilaf with sweet potato, spinach, and bacon that I found at Sounding My Barbaric Gulp!.  First, I must tell you that sorghum takes forever to cook (about an hour and a half), so I was hoping that it would be tasty enough to compensate for the time.  And I was also hoping to share an amazing recipe for sorghum because I had an extraordinarily tough time finding anything online.  The first few bites were good, very different, but pretty good.  It had a much stronger flavor than it did when popped, very earthy I would say.  But by the fourth bite I had had enough.  I've been able to eat a bite here and there because I hate to throw away leftovers, but I can't take anymore.

sorghum pilaf

So unfortunately I don't have a recipe to share, but do try popping it if you ever come across sorghum grains (that's what will happen with the remainder of my bag).  And I bet this pilaf would be good with quinoa, as it was originally made.  I'm disappointed that I didn't find my new favorite whole grain, and even more perplexed at how sorghum could be so great in other forms.  It was a fun experiment, though!

Tuesday, May 4, 2010

Oat-crusted chicken recipe

oat-crusted chicken
First off, I really appreciate all of the comments everyone left on my post about my grandpa.  And while I was spending time with my family last weekend, I learned the secrets of my grandmother's fried chicken.  She hasn't made it in years, but the whole family remembers how delicious it was.  Apparently it requires cutting up your own chicken so that the pieces are the same size, removing the skin, seasoning the chicken (not the flour), soaking the chicken in buttermilk for 24 hours before dipping it in flour, and then cooking it low and slow.  One day for a special occasional I'll get around to trying this method (I doubt that it will be as good as Grandmother's.... nothing ever is), but before I learned the secrets I made this incredibly easy oat-crusted chicken.  This was incredibly delicious the night I made it, very crispy on the outside and tender and juicy on the inside, but it's not something you want to eat leftover.  Just trust me on that one.

Now that April is behind us, it's time to wrap up the cookbook of the month, Whole Grains for Busy People.  Overall this is a fantastic cookbook if you're trying to ease whole grains into your meals or trying to cook whole grains with limited time.  My favorite recipe was the turkey ragu I made last month.  Even when I lost my appetite before my dissertation defense, I still wanted to eat it.  I also really enjoyed the macaroni and cheese with chicken and spinach, thai fish curry, and this chicken (the night I made it).  The hominy and bean chili wasn't my favorite recipe for chili, but it was pretty good too.  None of these recipes are going to win awards, but they're tasty, healthy recipes, and will give you a satisfying meal at the end of a long day.  If you have more time and only want to buy one book, I would recommend buying Lorna Sass's Whole Grains Every Day, Every Way, but this book is probably more suitable for most people who simply want a fast way to get healthy food on the table.


Oat-crusted chicken recipe (adapted from Whole Grains for Busy People)
(Printable version)

2 chicken breasts
salt and pepper
1/3 cup sorghum flour
2/3 cup rolled oats
zest of one lemon
1 egg, beaten
1 Tbsp olive oil

Season both sides of the chicken with salt and pepper.  Spread the flour out on one plate, and combine the oats and lemon zest and spread on a separate plate.  Pour the beaten egg into a wide, shallow bowl.  Dredge each chicken breast in flour, then dip it in the egg, then coat it in the oat mixture.  Heat the oil in a large skillet over medium heat.  Brown both sides of the chicken (about 2 min per side), then cover the skillet, reduce heat to low, and let cook until chicken is cooked through (about 10 min).  Serves 2-4.

Tuesday, April 13, 2010

Thai fish curry with brown rice recipe

Thai fish curry with brown rice
Last night I was reminded why I cut back my consumption of processed food.  Michael Pollan gave a lecture on campus, and he came on stage with bags full of groceries that he picked up at Meijer (he got extra points in my book for making fun of Meijer!).  He had boxes of sugary cereal claiming to be health food, fat free yogurt with more sugar than the full fat counterpart, and splenda with fiber.  But the one that caught my attention was the Tropicana Healthy Heart orange juice.  Sounds innocent enough, right?  Well, it contains tilapia, anchovies, and sardines.  I almost gagged.  Guess who will not be drinking store bought orange juice for a long time.

I would rather drink juice that I've squeezed myself (or at the very least has no sea creatures in it).  And I'll eat my fish with a fork, thank you very much.  Here's a great recipe in case you need ideas for ways to eat fish in its solid form.  I did have trouble finding a firm white fish that's sustainable but still affordable, but I finally came across cod from the U.S. Pacific, which is at least a "good alternative" according to the Monterey Bay Aquarium's standards. The flavors in this dish were mellow - I suggest adding a minced jalapeno if you're looking for something more dramatic - but I enjoyed it nonetheless.  The crunch of the water chestnuts was the perfect contrast for the flaky fish, and I wouldn't recommend making this without them.  It doesn't necessarily live up to "real" Thai food, but considering that it took about 10 minutes to make, it was a great substitute.


Thai fish curry with brown rice (adapted from Whole Grains for Busy People)
(Printable version)

1 can (13.5 oz.) light coconut milk
1/2 cup water
1 tsp fish sauce
2 tsp green Thai curry paste
pinch of sugar
1 cup corn kernels (frozen are fine)
1 can (8 oz.) water chestnuts, drained and sliced
1 lb. firm white fish (I used cod, but halibut also works), cut into bite-sized chunks
1/3 cup cilantro, chopped
zest of one lime
3 cups cooked brown rice

Combine coconut milk, water, fish sauce, curry paste, and sugar in a large saute pan, and bring to a boil.  Then stir in the corn, water chestnuts, and fish, making sure that the fish pieces are almost completely submerged in the sauce.  Cover the pan, reduce heat to medium, and cook until the fish is cooked through (about 4 min), stirring occasionally.  Stir in the cilantro and lime zest, and serve over rice.  Serves 4.

Thursday, April 8, 2010

Hominy and bean chili recipe

Hominy and bean chili
This isn't a very photogenic meal, and it may not be for meat lovers (if my dad's reaction is any indication), but I think it's a great example of a quick, easy, filling, and tasty dish.  I made this last week (the day of my panic attack, in fact), and it was great to have a delicious meal that required so little effort (without having too many pre-packaged ingredients).  It's not going to win any awards, but it's enjoyable and perfect for a crazy day.  That's what I love about this book, Lorna Sass's Whole Grains for Busy People, and I've decided to make it the cookbook of the month because I want to make more of these recipes.  Thus far the recipes I've made have been very solid; if you want something amazing, go for her Whole Grains Every Day, Every Way, but if you want something quick and very good, pick up this book.  This was also a great way to use up some of the cooked hominy and beans that are hanging out in my freezer and need to disappear before I move this summer!

Hominy and bean chili (adapted from Whole Grains for Busy People)
(Printable version)

1 Tbsp olive oil
1 onion, chopped
3 garlic cloves, minced
1 Tbsp chili powder
1 tsp cumin
1 tsp dried oregano
pinch of cinnamon
1 can (14 oz.) crushed tomatoes
1 can (14 oz.) diced tomatoes
2 cups cooked hominy (or 1 can)
1 1/2 cups cooked kidney beans (or 1 can)
1 cup cooked butter beans
2 small zucchini
1 cup water (if needed)
1/4 cup cilantro, minced
salt and pepper to taste

Heat the oil over medium heat in a large saucepan.  Add the onion and cook until it's tender, then add garlic and cook an additional minute.  Stir in chili powder, cumin, oregano, and cinnamon and let cook for a minute.  Add tomatoes, hominy, both kinds of beans, zucchini, and water (if you need additional liquid) and bring to a boil.  Then cover the pot, reduce heat to medium-low, and let simmer until zucchini is tender (about 15 min).  Remove from heat, add cilantro, and season with salt and pepper.  Serves 6.

Tuesday, March 23, 2010

Mexican red lentil and brown rice stew recipe

Mexican red lentil and brown rice stew, adapted from Kalyn's Kitchen
Before I get to this stew, you may have noticed a new navigation bar in the header.  I added a complete recipe index organized by category, which I'm hoping will help everyone (including me) find recipes, and also a list of my quick/easy and crock pot recipes.  I've intended to make these changes for a few months now, but I finally had time to sit down to do it (and it was a good distraction to keep me from thinking about the fact that my dissertation defense is in 10 days - yikes!).  Let me know if you have any suggestions for other ways to improve the navigation of my site (I'm open to anything!).

My Legume Love Affair
Now to the recipe!  First off, I'm naturally drawn to any recipe that includes turmeric.  Despite the fact that it has permanently dyed many of my kitchen utensils yellow, I can't get enough of it.  I've always had an unusual obsession with mustard, and I'm finally realizing that it's the turmeric that I love so much.  I also love red lentils, and they always seem to make meals amazing.  So, Kalyn had my attention as soon as she posted this recipe, and I'm sad that it took me so long to make it.  It turns out that I didn't have enough lentils, so I threw in some cooked brown rice and I loved the combination.  Next time I'm doubling the recipe so that I can stock my freezer (if I don't eat it all).  I'm submitting this to My Legume Love Affair, which is hosted by Manju at Mirch Masala this month, and is organized by Susan at The Well-Seasoned Cook.

Mexican red lentil and brown rice stew (adapted from Kalyn's Kitchen, who adapted it from Budget Bytes and Andrea Meyers)
(Printable version)

3/4 cup red lentils
3 1/2 cups water, divided
1 Tbsp olive oil
1 small onion, chopped
4 celery stalks, chopped
2 garlic cloves, minced
1/2 tsp turmeric
1 tsp cumin
1 tsp chili powder
1 can (14 oz.) diced tomatoes
2 cups cooked brown rice
salt and pepper to taste
juice of 1 lime
1/2 cup cilantro, chopped

Combine lentils and 1 1/2 cups water in a small saucepan and bring to a boil.  Then cover the pot, remove it from the heat, and let it sit for 20 minutes.  While lentils are sitting, heat oil in a medium saucepan over medium heat, and saute onion and celery until tender.  Then add garlic and cook another minute.  Stir in turmeric, cumin, and chili powder and cook one more minute.  Add tomatoes, brown rice, remaining 2 cups water, and lentils, and stir well.  Bring this to a boil, reduce heat, and simmer until lentils are tender (20-30 min), stirring occasionally.  Season with salt and pepper and add lime juice and cilantro.  Serves 4.

Tuesday, March 9, 2010

Wild rice and mushroom soup/pilaf recipe

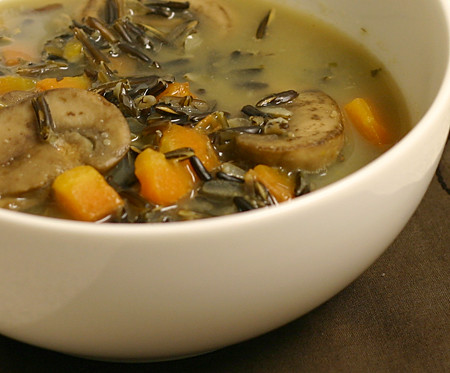
Wild rice and mushroom soup/pilaf
It has been remarkably warm around here for the past couple of days (even up to 55 degrees today!), and I couldn't be happier.  I woke up and listened to the birds having a loud discussion, and as soon as I stepped foot outside, I couldn't help but smile and whistle on my walk to the lab. (This might also be due to the fact that it's spring break and campus is empty. Swarms of students still intimidate me.)  But the remnants of winter still abound.  There's an inch thick layer of ice surrounding my parking spot, so I have to get to the edge of the ice, dive for my car, and hold on with a death grip, pulling myself towards the door.  It's only amusing because I haven't broken any bones yet.

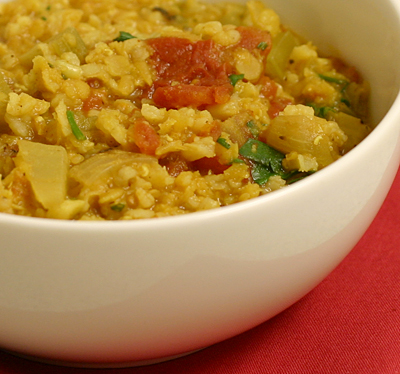
To keep myself warm for what I hope is the last of the winter, I made this soup last week.  Well, it started out as a soup.  Somehow between pouring my first bowl and packaging the leftovers, it kept cooking and most of the liquid evaporated, leaving me with a mushroom and rice pilaf.  I loved both versions, so I'll include rough directions for both.  I love wild rice for its nutty flavor and the crunch that it retains, and it was the perfect complement to the tender sauteed mushrooms.

Wild rice and mushroom soup or pilaf (inspired by We Heart Food)
(Printable version)

1 Tbsp olive oil
8 oz baby bella mushrooms, sliced
1 carrot, diced
3 garlic cloves, minced
1 tsp dried basil
1 tsp dried thyme
salt and pepper to taste
3/4 cup wild rice
2 cups veggie stock
4 cups water (for soup) or 2 cups (for pilaf), plus more if needed

Heat oil over medium heat in a medium saucepan.  Add mushrooms and saute until tender, and then stir in carrot and garlic and saute for another minute.  Add basil, thyme, and salt and pepper, and stir well.  Finally, add rice, stock, and water, bring to a boil, reduce heat, and let simmer until rice is tender (about 45 min), stirring occasionally.  Keep an eye on it and add more water if necessary.  If making pilaf, wait until the rice is done and most of the water is absorbed, then remove from heat and let sit for 5 min.  Serves 3-4.

Thursday, February 25, 2010

Chicken chile casserole with millet crust recipe

First of all, I've been having a great time reading all of your comments on how you save time when cooking - keep the suggestions coming!!

Now onto the food.  I'm a big fan of casseroles because there's something magical and comforting about combining a bunch of ingredients in a pan, letting them blend together in the oven for a while, and pulling out a wonderful meal.  I also love that I can clean up all of my prep dishes or get work done while it's cooking.  I found this recipe in February's cookbook of the month, The Complete Whole Grains Cookbook, and it stood out because I loved the idea of using millet as a casserole topping.  The bottom of this casserole was very tasty, a spicy combination of chicken and veggies in a thickened sauce.  The crust was definitely the element that took this to a new level, though.  The millet layer was thick, slightly crispy, and just cheesy enough to give it an extra boost of flavor and hold it together.

I have very mixed feelings about this cookbook.  I started out the month making a gluten-free pizza crust that was only ok, but some of the recipes were very good (including the tuna and red rice salad, crock pot millet and amaranth porridge, coconut chicken with quinoa, and this recipe).  I had a lot of fun trying a new type of rice and finding a way to enjoy amaranth.  Plus, I really appreciate alternate crock pot instructions  for many of the recipes.  Overall it's a very solid cookbook, but minor details bother me (typos in almost every recipe, ingredients that never show up in the directions, serving sizes that are way off).  It doesn't compare to my favorite whole grains cookbook, Whole Grains Every Day, Every Way, but I'm glad that I've added it to my collection. 

Chicken chile casserole with millet crust (adapted from The Complete Whole Grains Cookbook)
(Printable version)

1 cup millet
5 cups water, divided
pinch of salt
1 cup freshly shredded Monterey Jack cheese
1/2 cup sorghum flour (or your favorite gluten-free flour, or wheat flour)
1/2 tsp cayenne pepper
1 lb boneless, skinless chicken breasts, cut into bite-sized chunks
2 Tbsp olive oil, divided
1 onion, chopped
4 celery stalks, diced
1 bell pepper, diced
1/2 chipotle pepper in adobo sauce, diced
2 garlic cloves, minced
1 tsp lemon zest
1 Tbsp chili powder
1 tsp cumin
1 tsp dried oregano

Place millet in a medium saucepan and toast over medium heat, stirring frequently, until it starts popping (about 5 min).  Remove pan from heat, add 3 cups water and salt, and return the pan to the stove.  Cover the pan, reduce heat to low, and let simmer until all of the water is absorbed (about 20 min).  Then stir in cheese and set aside.

While millet is cooking, combine flour and cayenne pepper in a large bowl, add the chicken pieces, and stir well.  Heat 1 Tbsp oil over medium heat in a large saute pan and add the chicken pieces, shaking off the excess flour (but don't discard the flour yet).  Lightly brown the chicken on all sides, and then set it aside on a plate.  Add the remaining Tbsp oil to the saute pan, and then add onion, celery, and bell peppers and cook until they're tender.  Stir in chipotle pepper, garlic, lemon zest, chili powder, cumin, and oregano, and cook for an additional minute.  Add 2 Tbsp of the excess flour, and stir well for 2 min.  Pour in the remaining 2 cups of water, and continue to cook until the sauce thickens, stirring frequently (about 5 min).  Add chicken back to the pan, stir well, and then pour the mixture into a lightly oiled 9 x 13" baking pan.  Spread the millet mixture on top and bake at 375 for 25-30 min, until top is lightly browned.  Serves 6.

Wednesday, February 17, 2010

Coconut chicken with quinoa recipe

I haven't cooked much quinoa since I fell in love with millet, but I do miss it.  Millet and quinoa are roughly the same size and I often substitute one for the other, but they taste very different and I could never pick a favorite.  I was thrilled to find this recipe in the cookbook of the month because it sounded like a great excuse to cook quinoa again.  I had all of the ingredients on hand (well, not really, but I made it work anyway), and it was a fantastic dinner.  It's not a Thai dish, but it has similar flavors, and I loved it.

Coconut chicken with quinoa (adapted from The Complete Whole Grains Cookbook)
(Printable version)

1 Tbsp olive oil
4 boneless skinless chicken thighs (or use any cut of chicken, with or without bone and skin)
1 onion, chopped
5 garlic cloves, minced
1/2 chipotle pepper in adobo, minced
1 tsp curry powder
1 tsp cumin
1/2 tsp allspice
pinch of salt and pepper
3/4 cup quinoa, rinsed
1 cup water
1 cup light coconut milk

Heat oil over medium heat in a large saute pan.  Add chicken to the pan and brown for a few minutes.  Then flip it over, cover the pan, and cook for 5 more min.  Remove the chicken from the pan and set aside.  Add onion, garlic, and chipotle pepper to the pan and cook until the onion is tender.  Then stir in curry powder, cumin, allspice, salt and pepper, and quinoa, and cook for a minute or so, stirring constantly.  Add the water and coconut milk, bring to a boil, and place the chicken thighs on top of the quinoa.  Cover the pan, reduce heat to low, and cook until chicken is no longer pink (about 20 min for boneless, skinless thighs).  Serves 3.

Tuesday, February 9, 2010

Crock pot millet and amaranth porridge recipe

I must admit that amaranth didn't win me over the first time I tried it.  When eaten on its own, it has a very strong corn flavor with a bit of grassiness mixed in.  It also becomes thick and sticky while cooking.  That being said,  I was willing to give it another shot, and I liked the idea of mixing it with one of my favorite grains, millet.  The addition of millet tamed the amaranth flavor, and I really enjoyed the combination.  I often mix brown rice, steel-cut oats, millet, and quinoa in the crock pot, but this was a nice change from my usual breakfast.

This recipe brings up one of my biggest complaints about this month's cookbook of the month: the number of servings is very high on most recipes.  Recipes list nutritional information, and I'm guessing that there are lots of servings to reduce calories and fat per serving.  I understand that, but if I had eaten 1/6th of this, like they suggested, I would have had about two spoonfuls.  Typically I end up with more servings than recipes suggest, so it's been quite an adjustment with this book.

Crock pot millet and amaranth porridge (adapted from The Complete Whole Grains Cookbook)
(Printable version)

1/2 cup millet
1/2 cup amaranth
3 cups water
dried fruits, nuts, cinnamon, butter, milk (optional)

Combine millet, amaranth, and water in a small crock pot.  Place a towel over the top of the crock, and then set the lid on top.  Cook on low for 7-8 hours.  Add any of the optional ingredients when serving.  Serves 2.

Saturday, February 6, 2010

Tuna and red rice salad recipe

The last two months, I've tried out fantastic cookbooks, so this month's book has big shoes to fill.  I wanted The Complete Whole Grains Cookbook since the day I read about it almost a year ago, and luckily I won a copy of it (and 9 other books) when I received first prize in the Whole Grains Council photo contest in the fall.  Immediately upon opening the book, I was excited to find that many of the recipes have alternate instructions for the crock pot (it finally hit me that the author, Judith Finlayson, has written numerous slow cooking cookbooks).  Unfortunately the book and I got off to a rocky start.  I tried the recipe for gluten-free pizza crust, and it had a really weird texture and was a bit tough (it wasn't horrible, just disappointing).  However, this salad has redeemed the book for now.

I always have a few cans of tuna in my pantry, but almost never eat it.  Occasionally I'll have some if I'm desperate for a protein-packed post-workout snack, but I usually work out in the morning and the thought of eating tuna before noon is repulsive.  I also have a bag of Bhutanese red rice hanging out in my pantry (right next to the tuna, by coincidence), so I was excited to find this salad that combines the two.  The salad was really tasty, especially the next day when the flavors had blended.  It's more of a summer salad, but I still enjoyed it.

Tuna and red rice salad (adapted from The Complete Whole Grains Cookbook)

1 cup Bhutanese red rice (or use brown rice, and adjust cooking instructions)
1 1/2 cups water
1 can (6 oz.) tuna, drained
1/2 red bell pepper, chopped
4 green onions, chopped
10 cherry tomatoes, halved
2 Tbsp parsley, chopped
1 Tbsp red wine vinegar
3 Tbsp olive oil
1 Tbsp Dijon mustard
1 garlic clove, grated or smashed
1/2 tsp salt
freshly ground black pepper

Place rice and water in a small saucepan and bring to a boil.  Then cover, reduce heat, and simmer until rice is tender (about 25 min).  While rice is cooking, combine tuna, bell pepper, green onions, tomatoes, and parsley in a large mixing bowl.  In a separate small bowl, stir together vinegar, oil, mustard, garlic, salt, and pepper.  When rice is cooked, let it cool for a few minutes and then stir it into the large mixing bowl.  Pour dressing on top and mix well.  Serves 4.

Tuesday, February 2, 2010

Polenta with greens, eggs, and creamy tomato sauce recipe

As a kid, I never liked my foods to touch each other (who am I kidding, it's still true with some dishes), but I distinctly remember the first time that I tried grits and scrambled eggs together.  My uncle convinced me to stir them up in one bowl, and I loved it.  This is the grown-up version of grits and scrambled eggs - polenta with tomato sauce, sauteed spinach, and a fried egg.  This was a simple meal that had sophisticated flavor (perfect for inviting people for dinner at the last minute).  I found the basic recipe in January's cookbook of the month, but then added the book's basic tomato sauce recipe.  I'm glad I made the addition - it was the perfect complement to the meal, plus it gave me a lot of tomato sauce for pasta later in the week.  And it was one of the best tomato sauces that I've ever made thanks to the secret ingredient, cream cheese.

Now that I've tried a handful of recipes from Moosewood Restaurant Cooking for Health, I can conclusively say that I love it.  It surpasses the other Moosewood books, which is saying a lot.  I appreciate that there's a lot of variety, including several gluten-free recipes.  Everything that I tried turned out really well, and I'm having trouble picking my favorite, so I guess I'll just say that I loved the gluten-free apple and rice bran muffins, the dried fruit, nut, and coconut truffles, the eggplant, ricotta, and walnut pasta, the Mexican rice and pepper-stuffed portabellas, and this polenta recipe.  It's tempting to stick with this book for another month, but I'll move on to another one.  Don't be surprised if you see it popping up again soon, though.

Polenta with greens and eggs (adapted from Moosewood Restaurant Cooking for Health)
(Printable version)

3 cups water
pinch of salt
1 cup stone-ground corn grits (polenta)
1 Tbsp butter
1/4 cup freshly shredded parmesan
1 Tbsp oil + 1 tsp, divided
3 garlic cloves, minced
1/8 tsp crushed red pepper
10 oz spinach
2 tsp balsamic vinegar
4 eggs

Bring the water and salt to a boil in a medium saucepan.  Slowly whisk the grits into the water, reduce heat to low, and cook while whisking frequently until the polenta pulls away from the side of the pan (about 20 min).  When it's done, add the butter and parmesan.

While the polenta is cooking, heat 1 Tbsp oil over medium heat in a large skillet.  Add the garlic and red pepper, and saute for a minute.  Then add spinach, cover, and cook until it wilts (about 3 min).

Just before serving, heat remaining 1 tsp oil in a large skillet over medium heat.  Add eggs and cook until the whites are firm.

Serve a few spoonfuls of polenta topped with tomato sauce (recipe below), if desired, and spinach and an egg.  Serves 4.

Creamy tomato sauce (adapted from Moosewood Restaurant Cooking for Health)
(Printable version)

1 Tbsp olive oil
1 large onion, chopped
2 garlic cloves, minced
2 medium carrots, diced
1/2 red bell pepper, diced
1/4 tsp salt
1/4 tsp pepper
1/2 tsp dried oregano
2 Tbsp red wine
1 can (28 oz.) crushed tomatoes
1/4 cup basil, chopped
3 oz. cream cheese

Heat the oil in a medium saucepan on medium heat.  Add the onions and garlic, and cook until tender.  Then add the carrots, bell pepper, salt, pepper, oregano, and wine.  Cover and cook for about 10 minutes, stirring occasionally, until the vegetables are soft.  Add the tomatoes, recover, and simmer for 10 min.   Stir in the basil and cream cheese, puree in a blender or food processor, and season with additional salt and pepper if needed.  Makes about 5 cups.

Wednesday, January 27, 2010

Crock pot curried red lentil, chickpea, and quinoa stew recipe


Another lentil recipe??  I know, I know, but this is so different from the soup with lentils that I just shared.  This, my friends (and I don't mean that in the John McCain way), is one of the two favorites from Sunday's soup night.  It combines several of my favorite foods: red lentils, chickpeas, and quinoa.  You really can't go wrong.  I adapted this for the crock pot because I was making four soups and only have 2 large pots (it's a good thing that I have 2 crock pots!).  It worked perfectly, and there wasn't much left at the end of the night.  I'm still working my way through the other leftovers, though.

My Legume Love AffairThis soup was hearty, and the tender lentils almost melted in my mouth.  But the chickpeas were there to provide some complexity in texture.  The spices were perfect - nothing overwhelmed the taste, and it had the perfect amount of spice for a crowd with varying tastes.  I think this is one of the few examples of a recipe that I won't change the next time I make it.  I'm submitting this to January's My Legume Love Affair, which is hosted by EC at Simple Indian Food.

Crock pot curried red lentil, chickpea, and quinoa stew (adapted from ZestyCook/Closet Cooking)
(Printable version)

1 Tbsp oil
1/2 onion, chopped
1 carrot, diced
1 celery stalk, diced
3 garlic cloves, minced
1" piece of ginger, peeled and minced
1 Tbsp curry powder
1 1/2 cups red lentils
1 can (14 oz.) diced tomatoes
4 1/2 cups water
1 Tbsp hot chili sauce (I used Sriracha)
2 cups cooked chickpeas (or 1 can)
1 1/2 cups cooked quinoa*
1/2 cup cilantro, minced
salt and pepper to taste

Heat oil over medium heat in a medium skillet.  Add onion, carrot, and celery and cook until vegetables begin to get tender (about 8 min).  Add garlic, ginger, and curry powder, and saute for an additional minute.  Add this to a medium crock pot (I used a 3 1/2 quart, and it was almost too small) along with the lentils, tomatoes, water, chili sauce, and chickpeas.  Cook on high for an hour, and then cook on low for another 4 hours.  An hour before cooking is complete, add in quinoa.  At the end of the cooking time, stir in cilantro and season with salt and pepper.  Serves 6-8.

*You can substitute 1/3 cup uncooked quinoa, and add it to the crock pot at the beginning.  Add an additional 2/3 cup water.

Tuesday, January 19, 2010

Chicken and rice stew recipe


The weather has been consistent lately... consistently cold.  I probably shouldn't complain because this is the last time that I'll have to endure a Michigan winter, and I know that there are colder places to live.  My body still doesn't like it, though, and has been craving lots of soups and stews.  This one caught my eye because I already had almost all of the ingredients (I just had to pick up a pepper), which fits nicely with my need to use up everything in my pantry and freezer before I move this summer.  I really enjoyed this stew, and it definitely fits into my definition of comfort food.  It's very filling, and has kept me warm for the past few days.  I particularly enjoyed the combination of herbs and spices (I'm a sucker for anything with cumin).  You could certainly make this spicier, but I enjoyed the subtlety of the spice that still allowed the other flavors to shine through. This is also a great recipe to adapt based on what you have in hand - I can imagine all sorts of vegetables or grains being excellent additions or substitutions.


Chicken and rice stew (adapted from The Whole Life Nutrition Kitchen)
(Printable version)

1 Tbsp olive oil
1 onion, chopped
3 garlic cloves, minced
1 Tbsp cumin
2 tsp dried oregano
1 tsp paprika
1 lb boneless, skinless chicken breasts or thighs, cut into bite-sized cubes
1 red bell pepper, diced
3 carrots, sliced
4 1/2 cups water
6 Tbsp tomato paste
2 cups cooked brown rice
salt and pepper to taste

Heat oil over medium heat in a large pot.  Add onions and cook until they're tender, and then add garlic and cook for an additional minute.  Stir in cumin, oregano, paprika, chicken, pepper, and carrots and saute for a few minutes.  Then add water, tomato paste, and rice, and let simmer for about 30 min, stirring occasionally.  Season with salt and pepper before serving.  Serves 5.

Thursday, January 14, 2010

Oats (gluten-free??)


Why have I not posted about oats yet?  Luckily ejm reminded me about it the other day via a comment on my apple and rice bran muffin post.  I love oats and eat them almost every day for breakfast (and even got my mom hooked on steel-cut oats).  Here's the big question: are oats gluten-free??  It's a complicated answer.  In short, most oats are contaminated with wheat in processing facilities, but there are some dedicated gluten-free facilities (I typically buy Bob's Red Mill).  That being said, the protein in oats is similar to that found in wheat, and some people react to oats even if they are certified gluten-free.  Luckily I don't have this problem, and I can continue to eat oats.  I've also experimented with non gluten-free oats (I don't have Celiac disease, so I'm willing to try), and I'm usually ok with steel-cut oats, but not rolled ones (I'm guessing that less processing means less surface area for wheat to become attached).

What are oats?
Oat is a very common grain in the American diet.  It's usually used in its rolled form, but can also be cooked as groats (the whole oat kernel) and steel-cut oats (groats cut into smaller pieces).  In fact, you may have never seen an oat groat.  I saw some for the first time when I started using prairie voles in my research, and I give them a mixture of food including oat groats.  Steel-cut oats are my personal favorite because they are less processed than rolled oats and taste nutty and rich, but cook quicker than whole groats.

What do oats taste like and how are they used?
Wow, how to describe the taste of oats??  I suppose they have more of a nutty taste than most grains (particularly steel-cut oats, for some reason) and they blend with many flavors, from sweet to savory.  In fact, steel-cut oats made a big splash in the media when Mark Bittman said that he likes to eat oatmeal with soy sauce and scallionsI tried it, and he's right - it's delicious!  Oats are used in a million ways.  Most commonly they're made into oatmeal, but can be thrown into batter for cookies, muffins, and just about anything else that you're baking.  Of course oats are a large component of granola, and I also love eating raw oats (both rolled or steel-cut) as muesli.  There have even been a few times when I've grabbed a handful of steel-cut oats to satisfy extreme hunger.  I know I'm weird.

Where do you buy and store oats?
It depends.  If you need gluten-free oats, you're not going to find them in bulk bins (at least not that I've seen).  You're probably going to have to go to Whole Foods or your local natural foods store, or order them online.  And they're not cheap.  If gluten isn't an issue, then I prefer to buy them from bulk bins at natural foods stores.  That way I can get the amount that I want, and they're usually cheaper that way.  Also, I've found that bulk steel-cut oats are often much tastier than some pre-packaged versions.

I store oats at room temperature, but you can always throw them in the refrigerator or freezer if you have the space and plan on keeping them an extremely long time.  They never last long around me.

How do you cook oats?
First off, please don't buy quick-cooking oats.  Just don't do it.  Rolled oats still cook quickly, but they taste a whole lot better.  For every 1 cup of rolled oats (about 2 servings), simply bring 2 cups of water and a pinch of salt to a boil, add oats, and let simmer until the oats are your desired consistency (about 15 min), stirring occasionally.

For steel-cut oats, bring 3 to 3 1/2 cups of water and a pinch of salt to a boil, add a cup of oats, and let simmer until oats are the correct consistency (about 40 min), stirring occasionally.  If you want to dramatically reduce cooking time, soak the oats in the water overnight before cooking, and they'll only take 15-20 min to cook.  This makes 3-4 servings.

Cook oat groats the same way that you cook steel-cut oats, but they'll take longer (60 min or so).  You can also cook steel-cut oats and oat groats in a crock pot.  For steel-cut oats, use 3 cups of water for every cup of oats, and let cook for 7-9 hours on low.  I've already posted about oat groats in the crock pot.

My oat recipes 
Crock pot oatmeal with oat groats
Crock pot mixed grain porridge
Gluten-free apple and rice bran muffins
Gluten-free granola bars
Date and oat bars (these aren't gluten free as is, but you could easily substitute a gluten-free baking mix for the wheat flour)
Mushroom and pecan burgers (make sure to use gluten-free breadcrumbs and wheat-free tamari)
Bulgur, oats, flax, and bran bread (definitely not gluten-free, but it's one of my favorite breads, so enjoy some for me if you can eat gluten!)

Other great oat recipes
Pomegranate and blueberry oat smoothie from Lisa's Kitchen
Baked blueberry oatmeal breakfast pudding from Diet, Dessert, and Dogs
Bright green oats from Dani Spies
Zucchini bread oatmeal from Diet, Dessert, and Dogs
Autumn breakfast cookies from Find Your Balance
Easy peasy breakfast bars from What does your body good?
On-the-go bars from Organic Goodness
Hippie granola bars from Gluten-free, Dairy-free, Sugar-free
Sweet potato squares from Duo Dishes (minus the wheat germ for gluten-free)
Gluten-free strawberry rhubarb crisp from Daring to Thrive
Carrot cake breakfast cookies from Find Your Balance
Nikki's healthy cookies from 101 Cookbooks
Albondigas from Serious Eats
White bean and spinach burgers from The Reluctant Vegetarian

Monday, January 11, 2010

Mexican rice and pepper stuffed portabella mushrooms recipe


After a brief hiatus from stuffing a variety of vegetables, I'm back at it! My love for mushrooms has developed in the last few years. Unlike most of my friends who despise mushrooms, I never had an issue with them, but I didn't seek them out. I remember my mom raving over a portabella burger when I was in high school, and I didn't get the point. Why not go for the beef or one of those fake veggie burger concoctions? Things have changed, and I now appreciate mushrooms to the point that I will go out of my way to put them on pizza, salads, sandwiches, or anything else that is fungus-friendly. But then comes the important question: how do you spell the name of the large ones?? I've seen portabella and portobello, but I'm going to listen to the Mushroom Council and go with portabella (you get extra points if you realized that a Mushroom Council exists).

When I discovered a stuffed portabella recipe in this month's cookbook of the month, I knew I would be trying it. This is easily one of my new favorite dishes! I really liked the addition of rice (which wasn't in the original recipe), and I finally learned my lesson about using just the right amount of chipotle peppers. They make a filling side dish, but would also work for a meal. They're hard to eat neatly, but I'm convinced that messy foods taste better. It's good to be back to my stuffed vegetables (even though mushrooms aren't really vegetables... shhh!).

Mexican rice and pepper stuffed portabella mushrooms (adapted from Moosewood Restaurant Cooking for Health)

1 Tbsp olive oil
1 large onion, chopped
3 garlic cloves, minced
1 bell pepper (I used yellow), diced
1/2 chipotle pepper in adobo sauce, minced
1 tsp cumin
1 tsp cardamom
1/4 tsp paprika
salt and pepper to taste
1 1/2 cups cooked brown rice
2 small tomatoes, diced
3/4 cup freshly shredded monterey jack cheese, divided
1/4 cup cilantro, minced
4 portabella mushroom caps, stems removed

Heat oil over medium heat in a medium skillet.  Add onion and garlic and saute for a few minutes, until onion begins to get tender.  Then add bell pepper, chipotle pepper, cumin, cardamom, and paprika, and continue to cook until bell pepper is tender.  Taste and season with salt and pepper, and then stir in rice, tomatoes, half of cheese, and cilantro.  Place the mushroom caps in a large baking dish upside down, and mound the filling on top of each cap.  Sprinkle the remaining cheese on top, cover the dish with foil, and bake at 350 for 30 min.  Then remove the foil and bake for another 10 min.  Serves 4.

Sunday, January 10, 2010

Gluten-free apple and rice bran muffins recipe


I haven't baked in months, but for some reason the excitement of being back in my kitchen motivated me to do some baking.  It probably had something to do with the fact that I received the brand new Moosewood cookbook, Moosewood Restaurant Cooking for Health, for Christmas.  It has lots of great recipes, including baked goods that feature whole grains and very little sugar (and some are already gluten-free!).  I'm really excited about a lot of the recipes in the book, so it's going to be January's cookbook of the month.

Weekend Herb BloggingThese muffins have large chunks of apples interspersed in the bran base.  I really liked the large pieces of apple, and the muffins were delicious.  I had to modify this recipe to eliminate the gluten, but it turned out very well.  They were dense, but reminded me of the whole wheat muffins that I made back in the day.  Honestly, I think I prefer a dense muffin.  I'm submitting this to Weekend Herb Blogging, which is organized by Haalo from Cook (almost) Anything At Least Once, who is also hosting this week.

Gluten-free apple and rice bran muffins (adapted from Moosewood Restaurant Cooking for Health)
(Printable version)

2 eggs, beaten
1/2 cup plain yogurt
1 tsp vanilla
2 Tbsp honey
1 large apple (I used a pink lady), chopped
3/4 cup chopped dates
1 cup rice bran (or oat bran)
1/2 cup gluten-free baking mix (or wheat flour, if you can eat gluten)
1 1/2 tsp baking soda
1/2 tsp salt
1 tsp cinnamon
1/4 cup gluten-free rolled oats
2 Tbsp flax meal
1/2 cup water (if needed)
1/2 cup chopped walnuts (optional)

Combine the eggs, yogurt, vanilla, and honey in a large bowl.  Stir in the apple, dates, and rice bran.  In a separate small bowl, combine the baking mix, baking soda, salt, cinnamon, oats, and flax meal.  Stir this into the large bowl and combine well.  If the batter is extremely thick, add water as needed (it should still be thick, not runny).  Place muffin liners in a muffin tin, or lightly oil tin, and evenly divide batter between the cups (the cups will be about 2/3 full).  Sprinkle walnuts on top, if desired.  Bake at 375 for about 20 min, until a knife inserted in the center of one of the middle muffins comes out clean.  Let cool before storing.  Makes 12 muffins.