Showing posts with label vegetarian. Show all posts

Monday, May 16, 2011

Sweet potato casserole recipe

sweet potato casserole

When I was invited to an Easter lunch and needed to come up with a dish to bring, I immediately thought of sweet potatoes.  I don't typically associate sweet potatoes with Easter, but I guess I was in the mood for them.  I didn't want to make the typical southern sweet potato casserole that has more sugar than I care to think about, so I was excited to find a recipe for a low sugar sweet potato casserole at 101 Cookbooks.  This dish was just sweet enough that this could have been a dessert (I ate some of the leftovers this way), but it was also a nice accompaniment to the main meal.  I loved the combination of sweet potatoes and coconut, and I'll be using the two together more often now.  Unfortunately the sweet potatoes that I bought were very stringy, but otherwise it was amazing.

Sweet potato casserole (adapted from 101 Cookbooks)
(Printable version)

6 pounds sweet potatoes
1 cup coconut milk
1/2 tsp ground ginger
2 tsp cinnamon
1 tsp salt
2 Tbsp honey
2/3 cup grated coconut (ideally unsweetened), toasted
4 Tbsp melted butter
2/3 cup sliced almonds

Pierce the sweet potatoes in several places with a knife, place them on a large baking sheet, and bake at 400 for an hour to an hour and a half, until they are very soft.  Let the potatoes cool until you can handle them, and then peel them and put all of the flesh into a large mixing bowl.  Add the coconut milk, ginger, cinnamon, salt, and honey to the bowl and mix well.  Lightly grease a 9"x13" pan and spread the potato mixture in the pan.  Sprinkle the coconut on top of the potatoes and drizzle the butter over the coconut.  Bake at 350 for 30 minutes, and then sprinkle the almonds on top and cook for another 10 minutes, or until the almonds are toasted.  Serves 10.

Thursday, August 12, 2010

Fig gelato recipe

Fig gelato

Weekend Herb Blogging
I'm not generally a fan of fruit-flavored ice cream because it usually has a fake, chemically taste to me (unless we're talking about fresh peach ice cream from Dickey Farms).  But gelato is another matter.  I've had my fair share of gelato (while backpacking through Europe in college, I lived off of bread, cheese, peanut butter, and gelato for 10 weeks), and I always prefer the fruit flavors.  My favorites are apple (I remember a particularly good version in a gelateria in Rome) and kiwi (strangely, the first thing that comes to mind is a train station in Vienna).  I don't recall ever having fig gelato, but I was excited to find this recipe.  I don't know that it lives up to the best gelato I've had in Italy, but it's definitely the best I've ever made.  I might reduce the lime juice by half next time (it was good, but hid the fig flavor a little bit), but otherwise it was fantastic.  I'm submitting this dish to Weekend Herb Blogging, which is organized by Haalo from Cook (almost) Anything At Least Once.  I'm hosting this week, so make sure to send me your entries by Sunday (check the rules for details).

Fig gelato (adapted from About.com)
(Printable version)

1 lb fresh figs, stems removed (you can peel them if you want, but I didn't)
juice of 1 lime (next time I'll only use half)
1/2 cup milk
1 Tbsp honey

Combine the figs and lime juice in a blender and blend until smooth.  Then add milk and honey and blend briefly, just until combined.  Freeze in an ice cream maker, according to manufacturer's directions.  Serves 3-4.

Monday, August 2, 2010

Light summer squash casserole recipe

Light summer squash casserole
One of my favorite southern foods is squash casserole.  The squash is mushy (in a good way) and almost melts in your mouth.  It must be a family favorite, too, because Mom always made one for Thanksgiving until I took over the cooking duties and tried to focus on more seasonal concoctions (I may have to give some of the responsibility back this year, though...).    Most squash casseroles are full of butter, cheese, sour cream, and bread/cracker crumbs, and although there's not anything wrong with that, I wanted to make a lighter, everyday version.  I loved the taste of this casserole, and I didn't feel bad eating half of the pan.  I didn't miss any of the other ingredients, which honestly surprised me.  And with all of the squash that I inherited from my grandmother's freezer, I can make this all winter!


Light summer squash casserole (adapted from Vintage Victuals)
(Printable version)

1 1/2 pounds yellow summer squash, sliced thinly
1 small onion, chopped
1 egg, beaten
1 Tbsp butter
pinch of salt
freshly ground black pepper

Bring water to a boil in a medium saucepan, then add squash and let cook until it's tender (about 10 min).  Drain the squash and return it to the pot.  Then add the onion, egg, butter, and salt and pepper, and mix well.  Pour mixture into an 8x8 baking pan and cook at 375 for 45-60 min, until the edges are brown.  Let cool for 10 min before serving.  Serves 2-3.

Tuesday, June 22, 2010

Carrot macaroni and cheese recipe

Carrot macaroni and cheese
I've been in denial for the last few weeks, but I'm finally starting to accept the fact that I'm moving across the country in less than a week.  Don't get me wrong, I'm beyond excited, but I always turn into a mess before I move.  When I left for college, I cried for the entire 5 hour drive, and as I was moving out after college, I broke down in the food court on campus and cried like a baby (luckily this was the food court right next to the hospital, so crying was a common occurrence).  Of course I'll miss my friends more than anything, but it's also hard to say goodbye to all of my food-related loves in Michigan (particularly my farmers' market, my CSA farm, and Zingerman's).  And I'll miss the kitchen where I really fell in love with cooking.  I packed up the kitchen yesterday (how did I have so much stuff in there??), and it's weird seeing it so empty.  I still have a few things that I'm taking in my car because I can't survive without the ability to at least cook the basics while the rest of my belongings are in limbo on a moving truck, but it's not the same.  I'm excited to create new food memories in my new kitchen, but I'll always have fond memories of this one.  So, it's only fitting that I share one of the last things I made in Michigan, carrot mac and cheese.

It should be no surprise to you that I crammed vegetables into mac and cheese, and this worked wonderfully.  I really liked the way that the carrot blended with the cheese to make a hearty sauce that wasn't too heavy.  It was sweeter than your typical version, but it wasn't too much, and I thought it was a nice change.  However, unlike normal mac and cheese, I didn't enjoy the leftovers cold (I know I'm weird...), so make sure you warm it up.

Carrot macaroni and cheese (adapted from Food & Wine)
(Printable version)

12 oz. carrots, sliced thinly
1 large orange, zested and juiced
1/2 cup water
salt and pepper to taste
8 oz. chunky brown rice pasta (penne, fusilli, etc.)
3 oz. sharp cheddar cheese

Combine carrots, orange zest and juice, and water in a small saucepan, cover, and let simmer over medium heat until carrots are tender (about 30 min).  Let the carrots cool for a few minutes, and then puree them in a blender with salt and pepper (you may need a little bit more water to make a thick puree).

Cook the pasta according to package directions (make sure to stop when it's al dente), and reserve about a cup of the water before draining the pasta.  Add the pasta back to it's cooking pot, stir in the carrot and reserved pasta water, and let cook over medium heat for 5 min.  Then add 2/3 of the cheese and stir well.  Spread pasta out in a 8x8" baking pan and top with remaining cheese.  Bake at 350 for 20 min.  Serves 4.

Wednesday, May 26, 2010

Two gluten-free granola bar recipes

gluten-free granola bars
In addition to the fig, pecan, and flax crackers I made for my Mother's Day care package, I also sent two kinds of granola bars.  I found two recipes that sounded fantastic and couldn't decide between them, so I went overboard as usual.  Luckily granola bars fare well in the freezer, so none of them went to waste.  Both have relatively little refined sugar and are gluten-free, and I thought both were delicious.  Unfortunately the cocoa and orange variety (on the bottom in the picture, if you can actually tell them apart) had too much liquid and didn't stay together very well at all (I pieced one together for the picture).  I loved the combination of chocolate and orange, though, and I think the problem could be remedied simply by reducing the amount of orange juice.  The fig, raisin, and walnut ones were fabulous, too, and these held together well.  So, here are both recipes.  I recommend going overboard and trying both.  What do you have to lose?

Cocoa and orange granola bars (adapted from Anja's Food 4 Thought)
(Printable version)

1 1/2 cups rolled oats
1/2 cup chopped walnuts
1/4 tsp salt
1 tsp cinnamon
1 Tbsp cocoa powder
zest of one orange
3/4 cup dried fruit (I used half apricots and half currants)
1 1/4 cup orange juice (I would start with 3/4 cup and add more if necessary)
2 Tbsp honey

Combine oats, walnuts, salt, cinnamon, cocoa powder, zest, and dried fruit in a large bowl.  In a separate bowl, stir together orange juice and honey.  Pour the orange juice mixture into the dry ingredients and stir well.  Let this sit for 15 min, and then add more orange juice if the mixture isn't sticking together.  Spread this out on a parchment-lined baking sheet so that it's about 1/2" thick, and bake at 350 for 25 min.  Then let cool and cut into bars.  Wrap individually and freeze for long-term storage.  Makes 20 bars.


Fig, raisin, and walnut granola bars (adapted from Simply Sugar & Gluten-free)
(Printable version)

2 cups rolled oats
2 Tbsp flax meal
6 Tbsp teff flour
1 cup chopped walnuts
1/2 cup dried figs, chopped
1/2 cup raisins
1 tsp cinnamon
1/4 tsp ground ginger
1/3 cup agave nectar or honey
2 eggs, beaten
water if necessary

Combine oats, flax meal, teff flour, walnuts, figs, raisins, cinnamon, and ginger in a large bowl.  In a separate bowl, stir together agave nectar and eggs.  Pour the agave mixture into the dry ingredients and stir well.  If you need to moisten the mixture so that everything sticks together, add water a tablespoon at a time.  Spread the mixture out on a parchment-lined baking sheet so that it's about 1/2" thick, and bake at 350 for about 20 min.  Then let cool and cut into bars.  Wrap individually and freeze for long-term storage.  Makes 20 bars.

Saturday, May 22, 2010

Cabbage stuffed with quinoa pilaf recipe

cabbage stuffed with quinoa pilaf
I loved this simple quinoa pilaf, especially because my last pilaf was virtually inedible.  The flavors were very simple, but the combination of quinoa, tomatoes, raisins, and pine nuts was perfect.  I got the pilaf recipe from Gluten-Free Goddess, but decided to stuff cabbage instead of mushrooms.  The pilaf would be great alone, as well (I had some left after stuffing the cabbage, and enthusiastically gobbled it up while the cabbage rolls were baking).  I'm submitting this dish to Weekend Herb Blogging, which is organized by Haalo from Cook (almost) Anything At Least Once, and hosted by Astrid from Paulchen's Foodblog.

Cabbage stuffed with quinoa pilaf (adapted from Gluten-Free Goddess)
(Printable version)

8 large cabbage leaves
1 tsp olive oil
2 garlic cloves, minced
2 cups cooked quinoa
15 cherry tomatoes, halved
4 green onions, chopped
3 Tbsp raisins
3 Tbsp toasted pine nuts
salt and pepper to taste

Bring a large pot of water to a boil, and then add cabbage leaves and boil until they're tender (about 5 min).  Remove the leaves from the water and set aside to cool.  While the cabbage cools, heat the oil in a large skillet over medium heat.  Then add the garlic and saute for a minute.  Stir in the remaining ingredients, season with salt and pepper, and let heat through for a few minutes before removing it from the burner.  Then stuff each cabbage leaf with about 1/3 cup quinoa pilaf, roll the cabbage up tightly, and place it seam side down into a large baking dish.  Bake at 350 for 20-30 min.  Serves 4.

Thursday, May 20, 2010

Warm butter bean, red onion, and spinach salad with mustard recipe

Warm butter bean, red onion, and spinach salad with mustard
Even after making Brunswick stew this week (which is getting better and better!), I still have butter beans in my freezer (for some reason I thought it was a great idea to cook 3 pounds of them a few months ago).  Before I made the stew, I was inspired by Gel's kitchen to make this salad.  I made the recipe and it was pretty good, but then I got the idea to add whole grain mustard.  Sometimes I have random last-minute ideas that fail miserably, but this one took the salad from ok to wonderful.  Next time I'll probably add more spinach, but it was great just as I made it.  I tried the leftovers warm and cold and couldn't decide which way was better.

Now the only problem is deciding how I want to use my last bag of butter beans.  Do I make more of this salad?  Do I try mashing them up like potatoes (an interesting idea I just read about)?  Any favorite recipes out there?

Warm butter bean, red onion, and spinach salad with mustard (adapted from Gel's kitchen)
(Printable version)

1 Tbsp olive oil
1/4 large red onion, sliced thinly
2 1/2 cups cooked butter beans
salt and pepper to taste
2 large handfuls spinach
2 Tbsp whole grain mustard (I used one with horseradish)

Heat oil in a large skillet over medium heat, and then saute the onion until it's very tender (about 10 min).  Add butter beans to the skillet, season with salt and pepper, and stir everything around for a couple of minutes.  Then add spinach, stir well, and cook until the spinach wilts.  Stir in the mustard and serve.  Serves 3-4.

Thursday, May 13, 2010

Fig, pecan, and flax crackers recipe

Fig, pecan, and flax crackers
Since I've started packing up my apartment, I've become even more sensitive to the fact that nobody wants more junk to sit around.  So for Mother's Day, I wanted to give Mom something useful.  Between work and taking care of my grandmother, she has been excessively busy lately, so I decided to make her a care package of sorts, with healthy snacks that would keep her going at work and on her weekend trips.  It was also a present for me because it gave me an excuse to try new recipes (thanks, Mom!).  These crackers sounded perfect for Mom, so I gave 'em a shot.  They recipe made more than I expected, though, and I ended up taking some to a cookout with friends.  Between my friends and my parents, I've heard a lot of good things about these crackers.  I loved them, too, and had to package them up before I scarfed them all down.  And best of all, these crackers are the easiest ones I've ever made.  They're thick, and don't require the use of a rolling pin (I'm still not very skilled with my rolling pin).  In fact, their appearance is more similar to a cookie than a cracker, and they do have a hint of sweetness from the figs and brown sugar.  Sweet cracker?  Savory cookie?  Call them whatever you want, but I highly suggest making them.

Fig, pecan, and flax crackers (adapted from life as a h4)
(Printable version)

1/3 cup flax seeds (whole ones, not ground)
1/4 cup almond or flax meal
1 1/2 cups gluten-free baking mix (or white or whole wheat flour)
1/2 tsp baking powder
1/4 tsp salt
1 Tbsp brown sugar
4 Tbsp butter, cut into small pieces
1/4 cup chopped pecans
1 cup dried figs, chopped
1/2 cup milk (or more, if necessary)

Combine flax seeds, almond or flax meal, baking mix, baking powder, salt, and brown sugar in a large mixing bowl.  Using a pastry cutter or two knives, cut the butter into the mixture until the butter is in tiny pieces and well distributed throughout the flour/flax/etc.  Add the pecans, figs, and milk to the bowl, and stir until everything is mixed well.  If you're having trouble incorporating all of the flour into the dough, add milk a tablespoon at a time (I added about 1/4 cup more).  Cover the bowl with plastic wrap and refrigerate for 10 min.  Then divide the dough into two pieces and roll each piece into a log with a 2" diameter.  Using a sharp knife, slice the log into 1/4" slices and place them on baking sheets lined with parchment paper (some of my crackers fell apart as I was slicing the logs, but I pieced them back together and it worked fine).  Then bake the crackers at 325 for 20-30 min, until they are golden brown.  Let them cool before serving or storing.  Makes about 30 crackers.

Sunday, May 9, 2010

Rhubarb and strawberry compote recipe

Rhubarb and strawberry compote
My favorite farmers' market opened last weekend, and I'm so happy to have plans every Saturday morning again.  I'm trying to enjoy the spring offerings and not think about the fact that I'll move before the market really gets going.  Last week I picked up rhubarb on a whim.  The challenge with rhubarb is that most recipes call for tons of sugar to cancel out its sour nature.  However, I really enjoy rhubarb's sourness, and I also try to avoid much added sugar.  So, I decided to cook the rhubarb into a compote with strawberries (for some natural sweetness) and then added small amounts of honey until I was satisfied with the flavor.  Luckily my strawberries were very sweet and in the end I didn't have to add much honey at all.  I've added this compote to yogurt and oatmeal for breakfast, and I've also eaten in by itself as a dessert because it's just that good.  I just finished the last of it and I'm kicking myself for not getting more rhubarb at the market this morning.  I'm submitting this dish to Weekend Herb Blogging, which is organized by Haalo from Cook (almost) Anything At Least Once, and hosted by Lynne from Cafe Lynnylu this week.

Rhubarb and strawberry compote
(Printable version)

5 large stalks of rhubarb, chopped into 1/2" pieces
1 lb strawberries, tops removed and halved
1 Tbsp honey or agave nectar (to your taste)

Put the rhubarb and strawberries in a large saucepan and cook over medium-low heat, stirring occasionally.  When the fruit has broken down significantly (after about 20 min), add honey or agave until it's sweet enough for you.  Continue to cook for 10-20 more min.  Makes about 2 cups.

Saturday, May 1, 2010

Gluten-free sweet potato cobbler recipe

Gluten-free sweet potato cobbler
 I distinctly remember the first time I ate sweet potato cobbler.  I was about 10 and had just enjoyed breakfast on my grandparents' porch.  My grandpa Al always quizzed me about whether I had tried different foods (usually it was some uncommon fruit or vegetable, a classic southern food, or something weird he concocted).  I was an adventurous eater compared to most kids, so I tried quince jelly (it was delicious), tomatoes with sugar (not my thing), and even cornbread doused in buttermilk (you should have seen the look on my face - I haven't had any buttermilk since).  And all throughout breakfast that day he told us about sweet potato cobbler.  I love sweet potatoes and it's hard to beat cobbler, so I was excited when he announced that he had some in the refrigerator and insisted that I try some (never mind that it was still early in the morning).   As I expected, I loved it, which tickled Al to death (as my grandmother would say).

(Un)fortunately, Al passed away last weekend.   He found out about a week before that he had terminal cancer, and luckily didn't have to suffer very long.  I made a last-minute trip down to Atlanta to see him (hence my lack of posting), but didn't make it in time.   We were all as mentally prepared as possible, but that never seems to be enough.  As we reflected on our memories of Al over the weekend, it always came back to food.  Al loved to garden, he loved to cook, and he LOVED to eat. I remember spending summer mornings shelling peas and beans with Al and Grandmother in the basement.  Al also taught me how to make pickles.  Even when he no longer had energy to spend hours in the garden or kitchen, he would give me numerous tips on growing and preserving various fruits and vegetables (I now wish I had taken notes!).

Al also won me over with food.  He and my grandmother got married when I was 6, and I think we first bonded over our love of eating.  Before they got married, I was out in the yard with them (likely picking up pine cones, as that's Grandmother's favorite activity), and Al said that he had something for me inside.  We went in and he handed me a few Bugles (you know, those horn-shaped corn chip things).  Grandmother wasn't excited about this because she thought it would spoil my dinner, but Al explained that it was just a "sample," and samples don't count.   Almost every time that I saw Al, one of us would make a joke about having a sample of something and the calories not counting (sometimes the sample would be a large piece of cake, but as long as we called it a sample, it didn't exist).  I was hoping to bring Al a box of Bugles last week, but oh well.

Instead, I made a sweet potato cobbler today, because I know that's what he would want me to do.  Instead of using his recipe, I made a gluten-free, low-sugar version.  I made a small amount because I wasn't sure how it would taste, but I loved it.   It was very different from Al's, but fantastic and still reminds me of him.   Now I wish I had made a big pan of it!

Sweet potato cobbler (adapted from Gluten free Mommy)
(Printable version)

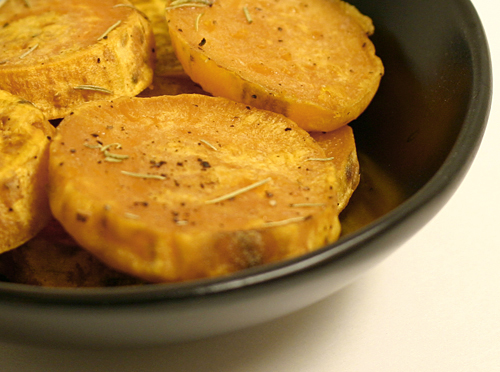
1 medium sweet potato, peeled and cut crosswise into 1/3" slices
1 1/2 Tbsp sorghum flour
1 1/2 Tbsp sweet rice flour
1 Tbsp almond meal
1 Tbsp tapioca starch
1 Tbsp potato starch
2 tsp sugar
1/4 tsp salt
1/8 tsp xanthan gum
pinch of cardamom
pinch of cinnamon
1 Tbsp butter, melted
2 Tbsp orange juice
3 Tbsp milk (more or less)
1 Tbsp lemon juice
2 tsp agave nectar
1 tsp vanilla

Cook sweet potato slices in boiling water until tender (about 7 min).  Then drain the sweet potato and place it in a small baking dish (I used a 4 cup round Pyrex dish).  While the sweet potato is cooking, combine flours, starches, sugar, salt, xanthan gum, and spices in a small bowl.  Combine the orange juice and butter, and stir this into the flour mixture.   Then add enough milk so that it is the consistency of muffin batter.  Sprinkle the lemon juice, agave nectar, and vanilla over the sweet potatoes, and then top with spoonfuls of the batter.  Bake at 350 until the dough is set and beginning to brown (about 30 min).   Serves 2.

Thursday, April 22, 2010

Macaroni and cheese with chicken and spinach recipe

Macaroni and cheese with chicken and spinach
I feel silly sharing this light version of mac and cheese now because I just got back from a trip to Vancouver, where I stuffed my face every day.  But it's probably a good thing that I was eating lighter food like this before I left, and it's probably the reason that I can still manage to button my pants.  If you have no problem buttoning your pants, feel free to use more cheese than I did to make it more similar to typical mac and cheese, but I really enjoyed this version.

Macaroni and cheese with chicken and spinach (adapted from Whole Grains for Busy People)
(Printable version)

4 cups water
8 oz. brown rice macaroni (or other small pasta)
2 cups cooked, shredded chicken (I used boiled chicken thighs - about 3/4 lb.)
4 oz. shredded cheddar cheese (or up to 10 oz., depending on how cheesy you like your pasta)
1 Tbsp cornstarch or arrowroot starch mixed with 1 Tbsp water (if necessary)
10 oz. fresh spinach
freshly ground pepper

Bring the water to a boil in a large saute pan over high heat, and then stir in the macaroni and let it cook for a few minutes less than the package directs (I cooked it for 7 min), stirring frequently.  Reduce heat to medium-high and add chicken and cheese, stirring until cheese is melted.  If the sauce is very thin, add the starch and water mixture.  Then add the spinach and continue to cook for a couple of min, until the pasta is tender and the spinach is wilted.  Grind black pepper on the top.  Serves 4.

Thursday, April 15, 2010

Roasted butternut squash recipe

Roasted butternut squash
How have I never shared this recipe?  It's one of my all-time favorites that I make more than any other recipe.  In fact, I think I tried this method the very first time that I cooked butternut squash (sadly that was in the last couple of years).  It's so easy that I hesitate to even call it a recipe, but it's always fantastic.  I made it for Thanksgiving two years ago and took it to my program's holiday party a few weeks later, and I got many requests for the recipe.  In fact, it was even requested for a Desperate Dinner cookbook that one of my friends put together (my first few years of grad school, a group of us got together for dinner and Desperate Housewives every Sunday night).  Any time I have a butternut squash lying around, there's a good chance that it will be used for this very recipe.

Weekend Herb Blogging
The best part about roasting winter squash is that it caramelizes and almost becomes a dessert.  Thyme is one of my favorite herbs, and I think it pairs beautifully with the sweet squash.  Sometimes I add Parmesan, sometimes I don't; it's great either way, so you can't go wrong.  I'm submitting this dish to Weekend Herb Blogging, which is organized by Haalo from Cook (almost) Anything At Least Once.  I'm hosting WHB this week, so send me your entries by Sunday! 

Roasted butternut squash (adapted from Kalyn's Kitchen)
(Printable version)

1 medium butternut squash, peeled and cubed
1 Tbsp olive oil
1 Tbsp dried thyme
salt and pepper to taste
2 Tbsp freshly shredded Parmesan cheese (optional)

Spread the squash cubes out on a baking sheet, drizzle the cubes with oil, and sprinkle with thyme, salt, and pepper.  Rub the squash around with your hands so that the cubes are coated in oil and the herbs/spices are distributed evenly.  Roast at 450 for about 45 minutes, stirring occasionally, until squash is tender.  Sprinkle squash with Parmesan if desired.  Serves 2-3 (if you can resist eating it all in one sitting).

Sunday, April 11, 2010

Black bean, roasted pepper, spinach, and tortilla casserole recipe

Black bean, roasted pepper, spinach, and tortilla casserole
I have a long list of recipes that I'm dying to try, and this one has been near the top of the list since I first saw it in December.  I've almost made it on several occasions, but something always foiled my plans.  The time finally arrived, though, and I'm glad that it did.  Sometimes if I wait too long to make a recipe, I'll build it up too much in my head and then it can't live up to my expectations.  However, this one didn't disappoint.  I loved the mix of ingredients, particularly the beans, spinach, and roasted peppers, and the salsa and yogurt gave it a hint of a tangy flavor.  There was just enough cheese to help hold it together without being overpowering and greasy.  It was also nice to pull out my spring-form pan for the first time in 4 years (The last thing I attempted to make with it was a sugarfree cheesecake.  BAD IDEA.  That thing made its way into the trashcan in a heartbeat.  Now I have better memories to associate with the pan.)

Black bean, roasted pepper, spinach, and tortilla casserole (adapted from lisa is cooking)
(Printable version)

4 poblano peppers
18 corn tortillas, cut in half
10 oz spinach (fresh or frozen)
1 Tbsp olive oil
1 onion, chopped
3 garlic cloves, minced
3 cups cooked black beans (or 2 cans)
1 cup plain yogurt
2 cups salsa verde
4 oz. shredded cheddar cheese
3 green onions (green part only), chopped

Place the peppers on a baking sheet and roast at 500 for about 10 min, or until the top is very blistered, and then turn and cook for another 10 min.  Then put the peppers in a paper bag, close the bag, and let sit for 10 min.  Finally, remove the skin and seeds from the peppers and chop them well.

While the peppers are resting, place the tortilla halves on two baking sheets, mist them with olive oil, and bake for 6 minutes at 425.  Then set them aside while you prepare the remaining ingredients.

If using fresh spinach, rinse it and then place it in a large skillet and cook just until wilted, then set the spinach aside.  If using frozen spinach, cook it according to the package directions.  Next, heat the oil over medium heat in the sauce pan, add onions, and cook until tender.  Then stir in the chopped poblanos and cook for a couple of minutes.  Set this mixture aside.  Add more oil to the pan if necessary, and then stir in the garlic, cook for a minute, and add the beans.

Place a spring-form pan (I used 8 1/2" pan, but bigger is better) on a baking sheet, and spray the bottom and sides with olive oil.  Layer 12 tortilla halves on the bottom of the pan, and then add the poblano mixture, half of the bean mixture, 1/2 cup yogurt, 2/3 cup salsa, and 1/2 cup cheese.  Repeat these layers substituting the spinach for the poblanos.  Then top with the remaining tortillas, salsa, and cheese, and top with green onions.  Bake at 350 for about 45 minutes, then let cool for 15 minutes before removing the ring of the pan.  Serves 6-8.

Thursday, April 8, 2010

Hominy and bean chili recipe

Hominy and bean chili
This isn't a very photogenic meal, and it may not be for meat lovers (if my dad's reaction is any indication), but I think it's a great example of a quick, easy, filling, and tasty dish.  I made this last week (the day of my panic attack, in fact), and it was great to have a delicious meal that required so little effort (without having too many pre-packaged ingredients).  It's not going to win any awards, but it's enjoyable and perfect for a crazy day.  That's what I love about this book, Lorna Sass's Whole Grains for Busy People, and I've decided to make it the cookbook of the month because I want to make more of these recipes.  Thus far the recipes I've made have been very solid; if you want something amazing, go for her Whole Grains Every Day, Every Way, but if you want something quick and very good, pick up this book.  This was also a great way to use up some of the cooked hominy and beans that are hanging out in my freezer and need to disappear before I move this summer!

Hominy and bean chili (adapted from Whole Grains for Busy People)
(Printable version)

1 Tbsp olive oil
1 onion, chopped
3 garlic cloves, minced
1 Tbsp chili powder
1 tsp cumin
1 tsp dried oregano
pinch of cinnamon
1 can (14 oz.) crushed tomatoes
1 can (14 oz.) diced tomatoes
2 cups cooked hominy (or 1 can)
1 1/2 cups cooked kidney beans (or 1 can)
1 cup cooked butter beans
2 small zucchini
1 cup water (if needed)
1/4 cup cilantro, minced
salt and pepper to taste

Heat the oil over medium heat in a large saucepan.  Add the onion and cook until it's tender, then add garlic and cook an additional minute.  Stir in chili powder, cumin, oregano, and cinnamon and let cook for a minute.  Add tomatoes, hominy, both kinds of beans, zucchini, and water (if you need additional liquid) and bring to a boil.  Then cover the pot, reduce heat to medium-low, and let simmer until zucchini is tender (about 15 min).  Remove from heat, add cilantro, and season with salt and pepper.  Serves 6.

Friday, April 2, 2010

White bean and garlic dip recipe

White bean and garlic dip
It's over.  The past five years have culminated in about two and half hours of torture.  Ok, that's not true at all.  The anticipation was torture, the actual event was rather anti-climactic (I had been warned that this is how it typically unfolds, but didn't believe it until today).  But either way you look at it, I now have a Ph.D.  To help ease my nerves yesterday afternoon, I decided to make some snacks for my committee, including this white bean and garlic dip.

This dip went over extremely well, and I'm a big fan myself (even though I could barely eat anything for most of the day).  The big bowl of dip was almost entirely gone, and Mom and I may fight over the small amount left over.

White bean and garlic dip (adapted from Cooking Books)
(Printable version)

1 head garlic
1 tsp dried thyme
1 tsp dried sage
1 tsp cumin
1 1/2 cups cooked cannellini beans (or 1 can)
1 1/2 cups cooked chickpeas (or 1 can)
juice of 2 lemons
1/4 cup cilantro, minced
3 Tbsp olive oil
salt and pepper to taste

Remove most of the outer skins from the garlic head, and cut the top off of the head so that the top of the cloves are exposed.  Place the garlic head in a piece of foil, drizzle it with a bit of olive oil, wrap it up in foil, and bake for an hour at 300.  Once the garlic is soft, let it cool for 10 minutes.

While the garlic is roasting, combine the thyme, sage, and cumin in a small skillet over medium heat, and toast until they become very fragrant (about 5 min), stirring frequently.  Squeeze garlic cloves out of their skin into a food processor, and also add toasted herbs/spice and all other ingredients.  Process until smooth, and season with salt and pepper.  Makes about 3 cups.

Saturday, March 27, 2010

Zucchini and almond saute recipe

Zucchini and almond saute
 Am I the only one with kitchen utensil fears? I'm not scared to go near my knives (even though they've done some damage to my fingers and I try not to sharpen them too often), but mandolines terrify me. They have a bad reputation, and one of my friends managed to almost completely cut off part of her finger a few years ago on one (the almost-removed finger part was lovingly known as "the flap"). But sometimes mandolines make life a lot easier. Sure, it's possible to julienne things by hand, but who really wants to do that at the end of a busy day? So for this dish I held my breath, maintained complete concentration, and went to town with the scary piece of plastic and blades. All of my fingers are intact, so I consider it a success.

Weekend Herb Blogging
It was a bigger success when I tasted this dish. I usually cook zucchini until it's falling to pieces (it's the southerner in me), but I liked this barely cooked, still crunchy version. It tastes like a completely different vegetable, and I'm always up for something new and different. I liked the almonds in it, as well, even though I almost burned them. But best of all, it takes no time. In fact, I spent far more time giving myself a pep talk to use the mandoline than actually preparing the dish. So if you don't have weird problems like I do, it will come together in less than 10 minutes.  I'm submitting this dish to Weekend Herb Blogging, which is organized by Haalo from Cook (almost) Anything At Least Once, and hosted by Graziana from Erbe in Cucina.

Zucchini and almond saute (adapted from Smitten Kitchen)
(Printable version)

1 Tbsp olive oil
1/4 cup sliced almonds
4 small zucchini, julienned
salt and pepper to taste

Heat oil in a large saute pan over medium heat.  Add almonds and saute, stirring frequently, just until they begin to turn brown.  Add zucchini, crank heat up to medium high, and cook for a few minutes, stirring constantly, just until zucchini is hot but still crunchy.  Season with salt and pepper.  Serves 3.

Tuesday, March 23, 2010

Mexican red lentil and brown rice stew recipe

Mexican red lentil and brown rice stew, adapted from Kalyn's Kitchen
Before I get to this stew, you may have noticed a new navigation bar in the header.  I added a complete recipe index organized by category, which I'm hoping will help everyone (including me) find recipes, and also a list of my quick/easy and crock pot recipes.  I've intended to make these changes for a few months now, but I finally had time to sit down to do it (and it was a good distraction to keep me from thinking about the fact that my dissertation defense is in 10 days - yikes!).  Let me know if you have any suggestions for other ways to improve the navigation of my site (I'm open to anything!).

My Legume Love Affair
Now to the recipe!  First off, I'm naturally drawn to any recipe that includes turmeric.  Despite the fact that it has permanently dyed many of my kitchen utensils yellow, I can't get enough of it.  I've always had an unusual obsession with mustard, and I'm finally realizing that it's the turmeric that I love so much.  I also love red lentils, and they always seem to make meals amazing.  So, Kalyn had my attention as soon as she posted this recipe, and I'm sad that it took me so long to make it.  It turns out that I didn't have enough lentils, so I threw in some cooked brown rice and I loved the combination.  Next time I'm doubling the recipe so that I can stock my freezer (if I don't eat it all).  I'm submitting this to My Legume Love Affair, which is hosted by Manju at Mirch Masala this month, and is organized by Susan at The Well-Seasoned Cook.

Mexican red lentil and brown rice stew (adapted from Kalyn's Kitchen, who adapted it from Budget Bytes and Andrea Meyers)
(Printable version)

3/4 cup red lentils
3 1/2 cups water, divided
1 Tbsp olive oil
1 small onion, chopped
4 celery stalks, chopped
2 garlic cloves, minced
1/2 tsp turmeric
1 tsp cumin
1 tsp chili powder
1 can (14 oz.) diced tomatoes
2 cups cooked brown rice
salt and pepper to taste
juice of 1 lime
1/2 cup cilantro, chopped

Combine lentils and 1 1/2 cups water in a small saucepan and bring to a boil.  Then cover the pot, remove it from the heat, and let it sit for 20 minutes.  While lentils are sitting, heat oil in a medium saucepan over medium heat, and saute onion and celery until tender.  Then add garlic and cook another minute.  Stir in turmeric, cumin, and chili powder and cook one more minute.  Add tomatoes, brown rice, remaining 2 cups water, and lentils, and stir well.  Bring this to a boil, reduce heat, and simmer until lentils are tender (20-30 min), stirring occasionally.  Season with salt and pepper and add lime juice and cilantro.  Serves 4.

Sunday, March 21, 2010

Colcannon (mashed potatoes and kale) recipe

Colcannon (mashed potatoes and kale)
Lately my celebrations for all holidays have been a bit late.  I had great plans to make colcannon (mashed potatoes with either cabbage or kale) for a St. Patty's day potluck, but I ended up working on my dissertation for most of the night.  Already armed with all of the ingredients, I decided to make it the next night.  And now the same thing has happened with my Persian new year celebration (luckily this time a party got in the way, not my dissertation).  Oh well, it's still fun to try new dishes, even if it is on the wrong day.

I love mashed potatoes, and this was a great variation.  Most of the colcannon recipes I see use cabbage, but I decided to make my version with kale because I hadn't had kale in a while.  Given that the texture and taste of cabbage and kale are so different, I imagine that a cabbage version tastes like a completely new dish, but I bet that it would be equally delicious.  It took me a few bites to get used to the interesting mix of textures, but I soon adjusted and thoroughly enjoyed it.

Colcannon
(Printable version)

1 bunch kale, stems removed
2 pounds red potatoes, chopped into quarters
2 Tbsp butter
3/4 cup (or more) warm milk
5 green onions (green part only), sliced thinly
salt and pepper to taste

Bring a large pot of salted water to a boil, add kale leaves, and let boil until kale is very tender (about 10 min).  Drain kale, let cool, and then chop it into small pieces.  Next, place the potatoes in the pot, cover with water, add salt, and bring the water to a boil.  Let simmer until potatoes are tender (15-20 min).  Drain potatoes and return them to the pot.  Add butter and warm milk and mash well with a potato masher or ricer.  You may need more milk if your potatoes aren't creamy enough with 3/4 cup.  Then stir in kale and onions and season with salt and pepper.  Serves 6.

Tuesday, March 9, 2010

Wild rice and mushroom soup/pilaf recipe

Wild rice and mushroom soup/pilaf
It has been remarkably warm around here for the past couple of days (even up to 55 degrees today!), and I couldn't be happier.  I woke up and listened to the birds having a loud discussion, and as soon as I stepped foot outside, I couldn't help but smile and whistle on my walk to the lab. (This might also be due to the fact that it's spring break and campus is empty. Swarms of students still intimidate me.)  But the remnants of winter still abound.  There's an inch thick layer of ice surrounding my parking spot, so I have to get to the edge of the ice, dive for my car, and hold on with a death grip, pulling myself towards the door.  It's only amusing because I haven't broken any bones yet.

To keep myself warm for what I hope is the last of the winter, I made this soup last week.  Well, it started out as a soup.  Somehow between pouring my first bowl and packaging the leftovers, it kept cooking and most of the liquid evaporated, leaving me with a mushroom and rice pilaf.  I loved both versions, so I'll include rough directions for both.  I love wild rice for its nutty flavor and the crunch that it retains, and it was the perfect complement to the tender sauteed mushrooms.

Wild rice and mushroom soup or pilaf (inspired by We Heart Food)
(Printable version)

1 Tbsp olive oil
8 oz baby bella mushrooms, sliced
1 carrot, diced
3 garlic cloves, minced
1 tsp dried basil
1 tsp dried thyme
salt and pepper to taste
3/4 cup wild rice
2 cups veggie stock
4 cups water (for soup) or 2 cups (for pilaf), plus more if needed

Heat oil over medium heat in a medium saucepan.  Add mushrooms and saute until tender, and then stir in carrot and garlic and saute for another minute.  Add basil, thyme, and salt and pepper, and stir well.  Finally, add rice, stock, and water, bring to a boil, reduce heat, and let simmer until rice is tender (about 45 min), stirring occasionally.  Keep an eye on it and add more water if necessary.  If making pilaf, wait until the rice is done and most of the water is absorbed, then remove from heat and let sit for 5 min.  Serves 3-4.

Friday, March 5, 2010

Rosemary and garlic roasted sweet potatoes recipe

Weekend Herb Blogging
I've been eating ridiculous numbers of sweet potatoes lately, and I don't see myself stopping any time soon.  Typically I enjoy them simply rubbed with a tiny bit of oil and salt and roasted until they're tender, caramelized, and practically melt in your mouth.  But tonight I decided to try something different - sweet potato slices roasted with garlic and rosemary.  This is still a simple side dish, but I loved the combination of flavors and it was nice to mix up my usual routine.  I'm submitting this soup to Weekend Herb Blogging, which is organized by Haalo from Cook (almost) Anything At Least Once, and hosted by Susan from The Well-Seasoned Cook this week.

Rosemary and garlic roasted sweet potatoes (adapted from Ezra Pound Cake)
(Printable version)

2 medium sweet potatoes, peeled and cut into 1/3" slices
1 Tbsp olive oil
1 tsp dried rosemary
3 garlic cloves, minced
salt and pepper to taste

Combine everything in a mixing bowl and toss well.  Spread potatoes out on a baking sheet and roast at 425 for about 30 min, turning once.  Serves 2-3.