Tuesday, March 31, 2009

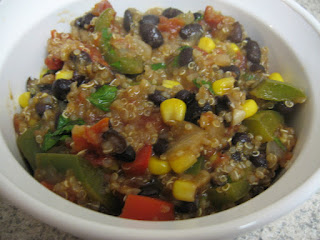
Corn and venison casserole

corn and venison casserole, adapted from Lorna Sass's Whole Grains Every Day, Every Way
Alrighty, it's time to wrap up the cookbook of the month posts for this month. This is the final post from "Whole Grains Every Day, Every Way" by Lorna Sass (at least for a while). This recipe was originally a masa harina and beef casserole, but I used what I had on hand.

Corn and venison casserole (adapted from "Whole Grains Every Day, Every Way" by Lorna Sass)

1/2 Tbsp olive oil
1 onion, chopped
1 green bell pepper, diced
1 1/4 lbs ground venison
2 garlic cloves, minced
1 tsp dried oregano
1/2 tsp ground cumin
pinch of salt (for meat)
freshly ground black pepper
1 can (15 oz.) diced tomatoes with green chiles (like Rotel)
1 1/4 cups medium-grind cornmeal
1 1/2 tsp salt (for topping)
1 tsp chili powder
1 egg
1/2 cup plain yogurt
1/4 tsp baking soda
1 cup corn kernels (I used frozen ones, and didn't bother to thaw them)

Heat oil in a large skillet. Add onion and green pepper and cook until tender (about 5 min). Add venison, garlic, oregano, cumin, and salt and pepper. Break up meat and continue to cook until meat is cooked through. Then stir in the diced tomatoes and bring to a boil. Reduce heat to medium-low and let simmer while you prepare the topping.

Pour 4 cups of cold water into a pot. Slowly whisk in the cornmeal until it's completely blended. Whisk in salt and chili powder. Bring this to a boil over high heat, then reduce the heat so that it's at a gentle boil. Stir constantly until it thickens and has a consistency similar to cake batter (about 8 min), and then remove from heat. In a separate bowl, beat the egg and add in yogurt. Add 1 cup of the cornmeal mix to egg/yogurt, then stir this and the baking soda into the pot of cornmeal mix.

Place meat in a baking dish (I used 11 1/2 x 8 1/2", and I wouldn't use anything smaller), making sure to leave most of liquid behind. Pour cornmeal batter over the top and then sprinkle corn kernels on top. Bake at 350 for 45 min, or until it's brown and bubbly. If your dish is very full, you may want to place a baking sheet underneath to catch any overflow. Let sit for 10 min before serving. Serves 6.

This was good, and reminded me a lot of a grits and sausage breakfast casserole (only without any cheese) that Mom used to make. I would add more veggies if I were to do this over again (like chunks of onions and more bell pepper). And, come to think of it, cheese would be a nice addition, and could either be stirred into the meat or batter (or both) right before putting them in the dish.

This wasn't my favorite recipe that I've made from this book, but it's still good and brings in great Mexican flavors. My favorite of Lorna's recipes have been the barley and tofu stir-fry, the Thai salmon and brown rice, and the two desserts (bulgur pudding and creamy wheat berries). But, this recipe and the hominy with shredded chicken and amaranth, quinoa, and corn chowder were also tasty. The only one that I wouldn't consider making again is the amaranth porridge, but it was still a good experiment for my taste buds.

I'm enjoying focusing on a cookbook or two each month. It makes meal planning much faster because if I don't give myself any guidance I end up reading recipes for hours before deciding on what to make for the week. It's also a great way to explore each of my many cookbooks in depth. I'll wait to announce the cookbook for April (I know you're all waiting on the edge of your seats!), but I'll just say that there may be a little bit less meat in my diet...

Monday, March 30, 2009

Creamy wheat berry and honey dessert

**This is not a gluten-free recipe and was posted before I eliminated gluten from my diet.**

Creamy wheat berry and honey dessert, adapted from Lorna Sass's Whole Grains Every Day, Every Way
While flipping through Lorna Sass's whole grains book, I came across another great dessert. I loved her bulgur pudding that I made, so I knew that this would be good. And, I had some milk that I needed to use, so this seemed like the perfect opportunity to try this out.

Creamy wheat berry and honey dessert (adapted from "Whole Grains Every Day, Every Way" by Lorna Sass)

1 1/2 cups milk (whole or 2%)
1 Tbsp honey
1 1/2 cups cooked wheat berries (see below)
pinch of salt
generous pinch of cinnamon
2 Tbsp currants (or raisins or chopped dates)

Stir milk and honey together in small saucepan and bring to a boil. Stir in wheat berries, salt, and cinnamon. Return to a boil, reduce heat slightly, and let simmer for 30 min, stirring occasionally. Discard the skin that forms at the top and add currants. Continue to simmer until the mixture gets really thick (about 10 min). Serves 3.

To cook wheat berries, combine 2/3 cup wheat berries and 3 cups water in pot and bring to a b
oil. Reduce heat, cover, and simmer until wheat berries are tender (about an hour). Drain wheat berries. You can store them in the refrigerator for a few days, or the freezer for a few months.

This was very similar to the bulgur pudding, and every bit as delicious. The main difference is the texture because the berries retain their chewiness while the bulgur gets extremely soft. I love both varieties, though. I'm still crazy about wheat berries, kamut, bulgur, and every other variation of wheat that I can get my hands on. Mom told me that the bulgur pudding was one of the weirder things that I've made, but both were incredibly sweet (I promise!) and very similar to rice pudding. I'm looking forward to trying one out on her to see what she thinks. I could eat this all day, except for the fact that it's extremely filling.

Jihva for Ingredients - wheat
This was so delicious, that I have to submit it to the Jihva for Ingredients blogging event because this month's theme is wheat. I have to celebrate and share one of my favorite grains! This month JFI is hosted by Roma at Roma's Space, and I'm excited to participate!

Sunday, March 29, 2009

Andean pinto bean and butternut squash stew

Andean pinto bean, quinoa and butternut squash stew, adapted from The New York Times
After a few days of warmer weather, it got fairly cold again. On one hand I'm completely sick of winter and can't wait for summer, but I also enjoy soups and stews that are essential for staying warm. I figured I should make one to make the most of the less-than-desirable weather. I was excited to stumble upon this recipe because it combined two of my favorite things - beans and winter squash.

Andean pinto bean and butternut squash stew (adapted from The New York Times)

1/2 Tbsp olive oil
1 onion, chopped
1/2 Tbsp paprika
2 garlic cloves, minced
1 cup (about 1/2 can) diced tomatoes
4 cups water
4 cups cooked pinto beans (from about 1/2 lb dried beans, or 2 cans)
1 small butternut squash, peeled and cubed into bite-sized pieces
1 bay leaf
1/4 cup quinoa, rinsed well
1 Tbsp fresh parsley, chopped
1 tsp tabasco sauce
salt and pepper to taste

Heat oil over medium heat in large pot. Add onion and cook until tender, about 5 min. Add paprika and garlic and cook for an additional minute. Stir in tomatoes, and cook until most of the liquid has evaporated (5-10 min). Add water and beans and bring to a boil. Stir in squash and bay leaf, reduce heat, cover, and let simmer until squash is tender (about 30 min). Add quinoa and continue to cook about 20 min, or until quinoa is done (there will no longer be a white dot in the middle of each grain). Stir in parsley and tabasco and season with salt and pepper. Cook for an additional 5 min. Serves 5.

This was delicious, and somewhat different than your typical bean soups/stews. I love pinto beans, but I usually forget about them and end up using black or kidney beans. I'm glad
I discovered this recipe that was perfect for them. Next time I'll add more quinoa because I really couldn't tell that it was there, but otherwise it was fabulous. I really liked the pairing of the beans and squash, and they gave the stew a smooth texture as they cooked and began to disintegrate.
My Legume Love Affair, ninth helping
I'm submitting this post to My Legume Love Affair. This blogging event was started by Susan from The Well-Seasoned Cook, and is hosted by Laurie from Mediterranean Cooking in Alaska this month (see complete list of hosts). I'm glad that I can include my reconnection with pinto beans in this great event!

Roasted asparagus with peanut sauce

Roasted asparagus with peanut sauce, adapted from Jack Bishop's Vegetables Every Day
Today the Michigan State basketball team played Louisville for a chance to go to the Final Four. I didn't think they had a chance, but figured that I should make something green for good luck. And, I figured a nice peanut sauce would go well with my leftover Thai salmon, butter beans, and rice.

Roasted asparagus with peanut sauce (adapted from "Vegetables Every Day" by Jack Bishop)

1 lb. thin asparagus
1 Tbsp peanut oil
2 garlic cloves, minced
1 Tbsp creamy peanut butter
juice of 1/2 lime
1 tsp soy sauce (use wheat-free tamari for gluten-free)
1/4 tsp crushed red pepper
water

Remove and discard bottom inch of asparagus stalk. Drizzle asparagus with oil, and sprinkle with garlic. Toss well so that all stalks are completely covered with oil, and then spread out on a baking sheet. Roast at 450, stirring asparagus occasionally, until it starts to brown (about 15 min). Mix remaining ingredients well, and add enough water so that it becomes pourable (I added about 2 Tbsp). Place asparagus on serving dish and drizzle with sauce. Serves 3.

This was delicious and went perfectly with my Thai lunch. I was never able to get the sauce very smooth (and I may have added a little bit too much water while I was attempting this), but it still tasted great. And apparently it brought the Spartans the luck that they needed because I've never seen them play better and they ended up creaming Louisville! I got so much energy from the excitement of winning the game (and the massive amounts of caffeine I consumed while watching the game) that I ended up juggling this afternoon instead of working. Note to self: don't lift weights in the morning and then juggle for a long time (your arms and shoulders will hate you so much that it's hard to stir while cooking).

Given that the month is almost up, this will probably be the last recipe from one of the cookbooks of the month, "Vegetables Every Day." I still love this book - the recipes are fairly simple, but all have been great. When all is said and done, in addition to this delicious asparagus, I've made a cauliflower and curry dish, boiled carrots with African spices, a spinach and pasta concoction, and two braised cabbage dishes (one with vinegar and onions and one with apples and cinnamon. It will be fun to use this book more as the seasons change and I have access to more veggies.

Saturday, March 28, 2009

Slow-cooked cabbage with apples and cinnamon

slow-cooked cabbage with apples and cinnamon, adapted from Jack Bishop's Vegetables Every Day
See, I told you there would be another cabbage recipe this week. And this was another winner. In the past, I've avoided cooking sweet vegetable dishes, but I'm liking it more and more now. The sugar of fruit (whether that be apples, pears, raisins, or other fruit) really enhances the flavor of some veggies. This is no exception.

Slow-cooked cabbage with apples and cinnamon (adapted from "Vegetables Every Day" by Jack Bishop)

1/2 head of green cabbage
1 Tbsp butter
2 small fuji apples, chopped into small pieces (peel if you want - I didn't)
1 medium onion, sliced thinly
1 cinnamon stick
1/2 cup apple cider (I made "strong" apple juice with frozen concentrate and water)
1 Tbsp apple cider vinegar
salt and pepper to taste

Shred cabbage into 1/2 - 1" strips. Melt butter in a large skillet or dutch oven over medium heat. Add apples and onions and cook until they start to brown (about 8 min). Add cinnamon stick, stir a few seconds, and then stir in cabbage. Add cider, reduce heat, cover, and cook until cabbage is tender (about 40 min). Stir in vinegar and season with salt and pepper. If there's remaining liquid, let simmer uncovered for a few minutes until it evaporates. Remove cinnamon stick. Serves 3.

Another delicious cabbage dish that I couldn't stop eating. In fact, I even ate some for breakfast the day after I made it. The cabbage absorbed a lot of the apple flavor from the apples and the juice, and it was a great combination of tastes. I wish I had more cabbage, but there should be more yummy veggie recipes on the way this week!

Friday, March 27, 2009

Thai salmon, speckled butter beans, and the perfect brown rice

Thai salmon, speckled butter beans, and the perfect brown rice, adapted from Lorna Sass's Whole Grains Every Day, Every Way
I love Thai food, and I love southern food. I wouldn't normally think of them going together, but I decided to throw some speckled butter beans into a Thai dish, and I think I might be on to something. I suppose you can throw anything in coconut milk and curry paste and it'll be good, but I'm especially fond of this one. And I found my new favorite way to prepare rice!

Thai salmon, speckled butter beans, and brown rice (adapted from "Whole Grains Every Day, Every Way" by Lorna Sass)

1/2 can light coconut milk
2 tsp Thai red curry paste
1/2 red bell pepper, diced
1 cup frozen speckled butter beans, thawed
1 1/2 cups cooked brown rice*
8 oz. thin salmon filets
1 green onion, chopped
lime for garnish

Blend coconut milk and curry paste in a large skillet. Add bell pepper and bring to a boil over medium-high. Add in butter beans and rice and return to a boil. Then add salmon on top of the rice mixture, cover, and cook until the fish flakes (about 5 min). Break up the salmon into chunks, add green onion, and stir together. Garnish with lime. Serves 2.

*Ok, I've heard Lynne talk about the "pasta method" of cooking rice several times on The Splendid Table, and kept meaning to try it. Then the other day I ran across more detailed instructions on Saveur and knew I had to give it a shot. Basically you bring a bunch of salted water to a boil, add brown rice, and let boil uncovered for 30 min. Then you drain the rice, put it back into the pot, cover, and let steam for 10 min. This was perfect. It takes less time, doesn't require any measurement, and the rice comes out perfectly (no sogginess, and no dried out rice). The only potential downside is that you lose a little bit of the nutrients in the cooking water, but it's probably not much (and still much better than eating white rice!). I think I'm a convert! Lynne says that you can do this with any type of rice, but obviously the cooking time will be different, so keep an eye on it and drain it when it gets tender (I think white rice takes less than 10 min).

As I said before, I really liked the Thai theme with the slight southern twist. This was also incredibly easy and quick. I cooked the rice the day before, so it took less than 10 min from start to fish. Perfect for a busy day!

Wednesday, March 25, 2009

Amaranth, quinoa, and corn chowder

amaranth, quinoa, and corn chowder, adapted from Whole Grains Every Day, Every Way by Lorna Sass
After my so-so experience with amaranth, I knew that I had to try it again in a different dish that would allow me to better appreciate its corny flavor. I figured that I could rely on Lorna Sass for my answer.

Amaranth, quinoa, and corn chowder (adapted from "Whole Grains Every Day, Every Way" by Lorna Sass)

1 1/2 Tbsp butter, divided
2 small leeks, chopped
1/2 cup diced celery
1/4 cup diced red bell pepper
pinch of salt
2 Tbsp amaranth
1/4 cup quinoa
1/8 tsp dried thyme
2 cups corn kernels (I thawed frozen ones)
1/2 cup milk
1 Tbsp fresh parsley, minced

Melt 1 Tbsp butter in a saucepan over medium-high heat. Add leeks, celery, bell pepper, and salt and cook until veggies are tender (about 5 min). Add amaranth and 1 1/2 cups of water. Increase to high heat and bring to a boil, then add quinoa and thyme. Return to a boil, reduce heat slightly, and cook partially covered for 10 min. While this is cooking, puree 1 1/2 cups of corn with 1/2 cup of water in a blender or food processor. After the 10 min is up, add pureed corn and remaining corn kernels. Reduce heat and simmer until amaranth and quinoa are done (the white dot in the middle of the quinoa will go away; about 5 min). Stir in remaining butter and milk and garnish with parsley.

This is good, and a much better use of amaranth, in my opinion. Obviously its corn-like flavor goes well with actual corn. I wonder how this would be with all amaranth and no quinoa...

There was nothing miraculous about this chowder, but it's good. I'm sure it would be even better with fresh corn and half-and-half or cream instead of milk (but I bet I could say that about everything!). Be careful with the parsley - this is what prompted the comment about choking on parsley when it's used as a garnish. In fact, I would nix the parsley all together unless you really love it. Instead, save that bunch for kookoo sabzi.

Braised cabbage with onions


Braised cabbage with onions and vinegar, adapted from Vegetables Every Day by Jack Bishop
I love cabbage. I would probably be happy eating it about 7 times a day, but luckily I manage to restrain myself. There's something about its simplicity and versatility that draws me in. Boiled? Steamed? Roasted? Braised? Sure! They all work beautifully. And cabbage can blend beautifully with a myriad of flavors.

I was ecstatic to have a beautiful head of cabbage in my possession (ok, I'm exaggerating a little...), and turned to one of the cookbooks of the month for a new recipe.

Braised cabbage with onions (adapted from "Vegetables Every Day" by Jack Bishop)

1 Tbsp olive oil
1 onion, sliced thinly
1 garlic clove, minced
1/2 head of green cabbage (yes, this means another cabbage recipe later in the week!)
salt and pepper to taste
1/3 cup chicken or veggie stock
1 Tbsp balsamic vinegar

Cut the half-head of cabbage into 4 pieces, then slice into strips (1/2 - 1" thick). Heat oil over medium heat in large skillet or dutch oven. Add onions and cook until they begin to brown (about 8 min). Add garlic and cook an additional minute. Add cabbage, salt, and pepper, cover and cook until cabbage begins to wilt (about 5 min). Add stock, recover, and continue to cook until cabbage is tender (about 10 min). Remove cover and simmer for a few minutes until any excess liquid evaporates. Stir in vinegar. Serves 3.

Balsamic vinegar is one of my favorite pairings with cabbage, so of course I loved this. It's simple, but has a lot more flavor than most cabbage because it absorbs a lot of the chicken stock yumminess. Toasted pine nuts and raisins would be a great addition to this dish, and I wish I had thought of that while I was cooking it. Oh well, I'm sure I'll be making this again!

Tuesday, March 24, 2009

Crock pot oatmeal (with oat groats): sweet and savory

crock pot oatmeal with oat groats, adapted from Not Your Mother's Slow Cooker
This is my 100th post! Ok, I didn't plan this, but it is quite appropriate that this momentous occasion will be commemorated with a post about oatmeal. After never liking oatmeal as a child, I have become obsessed with this stuff in the past few months. One key change was switching from rolled oats to steel-cut, and that makes a huge difference in the taste (although now I even like the rolled kind). And I figured that while I was going for the more whole version of the grain, I might as well go whole hog and cook up some oat groats (uncut and unrolled oats - the equivalent of a wheat berry in the oat world). The unfortunate thing about whole grains is that they take longer to cook, but that's where the crock pot comes in handy.

Crock pot oat groats (adapted from "Not Your Mother's Slow Cooker Cookbook" by Beth Hensperger and Julie Kauffman)

1 1/2 cups whole oat groats, picked over
6 1/2 cups water
pinch of salt
cinnamon stick

Combine everything in a 3-5 qt. crock pot. Cook on low overnight (7-9 hours). If it's thinner than you like, remove lid and cook for a few more minutes. Discard cinnamon stick. Serves 5-6.

This was my first try at making oatmeal in the crock pot, and I will definitely be doing this again. It's incredibly easy and is ready the second you want it. I was worried about getting the consistency right, but this recipe worked out perfectly for my taste.

I was surprised how different this was compared to steel-cut oatmeal. It had a similar consistency (I love that you can distinguish the individual pieces of both types), but it wasn't as sweet or nutty as steel-cut. I ended up adding cinnamon and a bit of agave to my first bowl, and that worked great. But I started to think that this would be the perfect oatmeal for a savory twist.


oatmeal with soy sauce and scallions, inspired by Mark Bittman
Mark Bittman (of "How to Cook Everything" and "Food Matters" fame) made the news when he raved about eating oatmeal with soy sauce and scallions. I've been reluctant to try it, but these oat groats were crying out for something savory, so I gave it a shot (adding a couple of dashes of soy sauce and about 1/2 of a green onion, chopped). The conclusion: I'm addicted. This is fabulous! The only downside is that you're stuck with onion breath for the day (and even brushing my teeth doesn't seem to get rid of it). It's totally worth it, though.

You may have noticed that I've been trying to improve the blog over the past few days. This means that I've been digging through old posts, and it's amazing how much it has changed in just 100 posts. I'm still loving this (probably a bit too much), and I can't wait to hit 200!

Monday, March 23, 2009

Kookoo sabzi (Persian herb frittata)

**This is not a gluten-free recipe and was posted before I eliminated gluten from my diet. To make this gluten-free, substitute a gluten-free flour.**

Kookoo Sabzi (Persian herb frittata) for Weekend Herb Blogging
Friday happened to be Nowruz, the Persian new year. Probably the only reason that I know that is because my friend, B, happens to be Persian and a basketball addict, and would often miss watching the opening round of March Madness games because of the big new year's celebration. I don't know a whole lot about Persian food, but when I had Kookoo while I was visiting B this winter, I fell in love (even when eating it left over and cold!). So, I knew that I had to make some to celebrate the new year (even though I was a few days late).

Kookoo sabzi (Persian herb frittata) (adapted from FarsiEats)

1 tsp currants
2 eggs
1/4 tsp whole wheat flour
1 Tbsp walnuts, chopped
1/4 tsp salt
freshly ground pepper
1 Tbsp olive oil, divided
1/2 green onion, chopped
1/2 cup parsley, chopped
1/4 tsp dried coriander
1/4 tsp dried dill weed

Soak currants in cold water for 15 min, then drain. Vigorously whisk together eggs, currants, flour, walnuts, salt, pepper, and 1/2 Tbsp olive oil. Add green onion, parsley, coriander, and dill, and mix gently. Add remaining oil to small oven-safe skillet (or baking dish), swirl to coat bottom, and then add egg mixture. Cover pan with foil and bake at 300 for 20 min. Remove foil and bake for an additional 20 min, or until frittata is set and top is brown. Serves 1-2.

Wow. I don't have any Persian in me, but I managed to pull this one off. The parsley flavor definitely shines through and, while I sometimes find parsley overwhelming, it works perfectly in this dish. I think that part of the reason I like it so much is because it's cooked. Parsley that's sprinkled on as a garnish often gets stuck in my throat, and I end up choking on whatever I'm eating. But, I think that the softening that occurs when it's cooked releases the flavor and prevents the gagging that would otherwise occur. In fact, the parsley was so delicious in this dish that I'm going to submit it to Weekend Herb Blogging, an event that is hosted by Anna from Anna's Cool Finds this week.

Weekend Herb Blogging

The currants and walnuts also give this dish a very nice contrast between savory and sweet. I often make omelets or frittatas, but I never think to put sweet things in them. It's amazing how delicious it is! You know, dried fruit is quite common in Persian food, so I really need to experiment more with this cuisine. B did offer to let me move in with her if I agreed to be her full-time cook, and perhaps I should consider that more seriously :)

Sunday, March 22, 2009

Who am I?

Katie
(me and Squirt)

A question I often ask myself.   No, really.  And some of you might be wondering the same thing, so I'll do my best to give you a little bit of insight into my thoughts on food, cooking, and blogging.

My interest in cooking has waxed and waned throughout the years, based mostly on the amount of time I had to dedicate to the process.  There were times (in high school, I believe) that I spent hours upon hours watching Food Network shows and trying to soak up as much as I could.  But, throughout grad school there have been many times when I ate a lot of pasta with simple tomato sauce and frozen veggies.  It was quick and it got the job done.

My sustained love for cooking resulted from a dramatic shift in the way that I think about food.  It all started last summer (2008) when I read "Animal, Vegetable, Miracle," "In Defense of Food," and "Omnivore's Dilemma" in quick succession (see my previous post for more about these books).  I began to realize the importance of paying attention to the food that I'm eating, and I became interested in eating local food, avoiding processed food, and eating a lot more whole grains, fruits, and veggies.  But I quickly realized that this eliminated virtually everything that I was accustomed to buying (especially snacks), and I was going to have to start cooking everything from scratch (or spend way more money than I have at the natural foods store) to avoid the weird chemicals in EVERYTHING.

Luckily I made this decision at the perfect time.  I'm the sort of person that needs challenge in life.  When things get simple, I get bored and very unhappy.  I had just finished my dissertation proposal, and grad school, while challenging in some regards, had become too monotonous and routine.  The solution?  Learn to shop differently and do a whole lot of things that I had never done before (like baking bread, making stock, etc.).  And the cool thing is that, in addition to giving me that challenge, it introduced me to a new community in Michigan.  And I suppose that I'm healthier, too :).

It has definitely been a learning experience.  I've been experimenting with a lot of whole grains - everything from barley to millet to amaranth - to figure out what I like best.  I also try to get new veggies whenever I see them (especially at the local markets) and then figure out how to cook them.  I'm a scientist at heart, so this has definitely been a fun process (and it's nice to be able to eat the results of an experiment, for once!).  

I suppose I should also say something about my thoughts on sugar.  In December of 2005 (the 27th, I believe), I decided to cut down on my sugar intake.  I thought that the most effective way to do this would be to completely cut out sugar for a week to reduce cravings, and then slowly add back a little bit.  Well, I made it through the week (relying on a whole lot of fresh fruit), and my desire for sugar was almost gone.  I had also managed to survive a trip to my grandmother's house (with approximately 57 freshly-baked cakes and pies staring me in the face at every meal).  So, I decided to try to go one more week without sugar.  At the end of that week, I didn't want it at all.  I must also mention that I am extremely stubborn.  In fact, I'm the most stubborn person I know, with one possible exception (let's just say that I inherited the tendency).  So, I kept it up.  And, it's now been over three years, and I really don't see this changing any time soon.

I'm not saying that I never eat sugar.  When I'm at home, I try to use more natural sources (particularly fresh and dried fruit, but also small amounts of honey and agave nectar, or even raw sugar).  And sometimes I'll have a bite of some dessert (although this is usually all I want).  There was even a time when I ate a huge piece of wedding cake, but that was a great decision because it was perhaps the best cake I've ever tasted.  But, I now enjoy the more subtle sweet tastes that come from using fruit or whole grains.  And I love that they don't leave me feeling gross afterwards.  So, you'll notice that I make a lot of desserts that are sweetened only with fruit.  I realize that these aren't for everyone, but perhaps you should try one... you just might like it.

And that brings me to the blog.  When I started cooking like a fiend, Dad suggested that I keep a record of everything that I made and any changes that I might want to make for next time.  I took that idea and ran with it.  That was the blog's original function, and I only shared it with a few family members.  After some improvements, though, I decided that maybe others would enjoy it.

Here we are seven months later and I'm still loving the experiments and the adventure.  I hope that you're enjoying the recipes, and I'm still finding ways that I want to improve the blog (but unfortunately I don't always have the time it needs).  I would love comments and suggestions about ways to improve the blog, new ingredients, different cooking methods, or anything else that's remotely related (or not!).

Saturday, March 21, 2009

Barley and sesame tofu stir-fry

**This is not a gluten-free recipe and was posted before I eliminated gluten from my diet. To make this gluten-free, substitute rice for the barley.**

barley and sesame tofu stir-fry from Lorna Sass's Whole Grains Every Day, Every Way

Once again I found myself with a refrigerator full of random veggies and tofu, so I could feel a stir-fry coming on. I wanted to kick it up a notch, though, so I adapted a recipe from one of the cookbooks of the month.

Barley and sesame tofu stir-fry (adapted from "Whole Grains Every Day, Every Way" by Lorna Sass)

1 cup barley
3 cups water
pinch salt

1/3 cup sherry
3 Tbsp soy sauce
2 Tbsp rice vinegar
1 Tbsp dijon mustard
1 Tbsp grated ginger
2 garlic cloves, grated
1 Tbsp sesame oil
1 tsp agave nectar
1/2 tsp crushed red pepper

1 lb extra firm tofu, cut into small cubes
1 Tbsp peanut oil
1/2 red onion, chopped
2 small bunches of broccoli
5 oz. spinach

Bring water and salt to a boil. Reduce heat to medium, add barley, and bring back to a boil. Reduce heat to low, cover, and let simmer until barley is tender (about 35 min for pearl barley, or a little bit longer for hulled). Drain off any excess water and let barley steam in pot, covered, for 10 min.

While barley is cooking, mix sauce ingredients together (everything from sherry to red pepper). Pour 3 Tbsp of sauce over tofu, stir, and let sit while you prepare everything else. Heat peanut oil over medium-high in a large skillet. Add onion and cook a few minutes, until tender. Stir in broccoli and let cook until it is just starting to get tender, but is still somewhat crisp (about 5 min). Add barley, tofu, remaining sauce, and spinach. Stir well and cook just until spinach wilts. Serves 4-5.

I really enjoyed this stir-fry (even for breakfast!), and it was really nice to have some barley again. It's been quite a while, and the last time I had it the taste of fennel seeds was somewhat overwhelming and I developed a bad association between the two. Luckily that is now shattered.

While I enjoyed the sauce (which was quite a bit more involved than my usual stir-fry concoction of soy sauce and some garlic), the soy sauce definitely dominated. But, the red pepper snuck through in some bites, and that gave my mouth a nice surprise. Next time I might decrease the soy sauce and add more mustard and rice vinegar to see if I can get those flavors to shine through. I would also add more veggies next time (or decrease the barley), but unfortunately I didn't have any more on hand.

I'm still loving this cookbook, and I find myself flipping through it often to either figure out how to cook a grain in a different way or for recipe inspirations. Hmmm... I just realized that she has another book on whole grains. The last thing I need is more cookbooks, but I might not be able to resist. And if I ever get a pressure cooker (which probably won't be any time soon), I will definitely pick up some of her books on the topic.

Tuesday, March 17, 2009

Sausage and spinach with penne

Sausage and spinach with penne: a deliciously simple meal
After buying a ton of spinach because it was on sale, I suddenly found myself in need of a new way to use some of it. While reading one of the cookbooks of the month, I remembered that sauteed spinach can make a great sauce-like concoction for pasta. And I have a freezer full of venison sausage, so why not throw some of that in there?

Sausage and spinach with penne (inspired by "Vegetables Every Day" by Jack Bishop)

1/2 lb spicy venison sausage (I used links, but I'm sure bulk would work fine)
1 lb spinach
6 oz whole wheat penne, cooked (use brown rice pasta for gluten-free)

Slice sausage and brown over medium heat in large pan. Add spinach to pan and stir to coat in the small amount of grease emitted by the sausage (if there's a lot of grease, pour some out; if there's none, add a Tbsp of olive oil). Cover and cook until spinach begins to wilt. Once spinach wilts, stir in pasta. You can add a little bit of the pasta cooking water if you want. Serves 3.

Spinach and pasta are the perfect companions to spicy sausage. This was super tasty, amazingly easy, and quick. Not a new and exciting recipe, but it's a good fallback for those days when you don't have much time and energy and still want something tasty.

Irish soda bread

**This is not a gluten-free recipe and was posted before I eliminated gluten from my diet.**

Irish soda bread for St. Patrick's Day
I couldn't let St. Patrick's Day go by without some Irish food. And given my newly-discovered love for bread baking, it seemed obvious that I should include some soda bread. Many of the American recipes call for all kinds of additions (mostly raisins and some sort of sugar), but true soda bread only has 4 ingredients: flour, baking soda, salt, and buttermilk. I flirted with the idea of making one of the "fancy" ones, but decided that I should start with an authentic, unadulterated version. If you're looking for one that's a bit sweeter, Kalyn has a tasty-sounding recipe.

Irish soda bread (adapted from Kalyn's Kitchen)

1 1/4 cup whole white wheat flour
1 cup whole wheat pastry flour
1 tsp baking soda
1/2 tsp salt
1 cup + 1 Tbsp buttermilk (I added 1 Tbsp vinegar to 1 cup milk)

Combine dry ingredients in a bowl. Add buttermilk and stir just until a dough forms. Oil a small baking sheet, flour hands, and form dough into a circle on the baking sheet (obviously I didn't do so well in geometry). Bake at 425 until it's golden brown (about 30 min). Serve while warm.

This was very good. I'm glad I started with the plain version because I can really taste the bread. It has a hint of sweetness (from the whole wheat flour), and is very dense and pairs perfectly with a nice stew. I ate mine with a lamb and root veggie stew and discovered that I don't like lamb. Eh, it's nice to know, and the veggies were still delicious. I suppose that's what I get for not wearing green for most of the day. Stop yelling at me... it's not my fault! I had to wear my Brain Awareness Week shirt to talk to 5th graders about the importance of the nervous system, and unfortunately the shirts are blue (but very cool, nonetheless).

So, before the day is done, stick some of this in the oven. It's so easy that you don't have any excuse. And feel free to play with the flours if you don't have these on hand. But, I highly recommend the whole wheat flours because they give it that delicious sweetness that you can never mimic with refined sugar.

Sunday, March 15, 2009

Pan-fried chickpea salad

pan-fried chickpea salad from Heidi Swanson at 101 cookbooks
I read through hundreds of recipes a day (thank you, Google Reader!), and mark many to save for future adventures. Occasionally I get the urge to stop everything that I'm doing and make one immediately. That's what happened here... only I couldn't do it immediately. I cooked up a bunch of chickpeas last weekend, I happened to have a red onion around, I always have yogurt... what was missing? Leeks. I love leeks, so I figured that I should wait to make this until I could acquire one. After a quick trip to the store, I was ready to get cracking.

Pan-fried chickpea salad (adapted from 101 Cookbooks)

1 Tbsp olive oil
1 can chickpeas (or 2 cups cooked)
1 leek, sliced thinly
1 garlic clove, minced
1/2 cup chopped red onion
3 Tbsp plain yogurt
1 1/2 tsp curry powder
juice of 1/2 lemon
salt and pepper to taste

Heat oil in skillet over medium-high. Add chickpeas and cook until they begin to brown. Add leeks and continue to cook until chickpeas are golden and leeks begin to brown. Add garlic, cook for another minute. Pour into a bowl and allow to cool for a few minutes. Add remaining ingredients; taste and adjust as necessary. Serves 3-4.

Yummy! I had no plans for this fitting into a meal... I just wanted to satisfy my cooking urges. It's a good snack - I have to admit that I've snuck a few spoonfuls from time to time. It's unbelievably simple, and a great way to use cooked chickpeas.

Speaking of chickpeas, I often have trouble getting them tender when I cook them. This time I cooked them in the crock pot (on high for about 4 hours) while I had two other pots of beans going on the stove. I think they came out much better this way.

Banana bread

**This is not a gluten-free recipe and was posted before I eliminated gluten from my diet.**

Banana bread from Sweet and Sugarfree by Karen Barkie
What do you do when you have bananas that are getting too ripe? Yep, that's right. It's banana bread time.

Banana bread (adapted from "Sweet and Sugarfree" by Karen Barkie)

3/4 cup mashed banana (I used 2 small bananas and came up slightly short, so added some unsweetened applesauce)
1/3 cup coconut oil, melted (canola oil will work too)
2 eggs
1/2 cup water
2 cups whole wheat pastry flour
1 tsp baking soda
2 tsp baking powder
1/2 tsp cinnamon
1/2 tsp nutmeg
1 cup walnuts, chopped

Beat banana, oil, eggs, and water together until creamy. Add everything except the nuts and beat well. Stir in nuts. Oil and flour a loaf pan, and pour batter in. Bake at 325 for 45 min, or until inserted knife comes out clean. Ideally, remove from pan and let cool on rack (mine was stuck to the pan). Refrigerate or freeze leftovers (which is always necessary for desserts baked without sugar).

This was delicious. Subtly sweet, as I've come to expect (and love!) from this book. And oh so nutty! I had to freeze most of it so that I wouldn't eat the whole loaf in one sitting. Fortunately (or perhaps unfortunately), it's not that hard to thaw...

Saturday, March 14, 2009

Amaranth porridge

amaranth porridge from Lorna Sass's Whole Grains Every Day, Every Way
I bought amaranth a few months ago, and decided that it was about time that I figure out how to use it. I wanted to really taste this grain (after all, I'm trying to compile a list of my favorites), so I needed a recipe that really highlighted it. This was somewhat difficult, but I did manage to find a recipe for porridge in one of the cookbooks of the month! And, given my recent love of oatmeal, I thought it would be perfect.

Amaranth porridge (adapted from "Whole Grains Every Day, Every Way" by Lorna Sass)

1 cup amaranth
3 cups water
1/2 Tbsp butter
1 Tbsp honey
dash of salt
dash of cinnamon

Soak amaranth overnight in water in small saucepan. Uncover and bring to a boil. Stir well, reduce heat to low, cover, and simmer until water is absorbed and amaranth is soft (about 22 min*). It will still have a bit of a crunch to it (it's very much like quinoa in terms of appearance, texture, and protein content). Add remaining ingredients. Serves 4.

* Usually Lorna is right on in terms of her timing. She said that if you soak the amaranth it only takes 3-5 min to cook (instead of the usual 22). I found that it didn't shorten the time at all (so it's fine to skip the overnight soak). Perhaps it was the batch of amaranth that I bought... who knows. Even still, it doesn't take a whole lot of time (and you can always do it the night before).

Exactly as Lorna describes, it has a "mildly sweet, earthy corn flavor." I have to admit that I didn't enjoy this nearly as much as a bowl of steal-cut oatmeal because it lacked the natural sweetness and has a weird consistency (similar to glue), but it was a nice change and a good experiment. I'm definitely planning to try amaranth in savory recipes to see what I think.

My perfect day and a stocked pantry

Sometimes you don't realize how miserable you were until the fog clears and you can frolic around in your happiness.  This winter was rough for me.  I'm pretty sure it was rough for everyone (apparently Michigan's coldest winter since the 1920's), but it didn't help that I was already anxious to move before it started.  And it has been especially cloudy and dreary this year.  It definitely encouraged me to spend more time cooking because all I wanted to do was rush home and hibernate in my apartment (and cooking definitely made it warmer!).

Over the past couple of weeks, I finally saw the sun and it was miraculous.  Even on days when it's  still below freezing, I find myself whistling, laughing, and smiling for the first time since... well, October.  I feel like a completely different person, and I'm loving it.  Bye bye, seasonal affective disorder!

Anyway, after an extremely productive week (it's amazing how much I can get done when everyone else is off enjoying spring break), I decided to treat myself to a day in Ann Arbor.  AA has much more character than Lansing and I love spending time there.  They have great concerts (and one of my favorite venues - the Ark), great restaurants, and a fabulous farmers' market.  And unlike the good markets in Lansing, theirs is open year-round.  So, this morning I lugged my cooler to the car and headed off for an adventure.

I had only been to the AA farmers' market once before and that was quite a while ago (before I truly appreciated them).  I wasn't expecting much because it is early March... and this is Michigan, after all.  But, I was pleasantly surprised by the variety of non-produce items and ended up coming home with a peck of apples, eggs, ground buffalo and grass-fed beef, and a piece of lamb (that will soon become my St. Patty's day dinner).  I'm happy about my finds, but more than anything it felt great to be at the market, among people that I immensely respect, and part of a community (even though I was only visiting).  

I also went across the street to Zingerman's and the Spice Merchants to look around.  I made myself promise that I wouldn't spend much money, so I was very proud that I didn't buy anything at either place, but it was definitely tempting.  The Spice Market is amazing - it's the epitome of organization and everything is beautiful.  You can tell that these are high quality spices... but you pay for it.  Luckily I'm pretty well stocked as far as spices go.  Zingerman's was even more enticing.  I really wanted some pancetta to have on hand, but luckily the line was too long.  And then they had to put out their olive oils, vinegars, and bread.  I've never owned a really nice bottle of oil and I always wondered if they are worth it.  I found out today.  I've never before wanted to drink a bottle of olive oil.  I managed to restrain myself, and instead moved on to the delicious vinegars (these were amazing too!).

After a trek over to Trader Joe's and Whole Foods (where I managed to make a lunch out of their free samples), I checked out a few used bookstores before heading home.  It was warm enough to walk around for a bit, and it was so nice to be outside in the sunshine.  I bought so much that I had to completely rearrange my pantry when I got home (and even found some things hidden in there that I didn't know I had!).

And all of this made me think about my cooking philosophy.  I just started reading "Alone in the Kitchen with an Eggplant: Confessions of Cooking for One and Dining Alone" (edited by Jenni Ferrari-Adler, who just happened to conceive of the book while living in Ann Arbor).  It's a book of essays written by chefs about their experiences cooking/dining alone, and I can't recommend it more.  In the intro, the editor talks about how her approach to cooking is completely different when she's cooking for only herself.  I completely relate, and began thinking about why I've fallen in love with cooking lately.  Honestly, it's not about eating.  It's about the process - the challenge of cooking with new and different ingredients.  It's also a peaceful experience for me, and the best form of stress relief.  Sure, it's nice when the food tastes good, but somehow the process makes it taste good.  As Carla from Top Chef would say, I can taste the love.  But when I cook for other people it's different.  I still enjoy it, but I go about it in a different way.  Taste becomes much more important and I'm far more concerned about the final product than the process.  I suppose it's nice to have both.

I've been slacking on the recipes, but I promise that I'll post more tonight or tomorrow.  This was much more important...

Wednesday, March 11, 2009

Boiled carrots with North African spices

boiled carrots with north African spices from Vegetables Every Day
I love carrots every way that I've ever had them... raw, steamed, boiled, roasted, microwaved, etc. There's something about their natural sweetness that draws me back to the refrigerator for a handful several times a day. Here's an easy and different way to cook them (from one of the cookbooks of the month!).

Boiled carrots with North African spices (adapted from "Vegetables Every Day" by Jack Bishop)

6 medium carrots (about a pound), sliced into 1/2" slices
1 Tbsp olive oil
juice of 1/2 lemon
1/2 tsp cumin
1/2 tsp paprika
1/2 tsp cinnamon
salt to taste

Bring several quarts of water to a boil, add carrots, and cook until tender (about 8 min). Whisk together remaining ingredients in a small bowl. When carrots are done, drain and mix with dressing. Serves 3.

This is tasty and different. I would suggest adding more cumin (although I must warn you that I'm in love with cumin and probably wouldn't mind adding it to my drinking water). It's a great alternative to butter and salt that usually adorns boiled and steamed carrots (not that there's anything wrong with that).

So far I'm really enjoying cooking through these books, and it's been quite successful. The only problem is that I have to prevent myself from getting out of control and cooking through every page.

Hominy with shredded chicken and peppers

Hominy with shredded chicken and peppers from Lorna Sass's Whole Grains Every Day, Every Way
As I was flipping through "Whole Grains Every Day, Every Way" (one of the cookbooks of the month), this recipe stood out. A few months ago I picked up a can of hominy (I'm still keeping my eye out for dried) and this seemed like a good time to use it.

Hominy with shredded chicken and peppers (adapted from "Whole Grains Every Day, Every Way" by Lorna Sass)

1 Tbsp olive oil
1 onion, thinly sliced
1 green bell pepper, cut into strips
1 red bell pepper, cut into strips
salt to taste
2 garlic cloves, minced
2 tsp oregano
1/2 tsp cumin seeds
1 can (15 oz.) hominy (I used white)
1 can (14.5 oz.) diced tomatoes
2 boneless, skinless chicken breasts, roasted and shredded
a few dashes of tabasco sauce
2 Tbsp chopped cilantro
juice of 2 limes

Heat oil in large skillet over medium-high. Add onions, bell peppers, and salt; cook, stirring frequently, for 5 min. Add garlic, oregano, and cumin and continue to cook until peppers soften (about 5 more min). Stir in hominy and tomatoes (with juice), bring to a boil, reduce heat slightly, and continue to cook 5 more minutes. Stir in chicken and tabasco and let cook until chicken warms back up. Remove from heat and stir in cilantro and lime juice. Serves 4.

As far as I can remember, I've only had hominy once before (made by some friends from New Mexico), but I really like it. I suppose it's not surprising given that I love every other form of corn. It gives an interesting dimension to a dish - somewhere between a grain and a bean. If I can find some dried hominy, I can definitely see myself making it often. I suppose I need to take a trip over to the Mexican grocery store...

Monday, March 9, 2009

Bulgur pudding with honey and dates

**This is not a gluten-free recipe and was posted before I eliminated gluten from my diet.**

Bulgur pudding with honey and dates, adapted from Lorna Sass's Whole Grains Every Day, Every Way
I already mentioned the first cookbook for March, but here's the second: "Whole Grains Every Day, Every Way" by Lorna Sass. I feel like I have great history with this book, even though I looked at it for the first time in September. It was my first primer in cooking the "weirder" whole grains. I really like the layout of the book. The first half is detailed info about each grain (different forms of each grain and how to cook and store each). There are tons of great tips throughout this section. The second half of the book is recipes that highlight one of the grains. So far everything I've tried is wonderful, so you'll be seeing a lot of it this month. To start off, here's a dessert I tried tonight with the little bit of bulgur I needed to use up.

Bulgur pudding with honey and dates (adapted from "Whole Grains Every Day, Every Way")

1/4 cup bulgur (fine or medium grind)
1/2 cup water
1/4 cup milk
1 tsp honey
1/2 tsp cinnamon
1/4 cup walnuts, toasted and chopped
1/4 cup dates, chopped
1 Tbsp raisins

Combine bulgur and water in small saucepan and bring to a boil. Reduce heat to medium and simmer, stirring frequently, until water is absorbed (about 5 min). Add milk, honey, and cinnamon and bring back to a boil. Simmer over medium heat until it develops the consistency of porridge (about 5 min). Stir in walnuts, dates, and raisins. Serves 2.

Wow. Delicious and very filling. It tastes like a much sweeter, nuttier version of oatmeal, and it was so good that I ate it straight out of the pan. It doesn't make a whole lot (I quartered the original recipe because I only had a little bit of bulgur left), but once I started eating it I filled up quickly and have some left for tomorrow. It's rare to find a dessert recipe in a "regular" cookbook that uses 100% whole grains and natural sweeteners, so I was sure to jump on this one. That was definitely a good decision.

Quinoa and black bean chili

Quinoa and black bean chili adapted from Closet Cooking
I noticed this recipe last week and it really caught my eye. I also had leftover chipotles in adobo sauce and was looking for a way to use them, so I came back to the recipe. Boy am I glad that I did.

Quinoa and black bean chili (adapted from Closet Cooking)

1/2 cup quinoa, rinsed well
1 cup water
1/2 Tbsp olive oil
1 small onion, diced
1/2 green bell pepper, cut into bite-sized chunks
1/2 red bell pepper, cut into bite-sized chunks
2 garlic cloves, minced
1/2 Tbsp chili powder
1/2 Tbsp cumin
1 can (14.5 oz) diced tomatoes
1 can black beans
1/2 chipotle pepper in adobo sauce, minced
1/2 tsp dried oregano
salt and pepper to taste
3/4 cup frozen corn
1/4 cup cilantro, minced

Combine quinoa and water in small saucepan and bring to a boil. Reduce heat, cover, and simmer until all of the water is absorbed (18-20 min). While quinoa is cooking, heat oil in pot and saute onions for a few minutes. Add bell peppers and cook until they're tender. Add garlic, chili powder, and cumin, and cook for 1 minute. Stir in tomatoes, beans, pepper, oregano, and salt and pepper, and let simmer for 20 min. Add corn and quinoa and simmer for 5 min. Stir in cilantro and serve. Serves 3.

This was absolutely delicious. It has a great smoky flavor that goes great with the veggies. And it's the perfect dish for quinoa, because I prefer it with stronger flavors that it can absorb. Just like most chilis, it's very filling and kept me stuffed for a long time.

Between this and the bean dip, my supply of cooked beans was dwindling, so I had a bean cooking fest yesterday and now my freezer is stuffed full again. Now I'm ready for just about anything!

White bean dip

White bean dip, adapted from Mark Bittman's How to Cook Everything
I'm addicted to raw veggies. I can easily go through 5 cups of raw veggies a day (and that's in addition to the other veggies I eat with meals). I don't think I'll get tired of the veggies any time soon, but it's always nice to mix things up a little bit. Plus, I'm trying to get a little bit more protein in my diet. So, a bean dip seemed like the perfect solution.

White bean dip (adapted from "How to Cook Everything" by Mark Bittman)

1 can great northern beans (or any white bean)
2 Tbsp olive oil
1 large garlic clove, peeled
2 tsp cumin
1/2 tsp cinnamon
1/2 tsp cardamom
1/2 tsp ground ginger
salt and pepper to taste
water, as needed (I used about 1/3 cup)

Put everything (except water) into food processor and blend. Add water a little bit at a time to make a smooth dip. Makes 2 cups.

Mark Bittman wins again. I'm in love with his new book (Food Matters), and he's onto something with this recipe. It's not your typical bean dip, but the spices work perfectly together. It would go well with chips or crackers, too, but I'm loving it with the veggies. In fact, it's calling my name from the refrigerator right now. This will definitely be something that I keep in mind next time I need to bring something for a party.

Braised cauliflower with curry and yogurt

Braised cauliflower with curry and yogurt from Vegetables Every Day by Jack Bishop
I've decided to pick a cookbook (or 2, in this case) to use each month. I'll cook other things, too, but I want to try to make a couple of things from that book each week. I'm not sure what I'm going to do once I get to my specialty books, but I have quite a few general cookbooks to get through first. The first book for March (or what remains of it) is "Vegetables Every Day" by Jack Bishop. This book is great. It has a chapter for each vegetable (even relatively obscure ones) and has info on when it's available and how to select it, store it, and cook it. Then it has several recipes (often with variations on each one). I've made quite a few things from this book, including spinach with brown butter and pecans and shredded brussels sprouts with balsamic vinegar and pine nuts. Most of the recipes use ingredients that I already have, so I often buy a bunch of veggies that look good and come home and flip through this book to figure out what to do with them. That's exactly what happened with this cauliflower.

Braised cauliflower with curry and yogurt (adapted from "Vegetables Every Day")

1 Tbsp olive oil
1 head cauliflower, cut into florets
1 onion, sliced thinly
1 tsp curry powder
1/4 cup plain yogurt
1/4 cup water
2 Tbsp fresh cilantro, minced
salt and pepper to taste

Heat oil in large skillet over medium heat. Add the cauliflower and onion and cook until the florets are lightly browned (about 8 min). Stir in curry powder and cook another minute. Mix yogurt and water together and add to pan. Cover, reduce heat to medium-low, and cook until cauliflower is tender (about 10 min). Stir in cilantro, salt, and pepper. If there's liquid in the pan, let simmer uncovered until it evaporates. Serves 3.

This is my new favorite cauliflower recipe. It was delicious! It definitely has Indian flavors, but they're not overwhelming. In fact, I ate this with my eggplant bake and somehow they worked together. Cookbook of the month is off to a good start!

Eggplant bake

simple eggplant bake with fresh mozzarella
I finally had some time to cook this weekend (ok, I probably should have been doing other things, but oh well...). I had quite a bit of fresh mozzarella left over from a pizza that I made on Friday, so I decided to pair it with eggplant. I've fallen back in love with eggplant (I'm not sure why I went a few years without buying any), and it's so perfect with mozz. This is incredibly simple and quick (which was good since I needed to be working).

Eggplant bake

1 medium to large eggplant, sliced into 1/2" slices
3 Tbsp olive oil, divided (or more, as needed)
1 onion, sliced thinly
3 garlic cloves, minced
1 can (28 oz.) crushed tomatoes
1 tsp dried basil
1 tsp dried oregano
salt and pepper to taste
8 oz. fresh mozzarella, sliced thinly or torn into small pieces

Spread eggplant slices out onto baking sheet, brush both sides with 2 Tbsp (or more) olive oil and sprinkle with salt and pepper. Broil until tender (10-15 min). While eggplant is cooking, heat remainder of oil in large pan over medium heat and saute onions until tender. Add garlic and cook for 1 minute. Add tomatoes, basil, oregano, salt, and pepper, and simmer for 10 min. Spread thin layer of sauce on the bottom of a baking dish (I used 8.5 x 11"), then layer half of eggplant on top, followed by half of remaining sauce and half of cheese. Repeat layers again. Bake at 350 for 20 min. Turn on the broiler and broil for 2 min. Serves 4.

Yum. So simple and so delicious. I love fresh mozzarella, and it's one of the cheeses that never makes me queasy as long as I don't eat tons of it. Even though I ate a lot of leftover lasagna from the freezer last week, I was still excited about this. And I'm excited that it made more than I thought it would :)

Saturday, March 7, 2009

Millet, veggie, tofu, and sausage stir-fry

Millet, veggie, tofu, and sausage stir-fry
Sorry that it's been so long since my last post. I was out of town for a while, and ended up getting back home a day and a half late (due to some snow in Atlanta!). I've been very busy the rest of the week and have mostly relied on leftovers out of the freezer. I did manage to make this stir-fry, though. The thing I love about stir-fries is that you can throw just about anything in there and it will be good (or at least interesting). I ended up going to the grocery store as soon as I got back to Michigan (at 1 am) because I knew I wouldn't have much time later in the week. Let's just say that I'm not great at planning in the middle of the night, and I ended up with a refrigerator full of random things. The solution? Throw it all in a pan.

Millet, veggie, tofu, and sausage stir-fry

2 bunches broccoli, cut into pieces
1 link turkey sausage (about 1/4 lb), sliced
1 Tbsp olive oil
1 onion, sliced thinly
2 garlic cloves, minced
1 green bell pepper, cut into bite-sized pieces
8 oz. button mushrooms, cut into bite-sized pieces
2 cups cooked millet (or your favorite grain)
1 lb firm tofu, cut into cubes*
5 Tbsp soy sauce, divided (use wheat-free tamari for gluten-free)

Boil broccoli until it starts to get tender, drain, and set aside. Brown sausage in large non-stick skillet over medium heat and set aside. Add oil to pan and saute onion until tender. Add garlic and bell pepper and cook a few more minutes, until pepper starts to get tender. Add mushrooms and cook a few more minutes. Add millet, broccoli, and sausage, stir well, and let sit on low heat. Brown tofu in separate skillet over medium-high heat. Before it's completely done, add 1 Tbsp soy sauce. Once it's browned, add to millet and veggie mixture and stir in remaining soy sauce.

*Ideally I would have marinated the tofu in the soy sauce for a while before I cooked it, but I didn't decide to use it until half-way through cooking when I realized that the millet and veggies dwarfed the amount of sausage that I had thawed.

This confirms that I'm still in love with millet. Quinoa has become the new popular whole grain (perhaps because you feel like part of an exclusive club when you learn how to pronounce it), but there are so many other options. Millet does a good job of soaking up flavors, so it was perfect for this. I used some that I cooked and froze a couple of months ago. It was still delicious. One day I want to have a giant freezer so that I can store an infinite amount of cooked grains, fruits and veggies, beans, meats, and stocks. Cooking millet isn't a big deal because it doesn't take long at all, but it's still nice to cook up a big batch at once and always have some on hand (and it saves energy, too!). For now, I'll have to make do with small amounts of a few things...

The next couple of months are becoming busier and busier, but hopefully I'll manage to spend some time in the kitchen. I'm toying with the idea of cooking through a cookbook each month, so that might help by reducing the time I spend planning meals (although that is my favorite part...). Stay tuned!